The motherboard CMOS battery change is a common maintenance task that many PC users eventually face. This small coin-cell battery (usually a CR2032) keeps your BIOS/UEFI settings and system clock alive when the computer is powered off. Over time—typically 3 to 10 years—it loses charge, leading to issues like incorrect dates, reset BIOS configurations, or boot warnings.
Replacing it is straightforward, but the big question remains: Can you do a motherboard CMOS battery change without losing your carefully tuned BIOS settings? The short answer is that a full preservation isn’t always guaranteed due to how CMOS memory works, but with proper preparation, you can make the process nearly seamless.
In this comprehensive guide, we’ll walk you through everything you need to know, from understanding the battery’s role to advanced techniques for minimizing disruption.
What Is a CMOS Battery and Why Does It Matter?
The Complementary Metal-Oxide-Semiconductor (CMOS) battery provides a tiny trickle of power to the RTC (Real-Time Clock) and the small amount of memory that stores your BIOS settings. Without it, your motherboard forgets custom configurations like boot order, overclocking profiles, fan curves, and hardware timings when power is completely removed.
Common Signs It’s Time for a Motherboard CMOS Battery Change
- System clock resets to January 1, 2000 (or similar default).
- BIOS settings revert to defaults on every boot.
- “CMOS Checksum Error” or similar messages appear.
- Frequent prompts to enter BIOS setup.
- Computer won’t retain date/time after being unplugged.
Recognizing these signs early prevents bigger headaches.
Preparing for a Safe Motherboard CMOS Battery Change
Success depends on preparation. Rushing this can lead to lost settings or even minor hardware risks.
Tools and Materials You’ll Need
- New CR2032 lithium coin-cell battery (ensure it’s a quality brand with good shelf life).
- Phillips screwdriver for case access.
- Anti-static wrist strap or work on a non-carpeted surface.
- Plastic pry tool or non-conductive object (optional for stubborn batteries).
- Smartphone or camera for documenting BIOS screens.
- Notepad and pen for manual notes.
Pro Tip: Buy a pack of CR2032 batteries since they are inexpensive and have a long shelf life.
Step-by-Step Guide: Performing the Motherboard CMOS Battery Change
Follow these steps carefully for desktops. Laptop procedures vary by model and may require more disassembly.
1. Backup Your Current BIOS Settings
This is the most critical step for avoiding loss of settings.
- Enter your BIOS/UEFI setup (usually by pressing Delete, F2, F10, or F12 during boot).
- Navigate through every page and submenu.
- Take clear photos of each screen with your phone. Include advanced sections like OC (Overclocking), Boot, and Peripherals.
- Note down important custom settings: XMP/DOCP profiles, boot priority, secure boot status, fan controls, etc.
Some modern motherboards offer built-in BIOS profile save/load features. Use them if available.
2. Power Down and Discharge the System
- Shut down your computer completely.
- Unplug the power cord from the wall and PSU.
- Press and hold the power button for 30-60 seconds to discharge residual power in capacitors.
- For extra safety, remove the main PSU cable and any GPU power connectors.
This step reduces the chance of electrical issues during the swap.
3. Open the Case and Locate the Battery
- Remove the side panel of your desktop case.
- Find the silver coin-shaped battery on the motherboard. It’s usually near the bottom, close to the PCIe slots or RAM, but location varies by board manufacturer (ASUS, MSI, Gigabyte, etc.).
Safety Note: Ground yourself by touching the metal case to discharge static electricity.
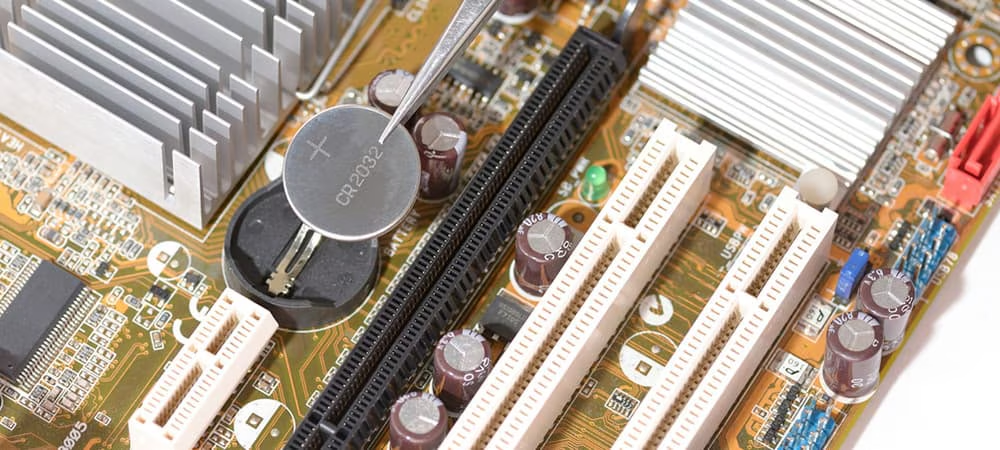
4. Remove the Old Battery
- Gently press the metal clip or tab holding the battery.
- Slide or pop out the old battery.
- Note the orientation: The positive (+) side (usually marked) faces up in most sockets.
Some advanced users report quick swaps (under 10-15 seconds) while the system is powered on or with the PSU plugged in can sometimes preserve settings due to residual capacitance, but this carries risks and is not recommended for beginners.
5. Insert the New Battery
- Place the new CR2032 battery in the same orientation.
- Ensure it clicks securely under the clip.
- Avoid touching the contacts excessively.
6. Reassemble and Boot Up
- Close the case, reconnect all cables.
- Power on the system.
- Immediately enter BIOS setup again.
- Compare with your photos/notes and restore settings.
- Set the correct date and time.
- Save and exit.
Advanced Techniques to Minimize BIOS Reset Risk
While complete preservation isn’t always possible, here are expert methods:
External Power Method (Advanced)
Some technicians connect a temporary 3V power source to the battery terminals during swap. This maintains voltage to the CMOS memory. Use a second CR2032 battery with wires or a lab power supply set to 3V. This requires soldering knowledge or precise clips and is best left to experienced users.
Quick Swap with Residual Power
Work quickly after discharging. Some residual charge in the circuit can hold settings for 10-30 seconds. Success varies by motherboard design.
Important: Always prioritize safety over speed. A brief reset is easier to fix than damaged components.
Common Challenges and Troubleshooting
| Issue | Possible Cause | Solution |
|---|---|---|
| Settings still reset after swap | Normal behavior | Restore from photos/notes |
| System won’t boot | Improper battery orientation | Double-check polarity |
| Date/time wrong | Expected after change | Set manually in BIOS/OS |
| Persistent errors | Bad new battery | Test with another CR2032 |
| Battery hard to remove | Clip too tight or adhesive | Use plastic tool carefully |
Benefits vs Drawbacks of Motherboard CMOS Battery Change
Benefits:
- Restores accurate system time.
- Eliminates boot warnings.
- Improves overall stability.
- Prevents gradual degradation of settings.
Drawbacks:
- Potential short-term downtime for reconfiguration.
- Risk of minor static damage if not grounded.
- Learning curve for first-timers.
For most users, the benefits far outweigh the drawbacks, especially on systems 5+ years old.
Maintenance Tips to Extend CMOS Battery Life
- Keep your PC in a cool, dry environment.
- Avoid frequent complete power losses.
- Update BIOS firmware occasionally (from manufacturer site).
- Consider motherboards with supercapacitors or alternative backup methods in future builds.
When to Consider Professional Help
If you’re uncomfortable opening your PC, dealing with a pre-built system under warranty, or have a laptop with soldered components, take it to a trusted technician. The cost is usually low for this simple task.
Real-World Scenarios: When Users Need This Guide
- Gamers: Losing XMP RAM profiles or overclock settings can hurt performance.
- Content Creators: Custom boot orders and drive configurations matter for workflows.
- Office Users: Simple clock resets become annoying over time.
- Server/Home Lab Owners: Uptime and consistent settings are critical.
In one common scenario, a user with a custom water-cooled rig spent hours tuning fan curves. Proper documentation before the motherboard CMOS battery change saved them from redoing everything from scratch.
External Resources for Further Reading
For more technical details on CMOS functionality, check this Wikipedia entry on CMOS (anchor text example adapted for relevance).
Gamers and builders often discuss experiences on forums—see community insights on Reddit’s r/buildapc for real-user stories.
You can find quality replacement batteries on trusted retailers like Amazon by searching for CR2032 batteries.
Conclusion
Performing a motherboard CMOS battery change safely doesn’t have to mean losing all your BIOS settings. With thorough preparation—especially photographing your current configuration—you can restore everything quickly and get back to optimal performance.
Key takeaways:
- Always document your BIOS screens before starting.
- Prioritize safety: power off, unplug, and ground yourself.
- Work methodically and test after reassembly.
- A fresh CMOS battery can add years of reliable operation to your system.
By following this guide, even beginners can handle this maintenance task confidently. Regular PC upkeep, including timely motherboard CMOS battery change, keeps your hardware running smoothly for gaming, work, or everyday use. If issues persist after replacement, consult your motherboard manual or manufacturer support for model-specific advice.
Your PC will thank you with reliable boots and accurate timekeeping. Stay proactive with maintenance, and you’ll avoid bigger problems down the line.
Related posts:
![Display Backlight Service Program]()
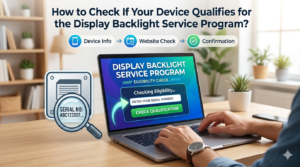
How to Check If Your Device Qualifies for the Display Backlight Service Program?
![MacBook Pro Screen Heat Damage ifixit.org.uk]()
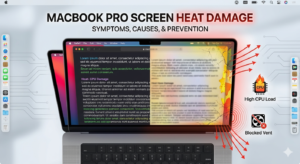
What Is Everything You Need to Know About MacBook Pro Screen Heat Damage?
![How to Find Reliable Computer Repair]()
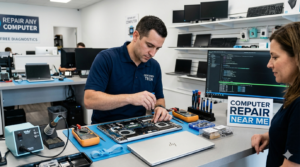
How to Find Reliable Computer Repair: A Comprehensive Guide to Troubleshooting and Professional Supp...
![How to Fix an HP Notebook Computer Battery That Is Not Charging]()
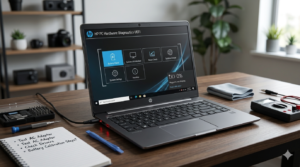
How to Fix an HP Notebook Computer Battery That Is Not Charging?
![How to Fix Overheating Issues on HP Omen and Victus Gaming Laptops]()
How to Fix Overheating Issues on HP Omen and Victus Gaming Laptops?
![How to Fix Screen Problems on a MacBook Pro]()
How to Fix Screen Problems on a MacBook Pro and Restore Normal Display Performance
![How to Fix MacBook Pro Screen Burn Marks and Restore Display Quality?]()
How to Fix MacBook Pro Screen Burn Marks and Restore Display Quality?
![Microsoft Surface Laptop 3 Screen Crack: ifixit.org.uk]()
Microsoft Surface Laptop 3 Screen Crack: Comprehensive Guide to Causes, Repair Options, and Preventi...