Microsoft Surface Laptop 3 Screen Crack: Comprehensive Guide to Causes, Repair Options, and Prevention
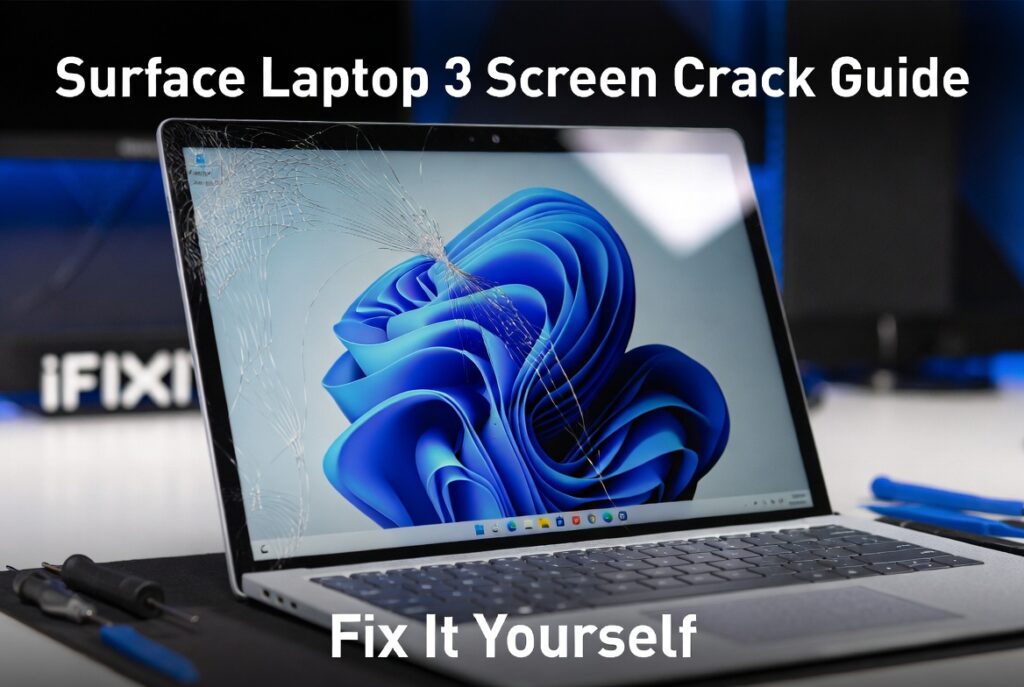
Microsoft’s Surface Laptop 3 remains a popular device known for its sleek design, vibrant PixelSense display, and premium build quality. However, a significant number of users have reported an unexpected and frustrating problem: screens cracking without any apparent physical impact. This article dives deep into the causes, repair options, costs, and preventative measures associated with the Microsoft Surface Laptop 3 screen crack.
Understanding the Microsoft Surface Laptop 3 Screen Crack Issue
What Is the Problem?
The Microsoft Surface Laptop 3 screen crack phenomenon refers to reports of screens developing hairline fractures or significant cracks without any visible cause such as dropping, impact, or mishandling. Users have reported opening their laptops to find cracks that were not present when they closed the device the night before.
These cracks typically appear in specific patterns—often from one corner of the display or running vertically from the bottom to the top of the screen. Many users also report hearing a crunching sound when picking up the laptop or opening and closing the lid, suggesting underlying structural tension.
Microsoft’s Official Response
Microsoft initially remained quiet on the issue but later acknowledged the problem. The company investigated claims of screen cracking and determined that “in a very small percentage of cases, a hard foreign particle may cause a hairline fracture in the glass that may seem to appear unexpectedly or without visible cause”.
In response, Microsoft introduced a repair program offering free repairs for affected Surface Laptop 3 devices during the warranty period. The company also stated that customers who already paid for such repairs could contact Microsoft Support to explore reimbursement options.
Important Note: The free repair program primarily covers spontaneous cracks—not damage caused by accidental drops, impacts, or user negligence.
Common Causes of Screen Cracks on Surface Laptop 3
Understanding why a Microsoft Surface Laptop 3 screen crack occurs is the first step toward prevention and informed decision-making. Several theories and confirmed factors have emerged:
1. Hard Foreign Particles
Microsoft’s official explanation points to “hard foreign particles” as the culprit. According to this theory, microscopic debris between the keyboard deck and the display can create pressure points when the lid is closed, eventually causing the glass to fracture.
2. Lack of Rubber Bumper
Many tech analysts and Reddit users have pointed out that the Surface Laptop 3 lacks a rubber bumper or gasket around the edges of the display. This design choice means there is less cushioning between the screen and the keyboard deck when the laptop is closed. Without this protective layer, the screen is more susceptible to flexing and pressure damage.
3. Removal of the Thermal Gasket
Microsoft made a notable design change with the Surface Laptop 3 by removing a “barely visible gasket” that was present in earlier models. This gasket previously helped accommodate metal expansion and contraction when opening and closing the lid. Its removal could be contributing to the vulnerability of the screen.
4. Assembly Tension Issues
Hardware assembly problems—such as overtightened screws—can increase tension throughout the device. This tension, combined with normal usage and temperature fluctuations, may cause the glass to crack over time.
5. Aluminum Case Models Only
Reports indicate that the cracking issue is limited to aluminum case versions of the Surface Laptop 3. Models with Alcantara fabric keyboards appear to be unaffected, suggesting that the structural rigidity of the aluminum chassis may play a role in the problem.
Signs and Symptoms: How to Identify a Surface Laptop 3 Screen Crack
Before you panic, it is essential to confirm that what you are seeing is indeed a Microsoft Surface Laptop 3 screen crack and not just a scratch or cosmetic blemish.
| Symptom | Description |
|---|---|
| Hairline Fractures | Thin, nearly invisible lines that may start from the edge or corner of the screen |
| Spiderweb Cracks | Multiple cracks radiating from a central point |
| Crunching Sound | Audible noise when opening, closing, or picking up the laptop |
| Touchscreen Malfunction | Unresponsive areas or erratic touch behavior around the crack |
| Display Artifacts | Flickering, dead pixels, or discoloration near the damaged area |
| No Visible Impact Point | The crack appears without any dent, scratch, or impact mark on the exterior |
If you notice any of these signs, it is time to assess your repair options.
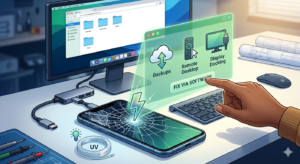
Repair Options for a Cracked Surface Laptop 3 Screen
When faced with a Microsoft Surface Laptop 3 screen crack, you have several repair pathways. Each option has its own benefits, drawbacks, and cost implications.
Option 1: Microsoft Official Repair (Free or Paid)
Who it is for: Users whose device is under warranty or who have Microsoft Complete accidental damage protection.
Process:
-
Visit Microsoft Support and select your Surface device.
-
Describe the issue and follow the prompts to initiate a repair request.
-
Microsoft will provide shipping instructions or direct you to an authorized service center.
Pros:
-
Genuine Microsoft parts
-
Professional repair with warranty on the work
-
Potential for free repair if the crack is spontaneous and covered
Cons:
-
Can be expensive if not covered ($300–$600+)
-
Longer turnaround time due to shipping
Option 2: Independent Repair Shops
Who it is for: Users out of warranty or those seeking faster, potentially cheaper service.
Many independent repair specialists offer screen replacement services for the Surface Laptop 3. For example, FixFactor in London provides professional screen replacement using original Microsoft parts.
Cost Range: Independent repair services typically charge between $250 and $450 for a Surface Laptop 3 screen replacement.
Pros:
-
Often faster than Microsoft’s official process
-
Competitive pricing
-
Local availability
Cons:
-
Quality may vary depending on the repair shop
-
May use aftermarket parts instead of genuine Microsoft components
Option 3: DIY Screen Replacement
Who it is for: Technically inclined users comfortable with electronics repair.
iFixit provides detailed step-by-step guides for replacing the screen on both the 13.5-inch and 15-inch Surface Laptop 3 models.
What You Will Need:
-
Replacement screen assembly (available from iFixit or other parts suppliers)
-
Precision tools (T6 screwdriver, spudger, heat gun or iOpener)
-
Replacement adhesive
Time Required: 1 to 3 hours, depending on your experience level
Difficulty: Moderate to Difficult
Pros:
-
Potentially lower cost
-
Satisfying and educational experience
-
Complete control over parts quality
Cons:
-
High risk of damaging the device further
-
Voids any remaining warranty
-
Requires specialized tools and patience
Important: The front glass and digitizer are fused to the LCD on the Surface Laptop 3. You cannot replace just the glass—you must replace the entire display assembly.
Cost Breakdown: How Much Does It Cost to Fix a Surface Laptop 3 Screen Crack?
The cost of repairing a Microsoft Surface Laptop 3 screen crack varies widely based on the repair provider, model size, and warranty status.
| Repair Option | Estimated Cost (USD) | Estimated Cost (GBP) |
|---|---|---|
| Microsoft Official (out of warranty) | $300 – $600 | £250 – £500 |
| Microsoft Official (under warranty / covered) | Free | Free |
| Independent Repair Shop | $250 – $450 | £200 – £380 |
| DIY Replacement (parts only) | $150 – $400 | £130 – £340 |
*Prices are approximate and subject to change. The 15-inch model generally costs more than the 13.5-inch model due to the larger display assembly.*
For reference, iFixit sells a genuine 13.5-inch screen assembly for the Surface Laptop 3 at approximately £396.99. Aftermarket parts may be available at lower prices from retailers like Amazon, eBay, and AliExpress.
Step-by-Step: How to Replace a Surface Laptop 3 Screen Yourself
For those who choose the DIY route, here is a high-level overview of the process. Always refer to iFixit’s official guides for detailed, model-specific instructions.
Preparation
-
Power down the laptop completely and unplug it from the charger.
-
Gather your tools: T6 screwdriver, heat source (iOpener or heat gun), plastic opening tools, spudger, and replacement adhesive.
-
Work in a clean, well-lit area with an anti-static mat if possible.
Screen Removal
-
Apply heat to the edges of the screen to soften the adhesive that holds the display assembly in place.
-
Carefully insert a thin plastic opening tool between the screen and the chassis.
-
Work your way around the perimeter of the screen, gently prying it loose.
-
Disconnect the display flex cables from the motherboard.
-
Remove the six T6 screws holding the display assembly in place.
Installing the New Screen
-
Position the new screen assembly and reconnect the flex cables.
-
Secure the display with the six screws.
-
Apply fresh adhesive to the chassis edges.
-
Press the new screen firmly into place, ensuring a proper seal.
Pro Tip: Take your time with the heating and prying steps. Rushing these stages is the most common cause of additional damage during DIY repairs.
Prevention Tips: How to Avoid a Surface Laptop 3 Screen Crack
While the spontaneous cracking issue is largely a design flaw, there are steps you can take to minimize the risk of a Microsoft Surface Laptop 3 screen crack:
1. Use a Screen Protector
A tempered glass screen protector can add an extra layer of protection and may help fill the gap between the display and the keyboard deck, reducing the risk of pressure damage.
2. Be Gentle When Closing the Lid
Avoid slamming the lid shut. Close it gently and evenly to distribute pressure across the display.
3. Keep the Keyboard Deck Clean
Ensure there are no crumbs, debris, or foreign particles on the keyboard deck before closing the laptop. Even small particles can create pressure points against the glass.
4. Use a Protective Sleeve or Case
When carrying the laptop in a bag, use a padded sleeve to protect against impacts and pressure from other items.
5. Avoid Extreme Temperatures
Rapid temperature changes can cause the glass and metal chassis to expand and contract at different rates, potentially leading to cracks.
6. Check for Crunching Sounds
If you hear a crunching noise when opening or closing the lid, have the device inspected immediately. This sound may indicate underlying tension that could lead to a crack.
Warranty Coverage and Consumer Rights
Standard Manufacturer’s Warranty
A cracked screen is not covered under the standard manufacturer’s warranty unless it is determined to be a manufacturing defect rather than accidental damage. For spontaneous cracks, Microsoft has made exceptions through its repair program.
Microsoft Complete
If you purchased Microsoft Complete (accidental damage protection), your Microsoft Surface Laptop 3 screen crack is likely covered, though you may have to pay a deductible.
Consumer Protection Laws
In some regions, consumer protection laws may provide additional coverage if the issue is determined to be a design or manufacturing defect. Check with your local consumer rights organization for guidance.
Frequently Asked Questions
Can I glue a cracked Surface Laptop 3 screen?
No. Gluing a cracked touchscreen will not restore functionality. The digitizer and LCD are fused together, and the only effective fix is replacing the entire display assembly.
Will a cracked screen affect the laptop’s performance?
A cracked screen does not affect the laptop’s internal performance (processor, memory, storage, etc.). However, it can impact the touchscreen functionality, display clarity, and overall user experience.
How do I contact Microsoft for a repair?
You can initiate the repair process by visiting Microsoft Support, selecting your Surface device, and following the prompts to describe the issue.
Can I claim a refund if I already paid for a repair?
Yes. Microsoft has stated that customers who previously paid for a repair related to the spontaneous cracking issue may be eligible for reimbursement.
Is the cracking issue fixed in newer Surface models?
Microsoft has not officially confirmed design changes in subsequent models. However, reports of spontaneous cracking appear to be far less prevalent in the Surface Laptop 4 and 5.
Expert Tips and Actionable Advice
Tip 1: Document Everything
If you discover a Microsoft Surface Laptop 3 screen crack, take clear photos of the damage before contacting support. This documentation can be valuable if you need to prove the crack appeared spontaneously.
Tip 2: Check Your Warranty Status First
Before spending money on a repair, verify whether your device is still under warranty or if you have Microsoft Complete coverage. You might be eligible for a free repair.
Tip 3: Consider Third-Party Repair for Out-of-Warranty Devices
If your warranty has expired, independent repair shops often offer more competitive pricing than Microsoft’s official service. Just ensure they use quality parts.
Tip 4: Backup Your Data
Before sending your device for repair, back up all important data. While screen repairs typically do not affect data, it is always better to be safe.
Tip 5: Use the iFixit Community for DIY Support
If you choose the DIY route, iFixit provides free repair guides and has an active community forum where you can ask questions and get advice from experienced repair technicians.
Pros and Cons of Each Repair Option
| Option | Pros | Cons |
|---|---|---|
| Microsoft Official | Genuine parts, repair warranty, potential free repair | Expensive out of warranty, longer turnaround |
| Independent Shop | Faster, often cheaper, local | Variable quality, may use aftermarket parts |
| DIY | Cheapest, educational, full control | High risk, voids warranty, time-consuming |
Conclusion: Making an Informed Decision About Your Surface Laptop 3 Screen Crack
Dealing with a Microsoft Surface Laptop 3 screen crack can be frustrating, especially when the damage appears without any fault of your own. However, you are not without options.
Key Takeaways
-
Microsoft acknowledges the issue and offers free repairs for spontaneous cracks within the warranty period.
-
The cause appears to be a combination of design choices, including the lack of a rubber bumper and the removal of a thermal gasket.
-
Repair costs range from free (under warranty) to over $600 (out-of-warranty official repair).
-
DIY repair is possible but requires patience, the right tools, and a willingness to accept risk.
-
Prevention measures—such as using a screen protector and keeping the keyboard deck clean—can reduce the risk.
Actionable Steps
-
Assess the damage: Determine whether the crack is spontaneous or caused by impact.
-
Check your warranty: Visit Microsoft’s support site to check your device’s warranty status.
-
Contact Microsoft Support: If you believe the crack is spontaneous, initiate the repair process.
-
Explore alternatives: If out of warranty, compare quotes from independent repair shops and DIY parts suppliers.
-
Take preventative measures: Invest in a screen protector and handle the device with care.
Final Word
The Microsoft Surface Laptop 3 screen crack issue is a known flaw that Microsoft has addressed through a repair program. While the problem is inconvenient, the availability of free repairs for eligible devices and the option of affordable third-party solutions mean you have viable paths forward. By understanding your options and taking proactive steps, you can get your Surface Laptop 3 back to full functionality without breaking the bank.
Additional Resources
For more information and step-by-step repair guides, consider these trusted resources:
-
iFixit Surface Laptop 3 Repair Guides – Free, detailed instructions for both 13.5-inch and 15-inch models
-
Microsoft Support – Official support and warranty information for Surface devices
-
iFixit Replacement Parts – Genuine and aftermarket screen assemblies for the Surface Laptop 3
Related posts:
![How to fix Google Messages landscape layout issues on Android phone]()
How to Fix Google Messages Landscape Layout Issues on Android Phone?
![fix 403 forbidden error on Google Chrome ifixit.org.uk]()
How to Fix 403 Forbidden Error on Google Chrome: The Complete Troubleshooting Guide
![Why Won’t macOS Golden Gate 27 Beta Install in a Virtual Machine]()
Why Won’t macOS Golden Gate 27 Beta Install in a Virtual Machine?
![How to Fix Google Chrome Not Updating on Older Macs]()
How to Fix Google Chrome Not Updating on Older Macs (2026 Complete Guide)
![How to Screenshot on Mac: The Ultimate Guide to Keyboard Shortcuts & Hidden Features]()
The Ultimate Guide on How to Screenshot on Mac: Shortcuts, Tips, and Hidden Utilities
![How to Fix mds_stores High Memory and CPU Usage on Mac]()
How to Fix mds_stores High Memory and CPU Usage on Mac
![How to Install macOS Golden Gate 27 Beta on Your Mac]()
How to Install macOS Golden Gate 27 Beta on Your Mac?
![How to Install iOS 27 Beta on an iPhone Safely]()
How to Install iOS 27 Beta on an iPhone Safely (Step-by-Step Guide)