Understanding the Root Causes of Sticky MacBook Keys
Before diving into solutions, it’s helpful to understand exactly what’s causing that annoying resistance. Knowing the “why” behind the problem can also help you prevent it from happening again in the future.
The Usual Suspects: Dust, Crumbs, and Daily Debris
The most common cause of sticky keys is the accumulation of microscopic particles under the keycaps. These particles can include everything from dust and pet dander to hair and food crumbs.
Every time you close your MacBook, these tiny invaders are pressed against the delicate mechanism. Over time, a build-up of dust and crumbs can interfere with the key’s movement, causing it to feel stuck, slow to rebound, or unresponsive.
The Liquid Spill Conundrum
Liquid spills are perhaps the most dreaded cause of keyboard failure. Whether it’s coffee, soda, juice, or water, any liquid that seeps under the keys can leave behind a sticky residue.
When sugary drinks dry, the sugar acts like a glue, binding the moving parts of the switch together. In more severe cases, liquid ingress can lead to corrosion of the electrical contacts, which may require professional replacement of the keyboard.
The Butterfly Keyboard Mechanism (2015–2019)
If you own a MacBook, MacBook Air, or MacBook Pro model built between 2015 and 2019, you likely have a “butterfly” mechanism keyboard.
Apple designed this switch to be exceptionally thin, but its low-profile nature made it highly sensitive to dust and debris. Even a single grain of sand could cause a key to stick or fail to register a press.
This design flaw was so widespread that Apple launched a Keyboard Service Program to address the issue, which we will discuss in more detail later in this guide.
Before You Begin: Essential Safety Precautions
Working on the delicate internal mechanisms of your MacBook requires a careful approach. A little preparation goes a long way in preventing accidental damage.
-
Power Down Completely: Shut down your MacBook and unplug the power adapter. This eliminates the risk of a short circuit while you’re cleaning near electronic components.
-
Gather Your Tools: Before you start, assemble the following items from around your home:
-
A can of compressed air (with a thin straw nozzle)
-
70% isopropyl alcohol (rubbing alcohol)
-
Cotton swabs (Q-tips) or a lint-free microfiber cloth
-
A toothpick or a soft-bristled brush (like a clean paintbrush)
-
A plastic spudger or keycap removal tool (optional, for advanced cleaning)
-
-
Set Up Your Workspace: Find a clean, flat, well-lit surface. Avoid cleaning near food or drinks to prevent introducing new crumbs into the keyboard.
Method 1: The Official Apple Cleaning Method (No Key Removal)
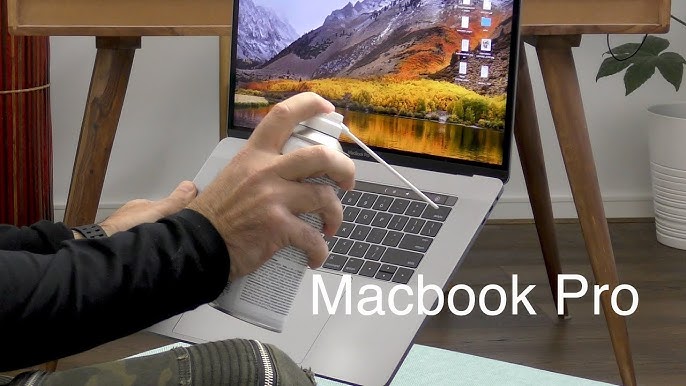
Apple’s official recommendation for cleaning a sticky keyboard is to use compressed air without removing the keycaps. This method is the safest and is effective for dislodging loose debris.
H3: Step-by-Step Compressed Air Cleaning
Follow these steps precisely for the best results:
Step 1: Hold Your MacBook at a 75-Degree Angle
Lift your MacBook and tilt it so it’s at a 75-degree angle, almost vertical but not completely. This orientation encourages any dislodged crumbs to fall out of the keyboard rather than deeper into the machine.
Step 2: Spray the Keyboard from Left to Right
Using short bursts, spray the compressed air across the keyboard, moving from left to right. If only one key is sticky, you can focus the spray on that specific key. Keep the nozzle about half an inch away from the keycaps.
Step 3: Rotate to the Right and Repeat
Now, rotate your MacBook onto its right side, maintaining the 75-degree angle. Again, spray the keyboard from left to right using short bursts.
Step 4: Rotate to the Left and Repeat
Finally, rotate your MacBook to its left side. Once more, spray the keyboard from left to right. This multi-angle approach is the most effective way to fix sticky keyboard keys by ensuring debris is dislodged from every crevice.
A Gentle Surface Clean with Isopropyl Alcohol
If the key still feels sticky after the compressed air treatment, it may have a gummy residue on its surface.
-
Lightly dampen a cotton swab or the corner of a lint-free cloth with 70% isopropyl alcohol. It should be damp, not dripping wet.
-
Gently wipe the top and sides of the sticky key. Avoid letting any liquid run down the sides of the keycap.
-
Allow the keyboard to air dry completely for a few minutes before turning your MacBook back on.
Expert Tip: Avoid using household cleaners like bleach or window cleaner, as these can damage the coating on your keys.
Method 2: Advanced Cleaning (Removing the Keycap)
If the simple methods above fail, you may need to remove the keycap to clean the mechanism underneath. Use extreme caution, as this can void your warranty if done incorrectly or damage the fragile switch.
This method is significantly riskier on “butterfly” mechanism keyboards (2015–2019 models). For these, it’s highly recommended to skip DIY removal and seek professional help.
The Keycap Removal Process
-
Identify Your Keyboard Type: Use a plastic spudger or a keycap puller. For scissor-switch keys (most MacBooks from 2020 onward), gently pry up from the bottom edge of the keycap.
-
Lift the Keycap: Work your way around the key, applying gentle upward pressure until it pops off. You might hear a small snap, which is normal.
-
Clean the Exposed Area: Use a toothpick to gently loosen and remove any visible debris beneath the keycap. Then, use a cotton swab dampened with isopropyl alcohol to clean the exposed mechanism and the underside of the keycap.
-
Reattach the Keycap: Align the keycap over its switch and press down firmly and evenly until you hear it click back into place.
When DIY Methods Aren’t Enough: Professional Repair Options
If you’ve followed all the steps and you still can’t fix sticky keyboard keys, the issue is likely more serious, involving a faulty mechanism, liquid corrosion, or a widespread defect. At this point, it’s time to consider professional repair.
Option 1: The Apple Keyboard Service Program
For owners of MacBook models with the infamous “butterfly” keyboard (mostly 2015–2019), Apple launched a Keyboard Service Program offering free repairs for sticky or unresponsive keys.
However, a critical update: Apple officially ended this free repair program in late 2024. The service is no longer available for most models, meaning out-of-warranty butterfly keyboard repairs will now come at a cost.
Option 2: Visiting the Genius Bar or an Apple Authorized Service Provider
Your next best bet is to book an appointment at a Genius Bar or find an Apple Authorized Service Provider.
-
What to expect: A certified technician will diagnose your MacBook. The repair often involves replacing the entire “top case” (the keyboard, battery, and aluminum frame), which is a major repair.
-
Cost: A full keyboard replacement through Apple can be expensive. Prices range from $180 to $700, depending on your specific MacBook model and the extent of the damage. MacBook Pro models often cost more to repair, with some reports indicating prices of $550 to $650
Option 3: Independent Third-Party Repair Shops
For a more budget-friendly alternative, consider a reputable third-party repair shop.
-
Pros: Independent shops are generally more cost-effective, offering full keyboard replacements for between $200 and $600. They can also sometimes perform single-key repairs for $30 to $150, which Apple rarely offers.
-
Cons: The quality of parts and workmanship can vary. It’s crucial to read reviews and choose a shop with a strong reputation for Mac repairs.
Proactive Prevention: How to Keep Your Keys Clean and Functional
As the old saying goes, an ounce of prevention is worth a pound of cure. By following these simple habits, you can dramatically reduce the chance of developing sticky keys in the future.
-
Establish a No-Food, No-Drink Zone: This is the single most effective way to prevent spills and crumbs from ever reaching your keyboard.
-
Wash Your Hands Before Typing: Natural oils and lotions from your hands can build up on the keycaps over time, leading to a grimy, sticky film.
-
Perform Weekly Maintenance: Once a week, take 30 seconds to shake your MacBook upside down over a trash can and give it a quick burst of compressed air to loosen any new debris.
-
Use a Keyboard Cover (with Caution): A thin, well-fitted keyboard cover can block dust and spills. However, be aware that on some MacBook models, closing the lid with a cover can put pressure on the display and potentially damage it.
Comparing Your Options: DIY vs. Professional Repair
To help you make an informed decision, here is a quick comparison of the various approaches to fix sticky keyboard keys on a MacBook.
| Method | Cost | Difficulty | Risk Level | Best For |
|---|---|---|---|---|
| Compressed Air (DIY) | Low ($10–$15 for a can) | Very Low | Very Low | Light dust, crumbs, general maintenance |
| Isopropyl Alcohol Wipe | Low ($5 for a bottle) | Very Low | Very Low | Grime, surface stickiness on keycaps |
| Keycap Removal (DIY) | Free (with tools you have) | Medium | Medium/High | Debris lodged deep under a single, non-butterfly key |
| Genius Bar / AASP | High ($180–$700+) | None (done by pro) | None | Butterfly keyboards, liquid damage, widespread failures |
| Third-Party Repair Shop | Medium ($200–$600) | None (done by pro) | Low | Out-of-warranty repairs, budget-conscious owners |
Frequently Asked Questions (FAQs)
Q1: Can I use a vacuum cleaner to remove debris from my MacBook keyboard?
It’s not recommended. Standard vacuums can generate static electricity that can damage your MacBook’s sensitive internal components. If you must use a vacuum, use a small, specialized electronics vacuum on its lowest suction setting. Compressed air is a safer and more effective choice.
Q2: Will cleaning my keyboard myself void my AppleCare or warranty?
Using compressed air and wiping the keycaps with a damp cloth is considered normal maintenance and will not void your warranty. However, physically removing a keycap and damaging the switch or mechanism can void your coverage for that specific repair. If in doubt, always start with the non-invasive cleaning methods.
Q3: I spilled liquid on my MacBook. What should I do immediately?
Act fast! Immediately shut down your MacBook, unplug it, and disconnect all peripherals. Turn the laptop upside down into an inverted “V” shape to let the liquid drain out. Do not try to turn it on for at least 48–72 hours. Then, bring it to a professional repair shop immediately. Do not attempt to clean a liquid-damaged keyboard with DIY methods, as you can cause a short circuit.
Q4: Is the Apple Keyboard Service Program still active for butterfly keyboards?
No, as of late 2024, Apple has officially ended its free keyboard service program for all butterfly mechanism MacBooks. Owners will now have to pay for repairs or rely on third-party shops.
Q5: My key is working, but it just feels “mushy” instead of clicky. What’s wrong?
A “mushy” feeling key is often the first sign of a developing sticky key. It’s likely caused by a small buildup of grime under the keycap. Try the isopropyl alcohol cleaning method described in this guide, and be sure to clean the edges of the key thoroughly.
Conclusion: Restoring Your MacBook’s Typing Experience
A sticky keyboard can feel like a major obstacle, but in most cases, it’s a problem you can solve with the right technique and a little patience. From using a can of compressed air to performing a careful deep clean, you have a range of options to restore your MacBook’s typing experience.
Remember to start with the simplest, safest method first. A quick blast of compressed air and a gentle wipe with isopropyl alcohol is often all you need to fix sticky keyboard keys. If the problem persists, you can explore more advanced techniques like keycap removal or consider the various professional repair options.
Related posts:
![Display Backlight Service Program]()
How to Check If Your Device Qualifies for the Display Backlight Service Program?
![MacBook Pro Screen Heat Damage ifixit.org.uk]()
What Is Everything You Need to Know About MacBook Pro Screen Heat Damage?
![How to Find Reliable Computer Repair]()
How to Find Reliable Computer Repair: A Comprehensive Guide to Troubleshooting and Professional Supp...
![How to Fix an HP Notebook Computer Battery That Is Not Charging]()
How to Fix an HP Notebook Computer Battery That Is Not Charging?
![How to Fix Overheating Issues on HP Omen and Victus Gaming Laptops]()
How to Fix Overheating Issues on HP Omen and Victus Gaming Laptops?
![How to Fix Screen Problems on a MacBook Pro]()
How to Fix Screen Problems on a MacBook Pro and Restore Normal Display Performance
![How to Fix MacBook Pro Screen Burn Marks and Restore Display Quality?]()
How to Fix MacBook Pro Screen Burn Marks and Restore Display Quality?
![Microsoft Surface Laptop 3 Screen Crack: ifixit.org.uk]()
Microsoft Surface Laptop 3 Screen Crack: Comprehensive Guide to Causes, Repair Options, and Preventi...