Nothing compares to the sinking feeling of opening your premium laptop only to be greeted by a spiderweb of cracks across the display. If you’re currently dealing with a surface laptop 3 cracked screen, you are not alone. Many users have reported this exact issue, whether from a sudden drop, pressure in a bag, or even seemingly spontaneous hairline fractures.
This comprehensive guide will walk you through seven actionable tips to fix your cracked screen and protect your device moving forward. Plus, we’ll cover costs, warranty options, and expert preventive advice so you can get back to work without breaking the bank.
Why Is Your Surface Laptop 3 Screen So Vulnerable?
Before diving into solutions, it helps to understand the root cause. The Surface Laptop 3, while beautifully designed, has a bonded display assembly. Unlike older laptops where the glass and LCD were separate, your Surface Laptop 3 combines the glass, digitizer, and LCD into one fused unit. This enhances visual quality but makes repairs more complex and costly.
Microsoft has also acknowledged that “in a very small percentage of cases, a hard foreign particle may cause a hairline fracture in the glass” that can appear unexpectedly. This issue seems more common in aluminum-case models and can sometimes occur without any visible cause.
Key Takeaway: A surface laptop 3 cracked screen is often not user error. It can result from manufacturing defects, design choices, or everyday pressure. But regardless of the cause, you need a clear path forward.
Tip 1: Immediately Assess the Damage (And Stop Using the Device)
The moment you notice a surface laptop 3 cracked screen, your first instinct might be to keep working. Don’t. Continuing to use a cracked screen can worsen the damage in several ways:
-
Touchscreen malfunction: Cracks can spread, turning dead zones into full-screen failures.
-
LCD damage: Sharp glass edges can puncture the underlying LCD panel, turning a repairable screen into a total device replacement.
-
Injury risk: Broken glass edges can cut your fingers or damage other items in your bag.
Step-by-Step Damage Assessment
Step 1: Power down the device completely.
Step 2: Examine the crack pattern—hairline, spiderweb, or corner impact.
Step 3: Check touch responsiveness in different zones (if still usable).
Step 4: Look for any display discoloration or black spots.
Step 5: Document the damage with clear photos for warranty claims.
Expert Tip: If you see black liquid crystal bleeding or flickering lines, the internal LCD is likely compromised. This requires immediate repair attention.
Tip 2: Determine If You Qualify for Microsoft’s Free Repair Program
One of the most important steps when facing a surface laptop 3 cracked screen is checking whether Microsoft will fix it for free. The company launched a repair program specifically for unexplained cracks.
Who Qualifies?
-
Warranty period: Your Surface Laptop 3 must still be under the standard limited warranty (typically one year from purchase).
-
No user damage: The crack must not result from drops, impacts, or mishandling.
-
Spontaneous cracks: If the crack appeared without any known cause, you likely qualify.
According to Microsoft’s official statement: “If you believe your Surface Laptop 3 is experiencing this issue, you are encouraged to contact Microsoft Support to initiate a repair free of charge during the warranty period”.
How to Claim a Free Repair
| Step | Action | Details |
|---|---|---|
| 1 | Gather documents | Proof of purchase, serial number, photos of crack |
| 2 | Contact Microsoft Support | Use chat, phone, or Microsoft Support |
| 3 | Explain the issue | Mention that the crack appeared without user fault |
| 4 | Follow instructions | They may ask you to ship the device or visit an authorized center |
| 5 | Get reimbursement | If you already paid for repair, you may qualify for a refund |
Note: Some users report difficulty getting past automated systems. Persistence is key—insist on speaking with a live agent.
Tip 3: Compare Repair Options – Microsoft vs. Third-Party vs. DIY
If your warranty has expired or the crack resulted from accidental damage, you’ll need to pay for the repair. Here’s a detailed breakdown of your options for fixing a surface laptop 3 cracked screen.
Option A: Microsoft Out-of-Warranty Service
Microsoft typically doesn’t “repair” screens; they offer a replacement device for a fixed fee:
| Model | Estimated Cost |
|---|---|
| 13.5-inch | $400 – $450 |
| 15-inch | $450 – $600 |
Source: Microsoft out-of-warranty pricing
Pros:
-
Genuine Microsoft parts
-
Professional installation
-
Retains warranty on remaining components
Cons:
-
Most expensive option
-
You may receive a refurbished unit, not your original device
-
Long turnaround times (7–14 days)
Option B: Third-Party Repair Shops
Independent repair shops typically charge $250–$450 for a Surface Laptop 3 screen replacement.
Pros:
-
More affordable
-
Often same-day service available
-
You keep your original device
Cons:
-
Risk of non-genuine parts
-
Potential voiding of any remaining warranty
-
Variable quality of workmanship
Look for shops that specifically advertise “original Microsoft parts” and offer a warranty on their work (typically 6–12 months).
Option C: DIY Screen Replacement (Advanced Only)
The Surface Laptop 3 screen replacement is rated as “Moderate” difficulty and takes 1–2 hours. You’ll need a replacement LCD assembly (the entire fused unit), not just the glass.
Total DIY cost: ~$112 – $400 for the part plus tools
You Will Need:
-
Replacement LCD assembly with digitizer
-
T5 Torx screwdriver
-
Spudger tools
-
Suction handle
-
Jimmy or iFlex opening tool
-
Adhesive strips
Warning: The Surface Laptop 3 contains delicate WiFi/Bluetooth antennas along screen edges. Improper removal can permanently damage these components.
Tip 4: Protect Your Investment with a Screen Protector
Prevention is always cheaper than repair. One of the simplest ways to avoid a surface laptop 3 cracked screen in the future is installing a high-quality screen protector.
Why a Screen Protector Helps
According to PCMag, “the temporary solution to help avoid a screen crack is to use a screen protector because it fills the gap between the display and keyboard and helps prevent the screen from flexing”.
What to Look For
| Feature | Why It Matters |
|---|---|
| Anti-shock layer | Absorbs impacts before they reach the glass |
| 9H hardness | Resists scratches and minor impacts |
| Plastic (not glass) | Won’t shatter like glass protectors |
| Bubble-free application | Prevents dust from getting trapped |
Recommended: The Dipos Anti-Shock display protector offers 9H hardness with an integrated anti-shock layer and a 10-year manufacturer’s warranty.
How to Apply a Screen Protector Correctly
Step 1: Clean the screen thoroughly with microfiber cloth and included alcohol wipe.
Step 2: Use dust-removal stickers to eliminate any particles.
Step 3: Align the protector carefully with the screen edges.
Step 4: Apply from one edge to the other, smoothing out bubbles as you go.
Step 5: Use the included squeegee to remove any remaining air bubbles.
Step 6: Allow 24 hours for full adhesion before heavy use.
Tip 5: Use a Protective Case to Absorb Impacts
While a screen protector guards against direct contact and flexing, a hard shell case protects the entire chassis from drops, bumps, and pressure damage.
Benefits of a Protective Hard Shell Case
-
Shock absorption: Heavy-duty armor shells with shock-absorbent bumpers protect against accidental drops.
-
Pressure distribution: Spreads force evenly across the lid, reducing stress points.
-
Scratch prevention: Keeps the aluminum body looking new.
-
Heat dissipation: Quality cases have vented designs for safe heat disbursement.
Top Protective Cases for Surface Laptop 3
| Brand | Features | Compatibility |
|---|---|---|
| ProCase | Shockproof, foldable kickstand, wraparound bumper | 13.5″ Metal Palm Rest models |
| mCover | Shatter-proof polycarbonate, translucent, lightweight | 13.5″ Alcantara Keyboard models |
| TechProtectus | Heavy-duty armor, impact-resistant bumpers | 15-inch models |
Installation tip: Look for cases with a “simple snap-on and snap-off” design that won’t scratch your device during application.
Tip 6: Adopt Safe Handling Habits
Sometimes the best repair is the one you never need. Changing a few daily habits can dramatically reduce your risk of another surface laptop 3 cracked screen.
Do’s and Don’ts for Surface Laptop 3 Owners
Do:
-
Close the lid gently from the center, not the corner
-
Use both hands when picking up or moving the laptop
-
Store the laptop in a padded sleeve when in a bag
-
Clean the keyboard deck regularly to remove debris
-
Place the laptop on hard, flat surfaces
Don’t:
-
Put heavy books or objects on top of the closed laptop
-
Grab the laptop by the screen corner
-
Close the lid with debris (crumbs, paper clips) on the keyboard
-
Carry the laptop loosely under your arm
-
Leave it in a tightly packed backpack
Pro Tip: Some users have reported a “crunching sound” when opening the lid before cracks appear. If you hear this, inspect your screen immediately.
Tip 7: Know When to Repair vs. Replace Your Surface Laptop 3
Not every surface laptop 3 cracked screen is worth repairing. Here’s how to make an informed decision.
When Repair Makes Sense
-
✅ Laptop is less than 3 years old
-
✅ Device still meets your performance needs
-
✅ You have Microsoft Complete coverage (deductible $49–$99)
-
✅ The rest of the device is in excellent condition
-
✅ Repair cost is less than 40% of replacement value
When Replacement Is Better
-
❌ Repair estimate exceeds $500
-
❌ Laptop has other issues (battery degradation, keyboard problems, overheating)
-
❌ You were already considering an upgrade
-
❌ The device is out of warranty and the screen replacement cost is close to the value of a used Surface Laptop 3
Real-World Cost Comparison
| Scenario | Estimated Cost | Recommendation |
|---|---|---|
| In-warranty spontaneous crack | $0 (free repair) | Repair immediately |
| Microsoft Complete coverage | $49 – $99 deductible | Repair |
| Out-of-warranty 13.5″ model | $400 – $450 | Consider repair |
| Out-of-warranty 15″ model | $450 – $600 | Consider replacement |
| Used Surface Laptop 3 (good condition) | ~$400 – $600 | Compare options |
Frequently Asked Questions
Can I glue my cracked Surface Laptop 3 screen?
No. The glass, digitizer, and LCD are fused together. Gluing will not restore touch functionality or prevent further cracking. The only proper fix is replacing the entire display assembly.
Does Microsoft still offer free repairs for Surface Laptop 3 cracked screens?
The free repair program was active during the warranty period of devices purchased around 2019–2020. For current claims, contact Microsoft Support directly to determine eligibility. The program specifically addressed spontaneous cracks caused by manufacturing defects, not accidental damage.
How long does a Surface Laptop 3 screen replacement take?
-
Microsoft service: 7–14 days including shipping
-
Third-party shop: 2–24 hours, often same-day
-
DIY: 1–2 hours for experienced users
Will replacing the screen affect my data?
Professional repair services typically do not access or wipe your data. However, Microsoft’s out-of-warranty replacement service may send you a different refurbished unit. Always back up your data before any repair.
Cost Breakdown Summary
| Repair Method | Cost Range | Turnaround | Warranty Impact |
|---|---|---|---|
| Microsoft (in-warranty) | Free – $99 | 7–14 days | Preserved |
| Microsoft (out-of-warranty) | $400 – $600 | 7–14 days | New device warranty |
| Third-party shop | $250 – $450 | 1–24 hours | May void remaining warranty |
| DIY replacement | $112 – $400 + tools | 1–2 hours | Voids remaining warranty |
Conclusion: Take Action to Fix and Protect Your Surface Laptop 3
Dealing with a surface laptop 3 cracked screen is frustrating, but you have clear options. Here’s your action plan:
-
Assess the damage – Document everything and stop using the device immediately.
-
Check warranty status – You may qualify for a free repair if the crack appeared spontaneously.
-
Compare repair costs – Weigh Microsoft service ($400–$600) against third-party shops ($250–$450) and DIY ($112–$400).
-
Invest in prevention – Install a quality screen protector and protective hard shell case.
-
Adopt safe habits – Handle your laptop gently and keep debris away from the keyboard.
Whether you choose professional repair or take on the DIY challenge, acting quickly will prevent further damage and save you money. And once your screen is fixed, the small investment in protective accessories will give you peace of mind for years to come.
Related posts:
![Display Backlight Service Program]()
How to Check If Your Device Qualifies for the Display Backlight Service Program?
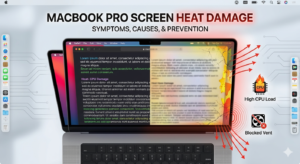
![MacBook Pro Screen Heat Damage ifixit.org.uk]()
What Is Everything You Need to Know About MacBook Pro Screen Heat Damage?
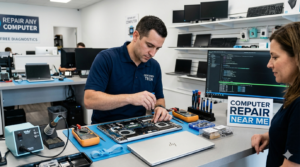
![How to Find Reliable Computer Repair]()
How to Find Reliable Computer Repair: A Comprehensive Guide to Troubleshooting and Professional Supp...
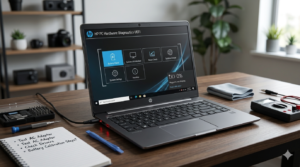
![How to Fix an HP Notebook Computer Battery That Is Not Charging]()
How to Fix an HP Notebook Computer Battery That Is Not Charging?
![How to Fix Overheating Issues on HP Omen and Victus Gaming Laptops]()
How to Fix Overheating Issues on HP Omen and Victus Gaming Laptops?
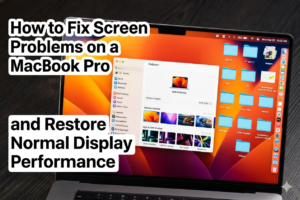
![How to Fix Screen Problems on a MacBook Pro]()
How to Fix Screen Problems on a MacBook Pro and Restore Normal Display Performance
![How to Fix MacBook Pro Screen Burn Marks and Restore Display Quality?]()
How to Fix MacBook Pro Screen Burn Marks and Restore Display Quality?
![Microsoft Surface Laptop 3 Screen Crack: ifixit.org.uk]()
Microsoft Surface Laptop 3 Screen Crack: Comprehensive Guide to Causes, Repair Options, and Preventi...