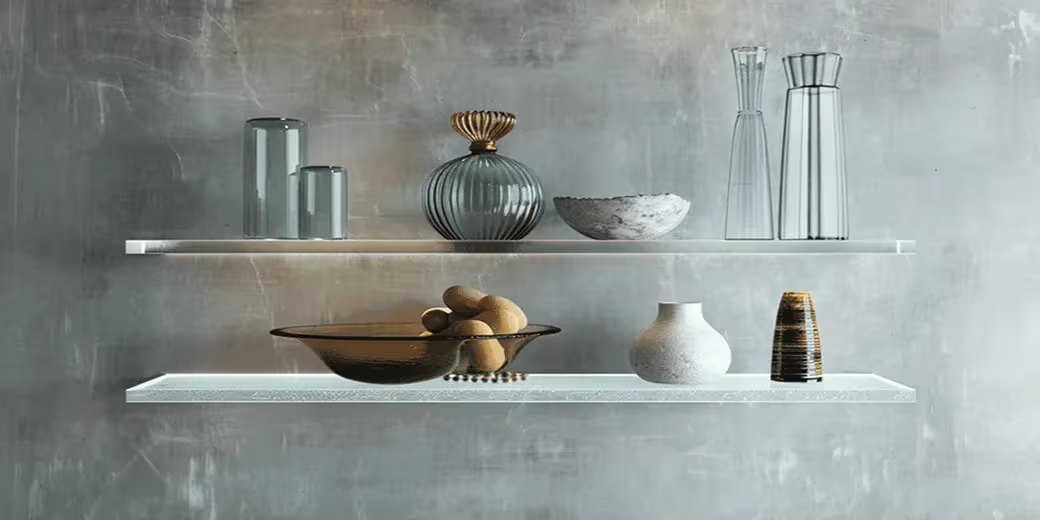
Bathroom glass shelves offer a sleek, modern way to organize toiletries, towels, and decor while maximizing light and space. Over time, however, they can crack, loosen, or simply look dated, prompting many homeowners to consider replacing bathroom glass shelving. The good news? You can achieve this upgrade without major wall damage when following the right methods.

Whether your shelves are held by brackets, clips, or adhesive, this comprehensive guide walks you through the process safely. You’ll discover practical techniques for removal, preparation, and reinstallation that prioritize wall integrity—especially important in tiled or drywall bathrooms exposed to constant moisture.
Why Replacing Bathroom Glass Shelving Matters
Glass shelving enhances bathroom aesthetics and functionality, but wear from humidity, weight, or accidental impacts often necessitates replacement. Old shelves may develop chips, lose clarity, or fail structurally, creating safety hazards.
Replacing bathroom glass shelving not only restores safety but also refreshes your space. Modern tempered glass options resist shattering and handle bathroom conditions better. Proper installation prevents future issues like water intrusion behind tiles or loose fixtures.
Many homeowners fear the process involves destructive drilling or costly professionals. With careful planning, DIY enthusiasts can complete this project successfully while minimizing risks.
Assessing Your Current Bathroom Glass Shelves
Before starting, evaluate the existing setup:
- Type of mounting: Brackets, recessed clips, adhesive, or corner supports?
- Condition of glass: Cracks, chips, or fogging?
- Wall material: Tile, drywall, or painted plaster?
- Weight capacity: What items will the new shelf hold?
Use a level and stud finder to check alignment and support. Take precise measurements of the shelf dimensions, thickness (typically 1/4″ to 3/8″ for tempered glass), and bracket spacing. Photograph the installation from multiple angles for reference.
Pro Tip: If the shelf is in a shower, note any silicone seals, as these often require careful removal to avoid tile damage.
Tools and Materials Needed for Replacing Bathroom Glass Shelving
Gather these essentials for a smooth project:
- Safety gear: Gloves, safety glasses, dust mask
- Screwdriver set (Phillips and flathead)
- Pry tool or plastic scraper
- Stud finder and level
- Measuring tape and pencil
- Drill with masonry bits (if needed)
- Wall anchors or toggle bolts
- New tempered glass shelf
- Mounting hardware (brackets, clips)
- Silicone caulk (bathroom-rated, mold-resistant)
- Isopropyl alcohol or mild cleaner
- Painter’s tape
- Optional: Adhesive mounting kits for no-drill solutions
For custom glass, visit a local supplier with your measurements. Tempered glass is recommended for safety.
Step-by-Step Guide: Removing Old Bathroom Glass Shelves Safely
1. Prepare the Area
Clear the shelf and surrounding space. Lay down protective towels or cardboard to catch debris. Turn off nearby water sources if working in a shower.
2. Remove the Glass Panel
- For bracketed shelves: Loosen any set screws or clips holding the glass.
- Gently lift or slide the glass out. Support it from below to prevent cracking.
- For adhesive or silicone-mounted shelves: Use a utility knife to cut through the sealant carefully. Apply gentle upward pressure with a plastic scraper.
Caution: Never force tempered glass, as it can shatter into small pieces. Work slowly.
3. Remove Brackets or Mounts Without Wall Damage
- Unscrew brackets using the appropriate screwdriver.
- If anchors are stubborn, use a screw extractor or apply penetrating oil sparingly.
- For glued mounts: Use a hairdryer on low heat to soften adhesive, then pry gently.
Fill old holes immediately with spackle or tile grout if not reusing them. Sand smooth once dry to prepare for new hardware.
Choosing the Right Replacement Glass Shelf
When replacing bathroom glass shelving, consider these factors:
- Thickness and Strength: 3/8″ tempered glass for heavier loads.
- Edge Finish: Polished or beveled for safety and style.
- Size: Match or slightly adjust for better fit.
- Style: Floating, bracketed, or corner units.
Compare options in this quick table:
| Type | Pros | Cons | Best For |
|---|---|---|---|
| Floating (Hidden Brackets) | Sleek, modern look | More precise installation | Minimalist bathrooms |
| Bracketed | Easier DIY, adjustable | Visible hardware | Heavy items |
| Corner Shelves | Space-saving | Limited size | Small showers |
| Adhesive/No-Drill | No wall damage | Lower weight capacity | Renters, temporary |
Methods for Installing New Shelves Without Damaging Walls
Traditional Bracket Installation
- Locate wall studs using a stud finder.
- Mark positions with a level.
- Pre-drill pilot holes.
- Secure brackets with appropriate screws and anchors for hollow walls.
- Slide or clip in the new glass shelf and tighten any retaining screws.
No-Drill Alternatives
Adhesive systems or tension mounts work well for lighter applications. Products using strong adhesive rings or Power.Kit technology allow secure attachment to tiles with residue-free removal later.
For showers, some installers cut into grout lines and seal with silicone for a flush, drill-free fit.
Sealing and Finishing
Apply mold-resistant silicone around edges in wet areas. Wipe away excess with a soapy finger for a smooth bead. Allow 24 hours curing time before loading items.
Expert Tips for Successful Replacing Bathroom Glass Shelving
- Work with a Partner: Glass is heavy and slippery when wet.
- Moisture Management: Use rust-resistant stainless steel or chrome hardware.
- Weight Distribution: Test with light items first; avoid overloading.
- Leveling Perfection: Even slight tilts cause items to slide.
- Maintenance: Clean regularly with non-abrasive cleaners to maintain clarity.
Real-World Scenario: Sarah, a homeowner in a humid climate, replaced her cracked shower corner shelf using adhesive mounts after previous drilling caused minor tile cracks. The new setup has held firm for over two years with daily use.
Common Mistakes to Avoid
- Ignoring wall type (drywall needs stronger anchors than tile).
- Using regular glass instead of tempered.
- Skipping level checks.
- Applying too much force during removal.
- Not allowing proper adhesive cure time.
Comparing Benefits and Drawbacks of Different Approaches
Drilling Method:
- Benefits: Maximum strength and durability.
- Drawbacks: Risk of wall damage if not done carefully; not ideal for renters.
No-Drill/Adhesive:
- Benefits: Wall-safe, reversible, beginner-friendly.
- Drawbacks: May have lower weight limits; some adhesives fail in extreme humidity.
Professional Installation:
- Benefits: Expert results, warranties.
- Drawbacks: Higher cost.
For most homeowners, a hybrid approach (minimal drilling with quality anchors) offers the best balance.
Caring for Your New Bathroom Glass Shelves
To extend lifespan:
- Wipe spills immediately.
- Avoid abrasive cleaners.
- Check hardware tightness every few months.
- Organize items by weight—heavier at the back.
Additional Considerations for Bathroom Glass Shelving Projects
Safety First
Always prioritize tempered glass and proper load limits to prevent accidents, especially with children or pets nearby.
Aesthetic Integration
Match hardware finishes to existing fixtures (chrome, brushed nickel, matte black) for a cohesive look.
Budget Planning
DIY replacement typically costs $50–$300 depending on shelf size and hardware, far less than professional services.
Environmental Factors
Bathrooms experience high humidity—choose materials rated for wet environments to prevent fogging or corrosion.
Conclusion
Replacing bathroom glass shelving doesn’t have to mean damaged walls or stressful renovations. By assessing your space, gathering the right tools, and following careful removal and installation steps, you can achieve a beautiful, functional update that enhances your bathroom for years to come.
Key takeaways include measuring accurately, opting for tempered glass, using appropriate mounting methods for your wall type, and sealing thoroughly in wet areas. Whether you choose traditional brackets for strength or innovative no-drill solutions for convenience, patience and preparation are your best allies.
Take action today: Measure your space, gather supplies, and transform your bathroom with confidence. A fresh set of glass shelves can instantly modernize the room while providing practical storage. Your updated bathroom awaits—clean, organized, and damage-free.
For quality hardware options, explore selections on Amazon. Check community discussions on Reddit for real homeowner experiences with similar projects. For general information on glass applications, refer to resources like Wikipedia’s entry on tempered glass.
Related posts:
![facebook video downloader facebook video downloader]()
How to Change Name on Facebook: The Complete 2026 Guide
![Fix Orange Discoloration on MacBook Pro Screen]()
How to Fix Orange Discoloration on MacBook Pro Screen: Complete Guide to Causes & Solutions
![Google Gemini in 2026]()
What Is Everything You Need to Know About Google Gemini in 2026?
![fbi warns iphone android scams]()
Why the FBI Warns iPhone Android Scams Are Increasing
![What Should You Know About the iPhone 17 in 2026]()
What Should You Know About the iPhone 17 in 2026, Including Features, Specs, Price, Release Date, an...
![Best Free Password Managers ifixit]()
Best Free Password Managers: Secure Your Digital Life in 2026
![Snapchat Planets - ifixit]()
How Do Snapchat Planets Work and What Does Each Planet Mean in the Friend Solar System?
![What Causes Black Lines on Laptop Screen]()
What Causes Black Lines on Laptop Screen? A Complete Troubleshooting Guide