In today’s digital world, knowing how to record your screen is an essential skill. Whether you’re a teacher creating educational videos, a professional demonstrating software, a gamer capturing epic moments, or someone simply troubleshooting an issue for tech support, screen recording bridges the gap between explanation and action.
Screen recordings, also known as screencasts, allow you to capture exactly what appears on your display, often with audio narration, making complex processes easy to understand. This comprehensive guide walks you through native methods and advanced options for every major platform, ensuring you can start recording confidently no matter your device how to screenshot on mac.
Why Learning How to Record Your Screen Matters
Screen recording has become a cornerstone of modern communication. It powers everything from customer support responses and remote team collaborations to YouTube tutorials and app demonstrations. Built-in tools have improved dramatically, offering high-quality capture without needing expensive software.
Benefits include:
- Clarity in explanations: Show rather than tell.
- Time savings: One recording can replace lengthy emails or calls.
- Versatility: Use for education, documentation, content creation, and more.
- Accessibility: Helps users follow visual instructions at their own pace.
While there are many third-party apps, starting with built-in features is ideal for most users.
How to Record Your Screen on Windows
Windows offers robust built-in options that have evolved significantly, especially in Windows 11.
Using the Snipping Tool (Recommended for Most Users)
The modern Snipping Tool is one of the quickest ways how to record your screen on Windows 11:
- Search for “Snipping Tool” in the Start menu and open it.
- Click the video camera icon to switch to screen recording mode.
- Click New and select the area of the screen you want to record (or full screen).
- Enable microphone or system audio as needed.
- Hit the record button to start. Stop when finished; the video saves automatically.
This tool supports internal audio and microphone input, making it perfect for tutorials.
Xbox Game Bar for Quick Recordings
Press Windows key + G to open the Game Bar. Click the capture widget and hit the record button (or use the shortcut Windows + Alt + R). It’s excellent for gameplay but works for any app.
Expert Tip: For background recording of the last 30 seconds, use Windows + Alt + G.
Microsoft Clipchamp for Advanced Editing
Clipchamp, pre-installed on many Windows devices, offers screen recording plus built-in editing tools like trimming, text overlays, and effects.
Comparison Table: Windows Built-in Tools
| Tool | Best For | Audio Support | Editing Features | Ease of Use |
|---|---|---|---|---|
| Snipping Tool | Quick captures | Yes | Basic | Very High |
| Game Bar | Gaming & full screen | Yes | Minimal | High |
| Clipchamp | Professional results | Yes | Advanced | Medium |
How to Record Your Screen on Mac
macOS provides seamless tools via the Screenshot app and QuickTime Player.
Using the Built-in Screenshot Toolbar
Press Shift + Command + 5 to open the toolbar:
- Choose “Record Entire Screen” or “Record Selected Portion.”
- Click Options to select microphone input and save location.
- Hit Record and stop via the menu bar icon.
This method is native, reliable, and supports high-resolution output.
QuickTime Player Method
- Open QuickTime Player.
- Go to File > New Screen Recording.
- Select recording area and audio source.
- Start recording and stop when done.
Pro Tip: For internal audio on Mac (which QuickTime doesn’t capture natively), consider trusted third-party solutions or system extensions, but built-in tools suffice for most with microphone audio.
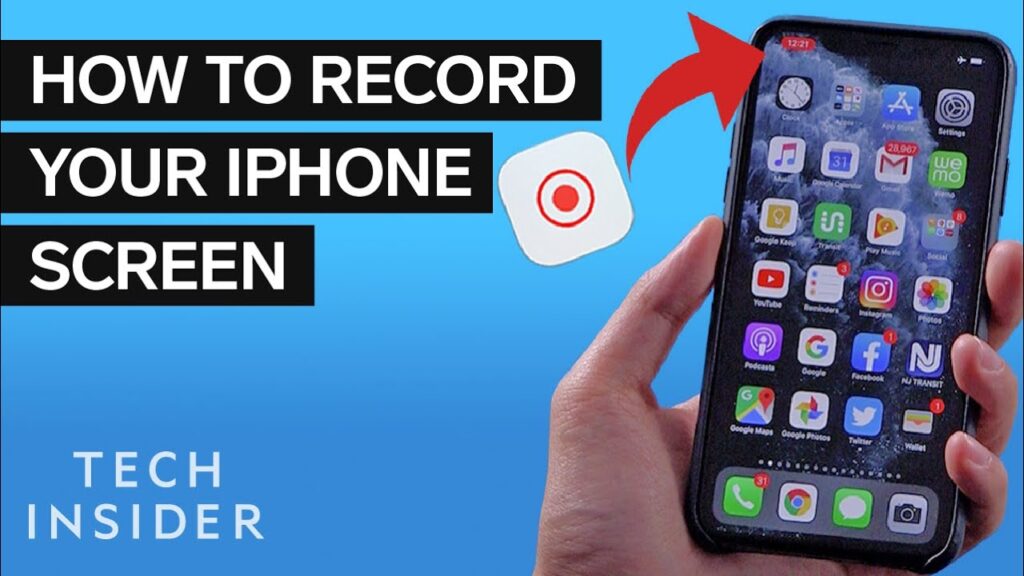
How to Record Your Screen on iPhone
iOS makes how to record your screen straightforward with the built-in Screen Recording feature.
Step-by-Step Guide
- Open Settings > Control Center and add “Screen Recording” if not already present.
- Swipe down from the top-right corner to open Control Center.
- Tap the Record button (circle inside another circle). A 3-second countdown begins.
- To include microphone audio, long-press the button and enable it.
- Stop recording by tapping the red status bar or returning to Control Center. Videos save to the Photos app.
Real-World Scenario: Perfect for creating app walkthroughs or capturing bugs to send to developers.
Actionable Advice: Edit the video directly in Photos for quick trims before sharing.
How to Record Your Screen on Android
Android’s built-in screen recorder varies slightly by manufacturer but is generally accessible via Quick Settings.
Standard Android Method
- Swipe down twice from the top of the screen to expand Quick Settings.
- Tap Screen Record (swipe right if not visible).
- Choose options like audio source (device audio, microphone, or both) and show touches.
- Tap Start and stop via the notification or floating button.
On Samsung devices, the interface may include additional options like media projection.
Expert Tip: For longer or more customized recordings, apps like built-in Game Launchers on gaming phones offer enhanced controls.
Choosing the Right Third-Party Tools for Advanced Needs
While native tools cover basics, third-party options shine for professional use:
- OBS Studio: Free, open-source, highly customizable for streaming and multi-source recording. Ideal for power users.
- Loom: Great for quick shareable videos with webcam overlay.
- Screen Studio or similar for polished Mac recordings.
Benefits vs Drawbacks:
Built-in Tools:
- Pros: Free, no installation, secure, fast.
- Cons: Limited editing, fewer advanced features.
Third-Party Software:
- Pros: Better editing, effects, cloud sharing.
- Cons: May require learning curve or subscription.
Additional Tips for High-Quality Screen Recordings
To elevate your recordings:
- Prepare your workspace: Close unnecessary apps and tabs to reduce clutter and improve performance.
- Plan ahead: Create a script or outline to avoid rambling.
- Optimize settings: Record at 1080p or higher, 60 FPS for smooth motion, and ensure good lighting if using webcam.
- Audio quality: Use a quiet environment and external microphone when possible.
- Editing essentials: Trim unnecessary parts, add annotations, zooms, and highlights for clarity.
- File management: Organize recordings with clear naming conventions.
For gamers or creators, consider hardware acceleration and sufficient storage, as high-quality videos can be large.
Common Use Cases and Real-World Applications
- Education: Teachers recording lessons for absent students.
- Business: Creating product demos or training materials.
- Support: Troubleshooting software issues visually.
- Content Creation: YouTube tutorials or social media clips.
- Personal: Saving recipes, walkthroughs, or memorable moments.
Mobile Triple Screen Setup Simracing enthusiasts often record multi-monitor setups to analyze performance or share setups with communities.
Troubleshooting Common Issues
- No audio: Check permissions and input sources.
- Lag or low quality: Lower resolution or close background processes.
- Storage full: Record in segments or use external storage.
- Permissions: Grant screen recording access in system settings.
Best Practices for Beginners
Start simple with native tools. Practice short recordings first. Focus on clear narration and steady cursor movement. Review your recording immediately to identify improvements.
Conclusion
Mastering how to record your screen on Windows, Mac, iPhone, and Android empowers you to communicate more effectively in our visual-first world. From quick built-in captures to professional-grade productions, the right method depends on your needs and device.
Key takeaways:
- Use native tools for speed and simplicity.
- Prepare content and environment for best results.
- Experiment with editing to polish your videos.
- Choose advanced software like OBS for complex projects.
Take action today: Open your device’s recording tool and create your first screencast. Whether documenting a process or sharing knowledge, your screen recordings can make a real difference. With practice, you’ll produce professional content that informs, engages, and inspires.
- Learn more about the history and applications of screencasts on Wikipedia.
- Official Apple Support guide for Mac screen recording.
- Microsoft’s detailed instructions on recording your screen on Windows.
- Google’s help for Android screen recording.
- Community discussions on best practices via Reddit screen recording threads.
These links provide trusted, authoritative information to complement the steps outlined here.
Related posts:
![How to Fix "Application Was Unable to Start Correctly (0xc000007b)" Error in Windows 11: Complete Guide (2026)]()
How to Fix "Application Was Unable to Start Correctly (0xc000007b)" Error in Windows 11: Complete Gu...
![How to Fix "DLL File Missing" Errors on Windows 10 and 11 – Complete Guide 2026]()
How to Fix "DLL File Missing" Errors on Windows 10 and 11 – Complete Guide 2026
![hard disk repair ifixit.org.uk]()
Hard Disk Repair: The Complete 2026 Guide to Diagnosing, Fixing, and Recovering Your Drive
![Fix Error Code 0x80070057]()
Fix Error Code 0x80070057: Your Ultimate Troubleshooting Guide
![How to Fix Slow Performance on Windows 11 Laptops?]()
How to Fix Slow Performance on Windows 11 Laptops?
![How to Fix USB Device Not Recognized Error on Windows PCs]()
How to Fix USB Device Not Recognized Error on Windows PCs?
![How to Fix Bluetooth Not Working on Windows 11: Complete 2026 Troubleshooting Guide]()
How to Fix Bluetooth Not Working on Windows 11?
![How to Fix Windows 11 Start Menu Not Working]()
How to Fix Windows 11 Start Menu Not Working?