Introduction
Energy bills are rising, the climate crisis is intensifying, and homeowners everywhere are searching for ways to take control of their electricity costs. There’s one solution that consistently rises to the top: installing solar panels. But the prospect of a rooftop solar installation can feel overwhelming. How do you know if your roof is suitable? What’s the exact step-by-step process? And most importantly, how can you ensure your system operates at peak efficiency to maximize your return on investment?
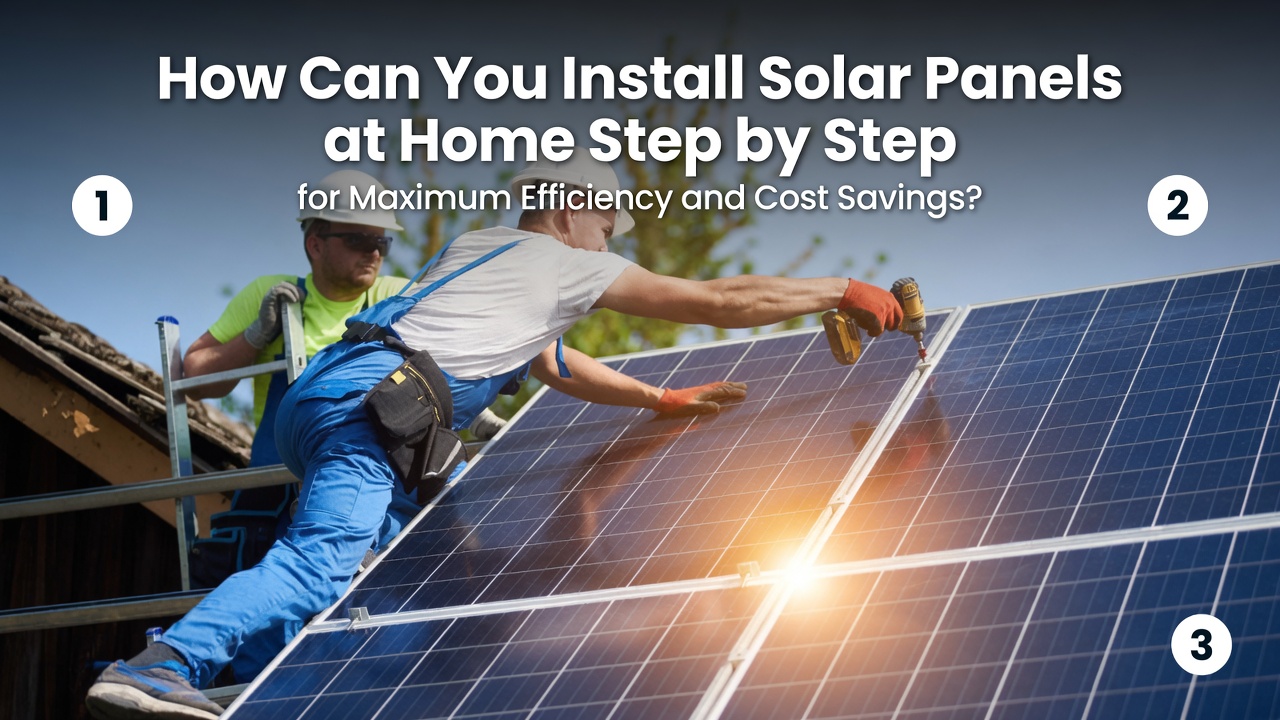
This comprehensive guide answers the long-tail question thousands of homeowners are asking: How can you install solar panels at home step by step for maximum efficiency and cost savings? You’ll walk away with a clear, actionable roadmap — from initial roof assessment through to final connection and long-term maintenance.
Let’s cut through the confusion and get straight to what matters.
Pre-Installation Planning – The Foundation of a Successful Solar System
Before a single panel is mounted, careful planning determines whether your system will deliver decades of reliable savings or become a source of frustration. Skipping this phase is the single biggest mistake homeowners make.
Assessing Your Home’s Solar Potential
Not every roof is created equal when it comes to solar energy generation. A thorough site assessment examines four critical factors:
-
Roof condition and structural integrity – Solar equipment adds considerable weight to your roof. A compromised roof with age-related deterioration, cracked tiles, or a sagging structure is a serious safety hazard. Your roof should have at least 10–15 years of remaining life. Otherwise, you’re better off re-roofing before installing solar panels.
-
Available unshaded space – You need sufficient square footage to accommodate enough panels to meet your energy needs. A basic residential installation typically requires roughly 100 square feet per kilowatt of capacity.
-
Sunlight exposure – Shading from trees, chimneys, dormers, or neighboring buildings can decimate energy production. Observe your roof at different times of day — morning, midday, and late afternoon — to identify problem areas.
-
Orientation and pitch – In the Northern Hemisphere, south-facing roofs capture the most sunlight. However, southeast, southwest, east, and even west orientations can still perform well, especially with modern panel-level electronics.
💡 Expert Tip: Don’t assume a north-facing roof is a dealbreaker. While a south-facing roof can save a typical household around £823 annually, an east/west-facing roof still saves approximately £728, and even north-facing roofs can deliver meaningful savings.
Understanding Your Energy Consumption
Solar is about matching generation to usage. Review 12 months of electricity bills to establish your average monthly kilowatt-hour (kWh) consumption. This baseline determines the size of the system you need.
For example, if your home consumes 900 kWh per month, you’ll need a system capable of producing roughly that amount, adjusted for seasonal variations and your specific sunlight hours.
Navigating Permits, Regulations, and Incentives
The regulatory landscape varies significantly by location, but the fundamentals are consistent worldwide.
Permitting Overview
Most jurisdictions require:
-
Building permits for structural roof modifications
-
Electrical permits for grid interconnection
-
Homeowners association (HOA) approval (if applicable)
-
Utility company interconnection agreement
Many municipalities now offer expedited “FasTrax” processing for residential solar permits, significantly reducing wait times.
Financial Incentives (2026 Update)
The financial case for solar has never been stronger. Here’s what’s available in 2026:
| Incentive Type | 2026 Status | Typical Value |
|---|---|---|
| Federal Investment Tax Credit (ITC) | Phasing down to 26% in 2026 | 26% of total system cost |
| State/Local Rebates | Varies by location | $1,000–$5,000 |
| Net Metering | Available in most states | Credits at retail or avoided-cost rate |
| Solar Renewable Energy Credits (SRECs) | Active in select markets | $50–$300 per 1,000 kWh |
| Property Tax Exemption | Many states | 100% exemption on added home value |
| Sales Tax Waiver | Some states | 5–10% upfront saving |
The Residential Clean Energy Tax Credit (25D) — which allowed homeowners to deduct 30% of system costs from their taxes — was terminated effective December 31, 2025. Under current legislation, the Investment Tax Credit (ITC) for solar energy property is extended at 30% through the end of 2025, then phases down to 26% in 2026, 22% in 2027, and 10% thereafter.
⚠️ Important: Tax credit deadlines are moving targets. Consult a qualified tax professional and check the Database of State Incentives for Renewables & Efficiency (DSIRE) for the most current information in your area.
Step-by-Step Solar Panel Installation Guide
With planning complete, it’s time for the hands-on process. While the steps below outline a professional installation — which is strongly recommended for rooftop systems — the sequence remains largely the same whether you hire a certified installer or pursue a strictly ground-mount DIY project.
Step 1 – Roof Preparation and Safety Setup
Professional installers begin by erecting scaffolding or setting up safety harness systems. The work area is clearly marked and cordoned off. If the roof is older, they may install walk pads or roof protection to prevent tile or shingle damage during foot traffic.
Key actions:
-
Turn off power to the area where panels will connect
-
Clear the roof surface of debris, moss, and loose materials
-
Mark rafter locations using a stud finder or by measuring from known reference points
Step 2 – Installing the Mounting System
The mounting system is the unsung hero of any solar installation. It’s the engineered framework that anchors your panels to the roof while maintaining watertight integrity.
For asphalt shingle roofs (the most common residential type), installers use a flashed lag bolt system:
-
A pilot hole is drilled through shingles and sheathing into the rafter
-
A stainless steel lag bolt (typically 5/16″ or 3/8″ diameter) is driven at least 2.5 inches into the rafter
-
Flashing — a waterproof metal or polymer shield — slides under surrounding shingles
-
Mounting feet attach to lag bolts atop the flashing
-
Mounting rails connect to the feet
-
Sealant is applied inside the pilot hole before the final bolt drive
For standing seam metal roofs, specialized clamps grip the raised seams — requiring no roof penetrations at all. This approach preserves the roof’s warranty and eliminates leak risks entirely.
For flat roofs, ballasted mounting systems use concrete block weights to hold the racking in place without penetrations, provided an engineer confirms the roof can handle the additional load.
Step 3 – Running Electrical Conduit and Wiring
Once mounting rails are in place, electricians run conduit from the roof array down to the inverter location and main electrical panel. This conduit protects wiring from weather, animals, and physical damage.
Modern installers use weather-sealed junction boxes at each array corner. Wires from individual panels connect inside these boxes, then run through the conduit system.
Step 4 – Panel Attachment
With the racking system complete, panels are lifted onto the roof and secured using end clamps (for panels at array edges) and mid-clamps (for panels between). Proper torque specifications — typically around 15–20 Newton-meters — are critical to prevent loosening or glass cracking.
Panels are arranged in “strings” (series connections) that maximize voltage for the inverter. At this stage, all wiring remains disconnected from the inverter until final electrical inspection.
Step 5 – Inverter Installation and AC Connection
The inverter converts the DC electricity produced by your panels into AC electricity your home can use. Most residential systems use one of three inverter types:
| Inverter Type | Best For | Pros | Cons |
|---|---|---|---|
| String Inverter | Unshaded, south-facing roofs | Lowest cost, simple | Single point of failure |
| String + Power Optimizers | Roofs with light shading | Panel-level monitoring, higher yield | Moderate cost |
| Microinverters | Complex roofs with shading | Maximum yield, redundancy | Highest upfront cost |
The inverter is typically mounted on an exterior wall near the main electrical panel, protected from direct sun and rain. From the inverter, AC wiring runs to a dedicated solar breaker in your main panel.
Step 6 – System Grounding and Bonding
Safety is paramount. Every metal component — panel frames, mounting rails, junction boxes — must be bonded together and connected to a grounding electrode system. This prevents shock hazards and protects against lightning strikes.
Grounding is typically accomplished using continuous copper wire run between components, terminated at the main panel’s ground bus bar.
Step 7 – Final Electrical Inspection and Grid Interconnection
Before you can flip the switch, your local building department and utility company must sign off. The inspection verifies:
-
Proper mounting and flashing
-
Correct wire sizing and conduit installation
-
Approved grounding and bonding
-
Code-compliant labeling and disconnect means
Once the inspector clears the installation, your utility will install a bidirectional meter (or reconfigure your existing meter) to track both consumption and exported solar energy.
Step 8 – System Activation and Monitoring
With meters swapped and paperwork filed, your installer will perform a “commissioning” test. This involves:
-
Energizing DC disconnect switches
-
Powering up the inverter
-
Verifying real-time production numbers against expected output
-
Configuring your monitoring app or web portal
Congratulations — your system is live. Now the real savings begin.
Maximizing Efficiency for Peak Energy Production
Installing panels is only half the equation. To truly maximize your cost savings, you need every watt working as hard as possible. Here’s how to push your system to its theoretical limits.
Optimal Orientation and Tilt
The single most impactful variable is panel orientation. Solar panels in the Northern Hemisphere should face as close to true south as possible, with a tilt angle roughly equal to your latitude. For example, at 40° latitude, a 40° roof pitch is ideal.
If your roof doesn’t cooperate, adjustable tilt frames can mount panels at the optimal angle — even on flat roofs. These frames add upfront cost but typically pay for themselves within 3–5 years through increased production.
Combating Shading
Just 10% shading on a single panel can reduce the entire string’s output by 50% or more if you’re using a basic string inverter.
Solutions ranked by effectiveness:
-
Remove the source – Trim trees where permitted. Relocate or remove shading structures.
-
Install microinverters – Each panel operates independently, so shade on one doesn’t affect others.
-
Use DC power optimizers – A middle ground between string inverters and microinverters.
-
Reconfigure panel layout – Sometimes moving a handful of panels to a different roof face solves the problem.
Temperature Management
It’s counterintuitive, but solar panels actually lose efficiency as they heat up. A panel rated at 20% efficiency at 25°C (77°F) might drop to 17–18% efficiency on a scorching 35°C (95°F) day.
To combat thermal losses:
-
Ensure at least 4–6 inches of air gap between panels and roof deck for passive cooling
-
Choose panels with a low temperature coefficient (look for -0.35%/°C or better)
-
Consider light-colored roofing materials that reflect rather than absorb heat
Regular Cleaning and Maintenance
Dust, bird droppings, pollen, and industrial fallout block sunlight and reduce output. Studies show that dirty panels can lose 10–25% of their potential generation.
DIY cleaning guidelines:
-
Clean at least twice per year — more often in dusty or high-pollen areas
-
Work early morning or evening when panels are cool
-
Use a soft-bristle brush, mild soap (or plain water), and a garden hose — never a pressure washer
-
Keep your feet on the ground; never stand on panels
🔧 Pro Tip: Many professional cleaning services will include a full system inspection for loose connections, animal intrusion, or physical damage. This is money well spent every 2–3 years.
Cost Breakdown and Financial Modeling
Let’s talk real numbers. Understanding true costs and realistic savings helps you make a confident decision.
Typical System Costs (2026)
| System Size | Approximate Equipment & Installation Cost | Suitable For |
|---|---|---|
| 3 kW | $7,000 – $10,000 | Small home, minimal energy needs |
| 5 kW | $10,000 – $15,000 | Average 2–3 bedroom home |
| 8 kW | $14,000 – $22,000 | Larger home, electric vehicle, pool |
| 10 kW | $18,000 – $28,000 | High-consumption home, full energy independence |
These figures include panels, inverters, racking, wiring, permits, and professional installation. Regional variations exist — some areas average as low as $2.62 per watt, while others approach $3.50 per watt.
Breaking Down Your Return on Investment (ROI)
Scenario: You install a 6 kW system costing $15,000. After the 26% federal tax credit ($3,900), your net cost is $11,100.
| Metric | Value |
|---|---|
| Monthly electricity savings | $150 |
| Annual savings | $1,800 |
| Simple payback period | ~6.2 years |
| 25-year lifetime savings (assuming 3% annual utility inflation) | $45,000–$55,000 |
Battery Storage – Worth the Investment?
Adding battery storage increases upfront costs but unlocks additional savings through time-of-use arbitrage and backup power protection.
Typical add-on cost: $7,000 – $15,000 for 10–15 kWh of usable storage
Expected benefit: Additional $300–$800 annual savings through peak shaving, plus outage protection
For many homeowners, starting with solar-only and adding batteries later when prices continue to fall is a smart strategy. However, if your utility charges high demand fees or your area experiences frequent outages, upfront batteries make strong sense.
Common Installation Mistakes to Avoid
Learn from others’ errors. Avoiding these pitfalls saves money, frustration, and safety risks.
Mistake #1 – Installing on a Deteriorating Roof
The problem: You install new panels on a roof with 5 years of life remaining. When the roof fails, you must pay for panel removal ($1,000–$3,000), roof replacement, and panel reinstallation (another $1,000–$3,000).
The solution: Inspect your roof first. If it needs replacement within 10 years, do it before solar.
Mistake #2 – Using a Basic String Inverter with Shading
The problem: A single shaded panel cripples the entire string, slashing total system output by 30–70%.
The solution: Invest in microinverters or power optimizers from day one. The extra 10–20% upfront cost typically pays back within 2–3 years through recovered production.
Mistake #3 – Underestimating Future Energy Needs
The problem: You size your system for current usage, then buy an electric vehicle, heat pump, or induction cooktop. Suddenly your panels produce only 60% of your needs.
The solution: Size for the home you’ll have in 5–10 years, not the home you have today. Adding extra panels during initial installation is far cheaper than retrofitting later.
Mistake #4 – Neglecting Professional Design
The problem: You purchase a “one-size-fits-all” kit online and install it yourself without custom shade analysis or structural review.
The solution: Even if you DIY the installation, pay a solar designer for a site-specific layout and electrical plan. This typically costs $300–$500 and prevents costly errors.
DIY Versus Professional Installation – What’s Right for You?
The question every homeowner eventually asks: can I install solar panels myself and save thousands?
The Case for DIY Installation
Pros:
-
Save $3,000–$8,000 in labor costs
-
Complete control over timeline and component selection
-
Deep satisfaction of self-powered home
Cons:
-
Requires advanced electrical, roofing, and structural knowledge
-
Many jurisdictions restrict DIY grid-tied solar (you may need licensed electrician signoff regardless)
-
Personal injury risk — falls from roofs are a leading cause of home DIY injuries
-
Warranty may be voided if installation isn’t performed by certified professional
-
May disqualify you from certain rebates and incentives
Best for: Ground-mount systems, off-grid cabins, small “plug-and-play” balcony systems (typically 800 watts or less), and homeowners with construction or electrical experience.
The Case for Professional Installation
Pros:
-
Certified installers handle all permitting, inspections, and utility paperwork
-
System is warrantied for workmanship (typically 10–25 years)
-
Safety — professionals have fall protection, lift equipment, and insurance
-
Access to higher-quality panels and inverters not sold to the general public
-
Faster timeline — pros complete a 5–8 kW system in 1–3 days
Cons:
-
Higher upfront cost
-
Less component customization
-
Must vet installer reputation carefully
A Middle Path – Hybrid Approach
The most cost-effective strategy for many homeowners is to hire a professional for structural mounting and electrical interconnection, while performing prep work yourself (clearing the work area, trimming trees, managing permit paperwork).
This hybrid approach typically saves 20–30% compared to full-service installation while still benefiting from professional expertise on the most critical safety elements.
Long-Term Maintenance and Performance Monitoring
Your relationship with your solar system doesn’t end at installation. Following a simple maintenance schedule ensures your investment performs at peak efficiency for 25+ years.
Monthly Quick Checks
-
Open your monitoring app and glance at daily production
-
Compare against expected output based on weather conditions
-
Note any sudden drops that might indicate equipment failure
Semi-Annual Cleaning and Visual Inspection (DIY)
-
Inspect for bird nests, rodent activity, or insect hives beneath panels
-
Check for cracks, discoloration, or delamination on panel surfaces
-
Verify all visible wiring is intact and conduit is secure
-
Clean panels according to guidelines above
Biennial Professional Servicing
A licensed electrician should perform a comprehensive service every two years including:
-
Torque checking on all electrical connections
-
Insulation resistance testing
-
Thermal imaging to identify hot spots or failing cells
-
Inverter performance analysis and firmware updates
-
Grounding system verification
Most professional maintenance plans cost $200–$400 per visit — a small price for preserving a $15,000–$30,000 asset.
Monitoring Your Performance Ratio
Track your performance ratio — actual energy output divided by theoretical maximum output. A healthy system maintains a PR of 0.75–0.85 (75–85% of theoretical). Drops below 0.70 indicate a problem needing investigation.
Frequently Asked Questions
Q: How long do solar panels last?
Most panels carry 25–30 year performance warranties, guaranteeing at least 80–85% of original output at year 25. Many panels continue producing useful electricity for 35–40 years.
Q: What happens during a power outage with grid-tied solar?
Standard grid-tied systems automatically shut down during outages to protect line workers. To have backup power during outages, you need battery storage or a specialized “islanding” inverter.
Q: Can I add panels later if my energy needs increase?
Yes, provided you left space on your roof and your inverter has spare capacity. Adding panels later costs more per watt than installing them initially, so oversizing from the start is usually more economical.
Q: Do solar panels work in cloudy or snowy conditions?
Yes — panels produce at 10–25% of rated output on overcast days. Snow typically slides off tilted panels, and even light reflection from snow can boost production. Heavy, persistent snow cover will reduce output until it melts or is cleared.
Q: How much do solar panels increase home resale value?
Studies from the National Renewable Energy Laboratory (NREL) indicate that homes with owned solar systems sell for approximately $15,000 more on average than comparable homes without solar — a premium of roughly $4–$6 per watt of installed capacity.
Conclusion
Installing solar panels at home for maximum efficiency and cost savings is one of the smartest financial and environmental decisions a homeowner can make in 2026. The path is clear: assess your home’s suitability, navigate incentives and permits, follow a meticulous installation process, and commit to ongoing maintenance and monitoring.
Here are your actionable takeaways:
✅ Start with a professional site assessment — even if you DIY later, a shade analysis and structural review are non-negotiable.
✅ Take full advantage of tax credits and incentives — the 26% federal ITC (phasing down soon) can save you thousands, and state programs add even more value.
✅ Oversize your system slightly — energy needs grow over time with EVs, heat pumps, and home appliances. Future-proof from day one.
✅ Prioritize shading solutions — microinverters or power optimizers cost more upfront but dramatically outperform string inverters on anything but a perfectly unshaded south-facing roof.
✅ Commit to a maintenance schedule — twice-yearly cleaning and biennial professional servicing protect your system’s performance and longevity.
✅ Monitor religiously — small production drops caught early become minor repairs. Ignored problems become costly failures.
The upfront investment is significant but manageable — especially when paired with financing options like solar loans, leases, or power purchase agreements (PPAs) that require zero money down. Your system will begin paying for itself the moment your utility installs that bidirectional meter.
Take the first step today. Contact 2–3 local solar installers for quotes, run your address through the National Renewable Energy Laboratory’s PVWatts Calculator to estimate production, and check EnergySage for installer reviews and price comparisons. The sun is shining on the opportunity — now it’s your turn to capture it.
Related posts:
![FIFA Club World Cup]()
Top 10 Biggest Mistakes Teams Make in the FIFA Club World Cup
![Why Does Google Deindex Website Pages and How Can You Get Them Reindexed]()
Why Does Google Deindex Website Pages and How Can You Get Them Reindexed?
![Google Gemini in 2026]()
What Is Everything You Need to Know About Google Gemini in 2026?
![fbi warns iphone android scams]()
Why the FBI Warns iPhone Android Scams Are Increasing
![What Is PS5 Jailbreak and How Does It Work]()
What Is PS5 Jailbreak and How Does It Work?
![Thunderbolt 4 External Graphics Card for Laptop]()
Thunderbolt 4 External Graphics Card for Laptop: Ultimate Guide to eGPUs in 2026
![HP DeskJet F2110 All-in-One Printer Driver Download]()
HP DeskJet F2110 All-in-One Printer Driver Download: Your Complete Setup and Troubleshooting Guide
![dnx mode ifixit.org.uk]()
DNX Mode: What Is It and How to Troubleshoot Your Device