How to Replace a Samsung DE94-02416Z Door Assembly: Step-by-Step DIY Guide
Maintaining a modern kitchen requires keeping your major appliances in peak working condition. Among these, the microwave is an indispensable workhorse. However, when components like the door handle crack, the glass shatters, or the inner shielding degrades, safety and functionality are instantly compromised. If you own a compatible Samsung over-the-range microwave, the samsung de94-02416z door assembly is the exact OEM factory replacement part designed to restore your appliance to its original condition.
Replacing a microwave door might seem daunting to a beginner, but it is one of the most straightforward DIY repairs you can perform. Doing it yourself saves hundreds of dollars in professional repair fees and prevents the premature disposal of an otherwise perfectly functioning appliance. This comprehensive guide covers everything you need to know about the samsung de94-02416z door assembly, including how to identify when it needs replacement, a step-by-step installation walkthrough, and vital safety considerations.
What is the Samsung DE94-02416Z Door Assembly?
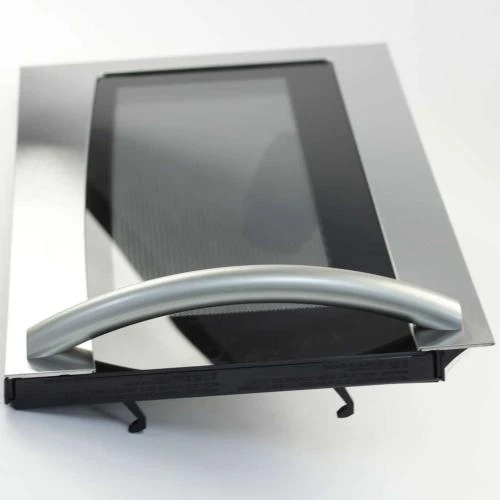
The samsung de94-02416z door assembly is a complete, pre-assembled factory replacement part manufactured by Samsung. Unlike ordering individual components—such as the outer plastic trim, the handle, the viewing window, or the internal latch hooks—this full assembly comes ready to hang directly onto your microwave’s existing frame hinges.
The assembly acts as the primary barrier between the microwave’s interior cooking cavity and your kitchen environment. It contains specialized mesh shielding designed to contain radiofrequency (RF) microwave energy while allowing you to monitor your food safely. It also incorporates the critical door latch mechanisms that interface with the appliance’s internal safety interlock switches.
Component Breakdown of the Assembly:
-
Outer Door Panel & Handle: The aesthetic front face of the microwave, usually finished in stainless steel or black stainless steel, complete with an ergonomic handle.
-
Inner Door Choke & Shielding: A specialized perforated metal grid that reflects microwave radiation back into the cooking cavity.
-
Viewing Window: High-heat resistant glass or heavy-duty acrylic that remains cool to the touch.
-
Latch Key Mechanism: Plastic hooks that actuate the microswitches inside the microwave frame, allowing the unit to receive power only when fully sealed.
Technical Specifications and Compatibility
Before ordering any replacement appliance part, verifying compatibility is critical. Installing an incorrect door assembly can cause alignment issues, door switch failure, or dangerous microwave radiation leakage.
The samsung de94-02416z door assembly is engineered primarily for specific over-the-range (OTR) Samsung microwave models. Below is a detailed look at the specifications and common cross-referenced models.
Key Technical Specs:
| Specification | Detail |
| Part Number | DE94-02416Z |
| Manufacturer | Samsung (Original Equipment Manufacturer) |
| Product Type | Microwave Door Assembly / Microwave Shield Parts |
| Primary Material | Stainless Steel, Glass, Polycarbonate |
| Color/Finish | Stainless Steel / Black Accents |
Confirmed Compatible Models:
This door assembly is widely used across several popular Samsung series. It directly replaces or fits models including, but not limited to:
-
ME21M706BAS/AA (Versions 00, 01, 02)
-
ME21R706BAS/AA
-
ME21A706BQS/AA
Note: Always verify your microwave’s specific model number, which is typically found on a sticker inside the door frame or along the inner cavity wall, before finalizing your purchase on platforms like Amazon or specialized appliance parts sites.
Signs Your Microwave Door Assembly Needs Urgent Replacement
Microwave components wear out over time due to structural stress, high heat, and repeated use. While some defects are purely cosmetic, others present immediate functional and safety risks. If you notice any of the following signs, it is time to source a new samsung de94-02416z door assembly.
1. Cracks in the Outer Frame or Handle
The daily pulling and slamming of an over-the-range microwave door puts immense physical stress on its plastic and metal housings. If the handle mounts crack, pulling harder can cause the entire outer panel to separate from the inner frame.
2. Broken or Misaligned Latch Hooks
If your microwave won’t start even though the door is closed, the plastic latch hooks inside the door assembly may be broken or warped. When these hooks fail to activate the internal interlock safety switches, the microwave’s control board shuts down operation as a protective measure.
3. Damaged Shielding Mesh or Inner Glass
The interior mesh grid is what keeps you safe from microwave radiation. If this grid becomes deeply scratched, corroded from steam and grease, or if the inner glass layer shatters, the door can no longer guarantee proper RF shielding. This can lead to hazardous energy leakage or localized electrical arcing (sparking) during cooking.
4. Sagging Door Alignment
Over years of use, the internal structural pins of the door assembly can bend. If your door sags or requires you to lift it slightly to close it properly, the microswitches will misalign, leading to erratic operation or intermittent power loss mid-cycle.
Step-by-Step Installation Guide for the Samsung DE94-02416Z
Replacing the samsung de94-02416z door assembly is a highly manageable DIY task that does not require opening the internal high-voltage cabinet of the microwave. Follow this structured walkthrough to complete the installation safely and efficiently.
Tools and Preparation Needed:
-
A new, authentic OEM Samsung DE94-02416Z door assembly
-
A Phillips screwdriver
-
A flat-head screwdriver or a putty knife (wrapped in tape to prevent scratching)
-
Work gloves
Step 1: Safety First
Before performing any work on an electrical appliance, disconnect the power supply. For over-the-range microwaves, unplug the power cord from the cabinet outlet directly above the unit. If the outlet is inaccessible, shut off the corresponding circuit breaker at your home’s main electrical panel.
Step 2: Accessing the Hinge Pins
Open the old microwave door completely. On many Samsung models, you will need to remove the top vent grille to clear space for lifting the door off its hinges. Use your Phillips screwdriver to remove the two or three screws securing the top grille, then slide the grille forward and set it aside.
Step 3: Removing the Old Door Assembly
Locate the hinge pins on the left-side frame of the microwave. While firmly supporting the weight of the old door with both hands, open it to roughly a 90-degree angle and lift straight upward. The door should slide smoothly off the bottom and top hinge pins. If it feels stuck, gently rock it back and forth while pulling upward.
[Image demonstrating lifting a microwave door straight up off its mounting hinge pins]
Step 4: Installing the New Samsung DE94-02416Z Door Assembly
Unbox your new samsung de94-02416z door assembly and remove all protective plastic films. Align the female hinge slots on the left side of the new door with the male hinge pins mounted on the microwave’s chassis. Lower the door straight down onto the pins until it seats firmly and flush against the frame.
Step 5: Reassembling the Vent Grille
Reinstall the top vent grille by sliding its tabs back into place. Secure it firmly with the Phillips screws you removed in Step 2.
Step 6: Testing Alignment and Microswitches
Slowly close the new door. Listen closely for a distinct, crisp double-clicking sound—this confirms that the latch hooks are properly depressing the internal safety microswitches. Verify that the door sits perfectly level and flush with the control panel housing on the right.
Step 7: Final Power and Operational Test
Plug the microwave back into the power outlet or flip the circuit breaker back on. Place a glass of water inside the cooking cavity. Close the door, set a heating cycle for 30 seconds, and press Start. If the unit powers on smoothly without error codes and heats the water successfully, your installation is complete!
Related Resource Links for Advanced DIY Appliance Care
To expand your technical knowledge or troubleshoot other appliance repair and workspace upgrades, explore these informative guides from our archive:
-
Microwave Maintenance Strategies: Check out our essential diagnostic tips for fixing microwave door switches over at iFixit UK Post 1.
-
Advanced Hardware Alignments: Learn about precise mechanical calibrations by reviewing our step-by-step structural repair guides on iFixit UK Post 2.
-
Kitchen Tech Optimization: For multi-monitor or complex technical workspace layouts, such as configuring a high-performance mobile triple screen setup simracing, explore our comprehensive ergonomics and alignment layout walkthrough on iFixit UK Post 3.
-
Safe Part Unboxing and Prep: See our recommendations for proper tool usage and unboxing guidelines at iFixit UK Post 4.
-
Common OEM Appliance Error Codes: Find out how to reset control boards after installing new doors at iFixit UK Post 5.
Benefits vs. Drawbacks of Replacing vs. Buying a New Microwave
When faced with an appliance repair, consumers must weigh the practical pros and cons of fixing the component versus replacing the entire machine.
Benefits of Replacing the Door Assembly:
-
Substantial Financial Savings: A premium Samsung over-the-range microwave typically costs between $300 and $600, plus installation fees. Buying just the replacement door assembly keeps money in your wallet.
-
Environmental Responsibility: Repairing your existing unit keeps bulky electronic waste out of landfills, helping reduce your overall environmental footprint.
-
Preserves Kitchen Aesthetics: If your microwave perfectly matches your stove, dishwasher, and refrigerator set, fixing it avoids the hassle of hunting down a matching model with identical stainless-steel finishes.
Drawbacks to Consider:
-
Aged Internal Components: If your microwave is more than 8 to 10 years old, other internal wear items like the magnetron, cooling fan, or high-voltage capacitor may be nearing the end of their lifespans anyway.
-
DIY Effort Required: For individuals completely uncomfortable using basic tools, the repair will require patience and careful handling.
Expert Maintenance Tips to Extend the Lifespan of Your New Door
Once you have installed your new samsung de94-02416z door assembly, adopt these simple operational habits to ensure it lasts for years to come:
-
Avoid Slamming the Door: Repeated hard impacts fracture plastic clips, stress weld joints, and shorten the lifespan of internal microswitches. Close the door firmly but gently.
-
Clean the Latch Paths Regularly: Cooking residue, grease, and splattered food can accumulate inside the latch pockets on the microwave frame. Wipe these out weekly to ensure the latch hooks insert cleanly without friction.
-
Use Non-Abrasive Cleaners: When wiping down the stainless-steel face or inner viewing window of your assembly, avoid harsh scrubbing pads or bleach-based chemical solvents that degrade plastic polymers and scratch protective coatings.
-
Never Run the Microwave Empty: Operating the unit without food or liquid causes energy to reflect directly back into the door assembly and magnetron, causing rapid overheating and structural warping.
Troubleshooting Common Issues Post-Installation
If you encounter performance issues immediately after installing your new door assembly, don’t panic. Check these common factors:
Issue: The Microwave Won’t Turn On or Respond
-
Likely Cause: The door isn’t closed completely, or the circuit breaker is still tripped.
-
Solution: Give the door a firm push. If that fails, inspect the interior latches to ensure no packaging materials are blocking them from fully entering the frame slots.
Issue: “Door” or “SE” Error Codes on the Digital Display
-
Likely Cause: The door assembly is slightly out of alignment with the chassis hinges, preventing one of the three internal switches from clicking shut.
-
Solution: Re-lift the door and verify that it sits perfectly flat on both the top and bottom hinge pins. Tighten any loose screws on the upper frame area. For advanced electronic troubleshooting discussions regarding appliance sensor failures, you can read community-verified insights on platforms like [suspicious link removed].
Conclusion
Replacing a damaged or worn-out microwave door is a highly effective, budget-friendly way to prolong the life of your kitchen’s hard-working cooking appliances. By purchasing an authentic OEM samsung de94-02416z door assembly, you guarantee that your over-the-range microwave retains its precise fit, beautiful stainless-steel aesthetics, and absolute safety against microwave radiation leakage.
Related posts:
![Laptop Battery Not Charging]()
How to Fix Laptop Battery Not Charging: A Comprehensive Troubleshooting Guide
![How to Fix WiFi Connected but No Internet Access Error?]()
How to Fix WiFi Connected but No Internet Access Error?
![ifixit.org.uk]()
How to Fix Heat Damage MacBook Pro Screen?
![How to fix Google Messages landscape layout issues on Android phone]()
How to Fix Google Messages Landscape Layout Issues on Android Phone?
![fix 403 forbidden error on Google Chrome ifixit.org.uk]()
How to Fix 403 Forbidden Error on Google Chrome: The Complete Troubleshooting Guide
![Microsoft Surface Laptop 3 Screen Crack: ifixit.org.uk]()
Microsoft Surface Laptop 3 Screen Crack: Comprehensive Guide to Causes, Repair Options, and Preventi...
![Why Won’t macOS Golden Gate 27 Beta Install in a Virtual Machine]()
Why Won’t macOS Golden Gate 27 Beta Install in a Virtual Machine?
![How to Fix Google Chrome Not Updating on Older Macs]()
How to Fix Google Chrome Not Updating on Older Macs (2026 Complete Guide)