This comprehensive guide covers everything from choosing the right tools to advanced techniques. By following these practices, you’ll learn to solder and desolder connections effectively while minimizing risk to delicate electronic parts. Let’s dive in and build your confidence one joint at a time.
Why Proper Soldering and Desoldering Matters
Electronics are delicate. Components like capacitors, resistors, microchips, and connectors can be damaged by excessive heat, static electricity, or mechanical stress. A good solder joint provides both electrical conductivity and mechanical strength. A bad one can cause intermittent failures or complete device malfunction.

Solder and desolder connections are at the heart of most repairs. Mastering this allows you to extend the life of devices, save money on replacements, and gain deeper insight into how electronics work. Beginners often fear the process, but with the right approach, it’s straightforward and rewarding.
Essential Tools and Equipment for Soldering and Desoldering
Success starts with quality tools. Investing in the basics pays off quickly.
Soldering Iron and Station
- Temperature-controlled station: Preferred over basic irons for precise heat management (typically 300–350°C for leaded solder, slightly higher for lead-free).
- Tips: Select based on the job. Conical tips for precision work on small components; chisel or beveled tips for larger joints and drag soldering.
Solder Wire
- Leaded (60/40 or 63/37 tin-lead): Easier to work with, lower melting point, great for beginners.
- Lead-free: More environmentally friendly but requires higher temperatures and more skill.
- Diameter: 0.5–0.8mm for fine electronics work.
Flux
Flux removes oxidation and helps solder flow. Types include rosin-based (common for electronics), no-clean, and water-soluble. Use rosin core solder for convenience or additional liquid/gel flux for stubborn joints.
Desoldering Tools
- Solder wick (braid): Absorbs molten solder.
- Desoldering pump (solder sucker): Quickly removes solder from joints.
- Hot air station (optional): Ideal for surface-mount devices (SMD).
Other Essentials
- Helping hands or vise for stability.
- Isopropyl alcohol (90%+) and brush for cleaning.
- Tweezers, wire cutters, and pliers.
- Magnifying glass or microscope for fine work.
- Tip cleaner (wet sponge or brass wool).
For reliable guides and parts, check resources like iFixit.org.uk | Repair Guides, Tools & Parts.
Safety Precautions: Protect Yourself and Your Components
Safety is non-negotiable. Soldering involves high heat, fumes, and molten metal.
- Work in a well-ventilated area or use a fume extractor. Solder fumes can irritate lungs.
- Wear safety glasses to protect against splatter.
- Use a stand for your iron—never lay it on the workbench.
- Avoid touching hot tips or freshly soldered joints.
- Ground yourself with an anti-static wrist strap to prevent ESD damage to components.
- Keep a fire extinguisher nearby and avoid flammable materials.
- Wash hands after handling lead-based solder.
For sensitive components, use heat sinks or alligator clips on leads to dissipate heat away from the part.
Preparing Your Workspace and Components
Cleanliness is key. Oxidation prevents good wetting (solder flow).
- Clean pads and component leads with isopropyl alcohol.
- Tin your iron tip: Apply a small amount of solder to coat it for better heat transfer.
- Secure the board or component to prevent movement.
- Have flux ready for stubborn or old joints.
Step-by-Step Guide: How to Solder Connections
Basic Technique for Through-Hole Components
- Insert the component: Bend leads slightly to hold it in place.
- Heat the joint: Touch the iron tip to both the pad and lead simultaneously for 1–2 seconds.
- Apply solder: Feed solder to the joint (not the iron tip directly). It should flow smoothly around the connection.
- Remove heat: Pull away the iron and let the joint cool undisturbed. Movement causes disturbed joints.
- Inspect: A good joint is shiny, concave (fillet shape), and covers the pad and lead without excess.
Expert Tip: The iron heats the work; the work melts the solder. This prevents cold joints.
Soldering Wires and Connectors
- Twist wires together for mechanical strength before soldering.
- Use heat-shrink tubing for insulation and strain relief.
- For multi-strand wires, tin the ends first to prevent fraying.
Surface-Mount Soldering (SMD)
- Apply flux to pads.
- Tack one side, align the component, then solder the rest.
- Drag soldering with a chisel tip works well for ICs.
Practice on scrap boards to build muscle memory.
How to Desolder Connections Safely
Desoldering is often trickier than soldering because you must avoid damaging pads or traces.
Using Solder Wick
- Apply flux to the joint.
- Place wick over the solder.
- Heat with the iron until solder wicks into the braid.
- Remove wick and repeat if needed.
Using a Desoldering Pump
- Melt the solder with the iron.
- Quickly position the pump and suck away the molten solder.
- Clean residue with wick if necessary.
Hot Air Method
Ideal for SMD. Heat the area evenly and lift the component with tweezers. Control temperature and airflow to avoid board delamination.
Removing Stubborn Components
For multi-pin parts like connectors, add fresh solder first to improve heat transfer, then remove. Cut pins if the component is sacrificial.
Solder and desolder connections carefully—patience prevents lifted pads, a common repair nightmare.
Common Soldering Mistakes and How to Avoid Them
- Cold Joints: Dull, grainy appearance. Cause: Insufficient heat. Fix: Reheat properly.
- Solder Bridges: Unintended connections between pins. Remove with wick.
- Overheating: Lifted pads or damaged components. Use temperature control and short contact times.
- Insufficient Wetting: Solder balls up. Clean surfaces and use flux.
- Disturbed Joints: Cracked appearance from movement while cooling.
Always inspect joints visually and with a multimeter for continuity.
Temperature Guidelines and Tip Selection
| Solder Type | Recommended Temperature | Best For |
|---|---|---|
| Leaded (63/37) | 300–350°C | General electronics |
| Lead-Free | 330–380°C | RoHS-compliant work |
| Large Joints | Higher end of range | Ground planes, connectors |
Choose tip size based on thermal mass: Larger tips transfer heat faster for big areas but lack precision for tiny SMD.
Advanced Techniques and Real-World Scenarios
Repairing Consumer Electronics
Fixing headphones, game controllers, or phone charging ports often involves desoldering old connectors and soldering new ones. Use helping hands for stability.
PCB Repair
For lifted traces, use copper tape or wire jumps. Practice reflowing existing solder before adding more.
Battery and Power Connections
These carry higher current—use thicker wire and ensure robust joints to prevent overheating in use.
Real-World Example: Replacing capacitors on a vintage amplifier board requires desoldering old ones without damaging nearby traces, then soldering new polarized capacitors in the correct orientation.
Benefits and Drawbacks of Different Methods
Hand Soldering:
- Pros: Precise control, low cost.
- Cons: Time-consuming for large boards.
Hot Air Rework:
- Pros: Great for SMD, even heating.
- Cons: Risk of blowing small components away; requires practice.
Wick vs. Pump:
- Wick excels at cleanup and fine work.
- Pump is faster for through-hole but can leave residue.
Expert Tips for Professional Results
- Keep your tip clean and tinned at all times.
- Work quickly—prolonged heat is the enemy of components.
- Use flux generously on old or dirty boards.
- Let joints cool naturally; never blow on them.
- Document your work with photos for complex repairs.
- Start with through-hole practice before tackling fine-pitch SMD.
For detailed visual guides, explore iFixit.org.uk | Repair Guides, Tools & Parts, a trusted resource for step-by-step repair instructions.
Additional reading: Wikipedia’s entry on soldering offers historical and technical context, while electronics communities on Reddit provide real-user experiences.
Maintenance and Care of Your Tools
- Clean and tin the tip after every session.
- Replace worn tips promptly.
- Store solder in a cool, dry place.
- Calibrate your station periodically.
Troubleshooting Difficult Joints
- Old solder with heavy oxidation: Add fresh solder and flux, then remove.
- Heat-sensitive parts: Use lower temperature and heat sinks.
- Multi-layer boards: More heat may be needed due to internal planes.
Conclusion
Mastering how to solder and desolder connections properly is a gateway to endless electronics projects and repairs. By selecting quality tools, prioritizing safety, practicing clean techniques, and understanding common pitfalls, you can create reliable joints without damaging sensitive components.
Key takeaways:
- Always heat the joint, not just the solder.
- Use flux and keep everything clean.
- Work patiently with appropriate temperatures and tip sizes.
- Inspect every joint visually and electrically.
- Practice on scrap before tackling valuable devices.
With these skills, you’ll approach repairs with confidence. Start small, build experience, and soon you’ll handle complex projects effortlessly. Happy soldering—your electronics (and wallet) will thank you!
Related posts:
![facebook video downloader facebook video downloader]()
How to Change Name on Facebook: The Complete 2026 Guide
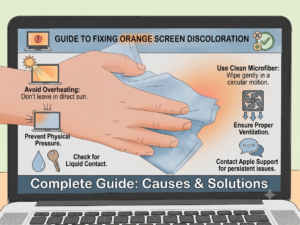
![Fix Orange Discoloration on MacBook Pro Screen]()
How to Fix Orange Discoloration on MacBook Pro Screen: Complete Guide to Causes & Solutions
![Google Gemini in 2026]()
What Is Everything You Need to Know About Google Gemini in 2026?
![fbi warns iphone android scams]()
Why the FBI Warns iPhone Android Scams Are Increasing
![What Should You Know About the iPhone 17 in 2026]()
What Should You Know About the iPhone 17 in 2026, Including Features, Specs, Price, Release Date, an...
![Best Free Password Managers ifixit]()
Best Free Password Managers: Secure Your Digital Life in 2026
![Snapchat Planets - ifixit]()
How Do Snapchat Planets Work and What Does Each Planet Mean in the Friend Solar System?
![What Causes Black Lines on Laptop Screen]()
What Causes Black Lines on Laptop Screen? A Complete Troubleshooting Guide