The Holga 120N Camera stands as one of the most beloved toy cameras in film photography history. Its quirky, unpredictable results have inspired countless artists, but like many plastic wonders from the past, it can develop mechanical issues over time. One frustrating problem is an overextending shutter, which prevents the camera from firing properly and capturing those dreamy, vignetted images.
In this comprehensive guide, we’ll walk through diagnosing, repairing, and preventing shutter problems on your Holga 120N Camera. Whether you’re a beginner or an experienced analog shooter, you’ll find clear instructions, practical tips, and expert advice to get your camera back in working order. Let’s dive in and restore your creative tool.
Understanding the Holga 120N Camera
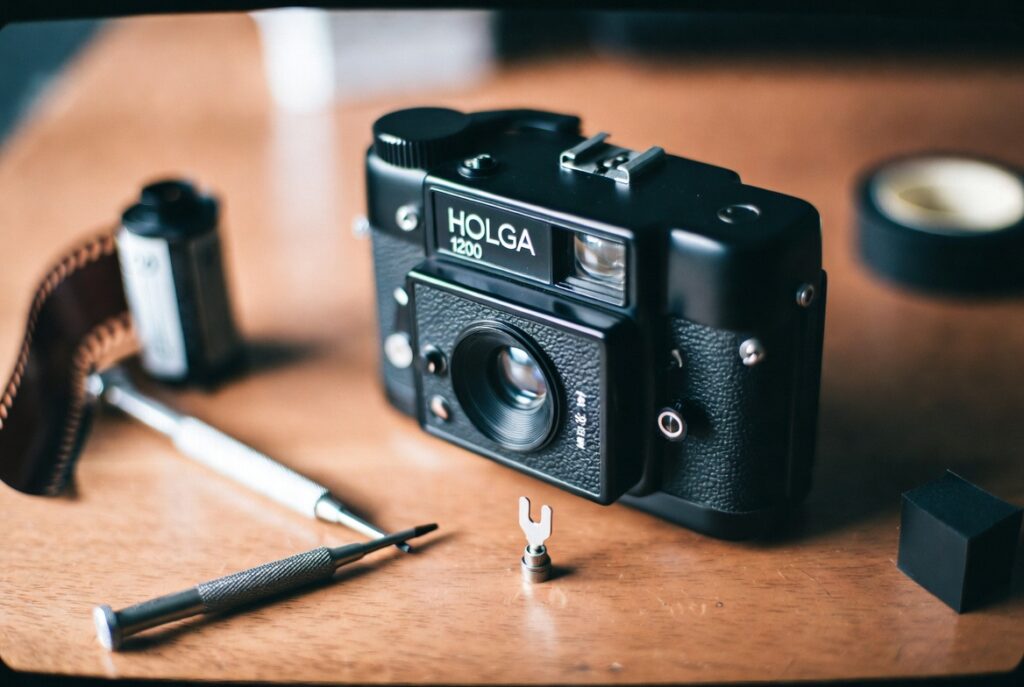
The Holga 120N is a medium format film camera designed for 120 roll film, producing 6×6 cm or 6×4.5 cm negatives. Introduced as an update to earlier models, it features a simple plastic 60mm f/8 meniscus lens, zone focusing, and basic controls for shutter speed (normal 1/100s or bulb) and aperture.
Its low-fidelity aesthetic—soft focus, heavy vignetting, and occasional light leaks—makes it a favorite for experimental photography. However, the camera’s plastic construction and age (many units date back decades) make it susceptible to wear. The Holga 120N Camera remains popular for its affordability and artistic potential, but maintenance is key to longevity.
Why the Holga Endures in the Digital Age
Despite modern digital options, the Holga delivers unique images that software filters struggle to replicate. Its simplicity encourages photographers to focus on composition and light rather than technical perfection. Many users report rediscovering joy in photography after switching to this “plastic fantastic” tool.
What Causes an Overextending Shutter in the Holga 120N?
An overextending shutter occurs when the shutter mechanism travels too far or fails to return properly after being tripped. This can jam the release, leaving the shutter in a position that blocks new exposures.
Common causes include:
- Wear and tear on plastic and metal parts: Decades of use loosen components.
- Spring fatigue: The return spring loses tension.
- Debris or misalignment: Dust, old lubricant residue, or minor warping.
- Manufacturing tolerances: As a budget toy camera, precision wasn’t the priority.
In real-world scenarios, photographers notice the issue during a shoot when the shutter button presses but nothing happens, or the mechanism feels “off.” One user described firing the shutter only to find it stuck extended, ruining a roll of precious Portra film during a landscape outing.
Early diagnosis prevents further damage. Test by advancing film, setting to “N” mode, and gently pressing the shutter. Listen for unusual sounds or feel for excessive travel.
Tools and Materials You’ll Need for the Repair
This repair is beginner-friendly and requires minimal tools. Gather these items:
- Phillips #00 screwdriver
- Hot glue gun and glue sticks
- Scissors
- Box cutter or Exacto knife
- Spade terminal (electrical connector, easily sourced from hardware stores)
- Optional: Isopropyl alcohol for cleaning, tweezers, magnifying glass
Safety note: Work in a clean, well-lit area. Avoid forcing parts to prevent cracking the plastic body.
Step-by-Step Guide to Fixing the Overextending Shutter
This process is based on proven community repairs and focuses on adding a simple mechanical stop using a modified spade terminal.
Step 1: Prepare the Camera and Disassemble
Remove any film. Slide off the metal lanyard locks if present. Pop open the back by releasing the side clips.
Locate the two small screws securing the shutter assembly (one above and one below the shutter opening inside the film chamber). Use the Phillips #00 screwdriver to remove them carefully. Store screws safely.
Gently pull the shutter piece forward, being cautious not to damage the connecting wires for the flash (if your model has one). Set the main body aside.
Step 2: Modify the Spade Terminal
Cut off one prong of the spade terminal using scissors. Bend the remaining part at a 90-degree angle to form a stop. Carefully slice away the blue plastic insulation with the box cutter. Clean any residue.
Step 3: Install the Blocker
Apply a small amount of hot glue to the base of the modified terminal. Position it in the small hole or slot underneath the shutter mechanism, oriented horizontally toward the connecting wire. This acts as a physical block to limit overextension.
Press firmly and allow the glue to set for a few minutes. Test the shutter movement manually (without film) to ensure it now stops correctly without jamming.
Step 4: Reassemble and Test
Screw the shutter assembly back into place. Reattach the back. Load a test roll (inexpensive black and white film works well) and shoot a few frames in different lighting conditions. Advance film and check shutter operation consistently.
The entire process typically takes 30-60 minutes.
Troubleshooting Common Issues During Repair
If the shutter still feels sticky after installation:
- Clean the mechanism with isopropyl alcohol on a cotton swab (avoid excess liquid).
- Check wire connections for the flash unit.
- Ensure the terminal doesn’t interfere with normal operation.
For bulb mode issues, verify the selector switch moves freely.
Other Common Holga 120N Problems and Fixes
The overextending shutter is just one challenge. Holga owners often encounter:
Light Leaks
These create artistic streaks but can be excessive. Seal seams with black electrical tape or gaffer tape. Pay special attention to the back clips and film counter window. Many photographers embrace controlled leaks for character.
Stuck or Slow Shutter
A drop of light machine oil or sewing machine oil on the mechanism can help. Some disassemble the lens assembly further for deeper cleaning, but this increases risk.
Film Advance Problems
Foam inserts in the 120N help tension, but they degrade. Replace with new foam or use tape as a temporary fix.
Focus and Sharpness Issues
Zone focusing requires practice. The “mountain” setting (infinity) works for distant subjects, while closer settings suit portraits.
Comparison Table: Repair vs. Replacement
| Aspect | DIY Repair | Buy New Holga 120N |
|---|---|---|
| Cost | Under $10 (tools + terminal) | $40–$70+ |
| Time | 30-60 minutes | Immediate |
| Skill Level | Beginner | None |
| Customization | High (learn mechanics) | Low |
| Environmental Impact | Better (reuse) | New production |
| Satisfaction | High for tinkerers | Quick fix |
Repairing extends the life of your existing camera and builds skills, while a new unit ensures reliability for travel shoots.
Maintenance Tips to Prevent Future Shutter Problems
Regular care keeps your Holga 120N Camera performing:
- Store in a dry, dust-free case.
- Avoid extreme temperatures.
- Clean the lens with a soft cloth and blower.
- Exercise the shutter periodically even when not shooting.
- Use fresh batteries for flash models.
- Tape the back securely during use to prevent accidental opening and light leaks.
Expert Tip: Carry a small repair kit (screwdriver, tape, spare terminal) on shoots. Many Holga enthusiasts join online communities for shared knowledge.
Enhancing Your Holga Photography Experience
Once fixed, experiment with techniques:
- Double exposures by not advancing fully.
- Long exposures in bulb mode with a tripod.
- Filters and accessories for creative effects.
- Different films: ISO 400 for versatility, slower for bright conditions.
The Holga rewards patience and playfulness. Its imperfections become features in your portfolio.
When to Seek Professional Help or Consider Alternatives
If disassembly feels intimidating, consult a camera repair shop specializing in film gear, though costs may exceed the camera’s value. Alternatively, explore similar toy cameras or pinhole conversions.
For purchasing, check trusted retailers. Many users find good deals on pre-owned units.
Additional Resources:
- Detailed community discussions on film photography forums.
- Repair inspiration from sites like iFixit.org.uk Repair Guides, Tools & Parts for general camera fixes.
- Wikipedia’s overview of the Holga camera for historical context.
Conclusion
Fixing an overextending shutter on your Holga 120N Camera is a rewarding project that breathes new life into a classic tool of creative expression. By understanding the problem, following the spade terminal blocker method, and adopting good maintenance habits, you can enjoy reliable operation and stunning analog images for years.
Key takeaways:
- Diagnose early and gather simple tools.
- The repair is accessible and cost-effective.
- Combine fixes with light leak management for best results.
- Embrace the Holga’s character while minimizing frustrations.
Whether you’re restoring a family heirloom or starting your toy camera journey, this guide equips you to make informed decisions. Grab your Holga 120N Camera, head outdoors, and capture the world in its beautifully imperfect way. Happy shooting—your next great image awaits!