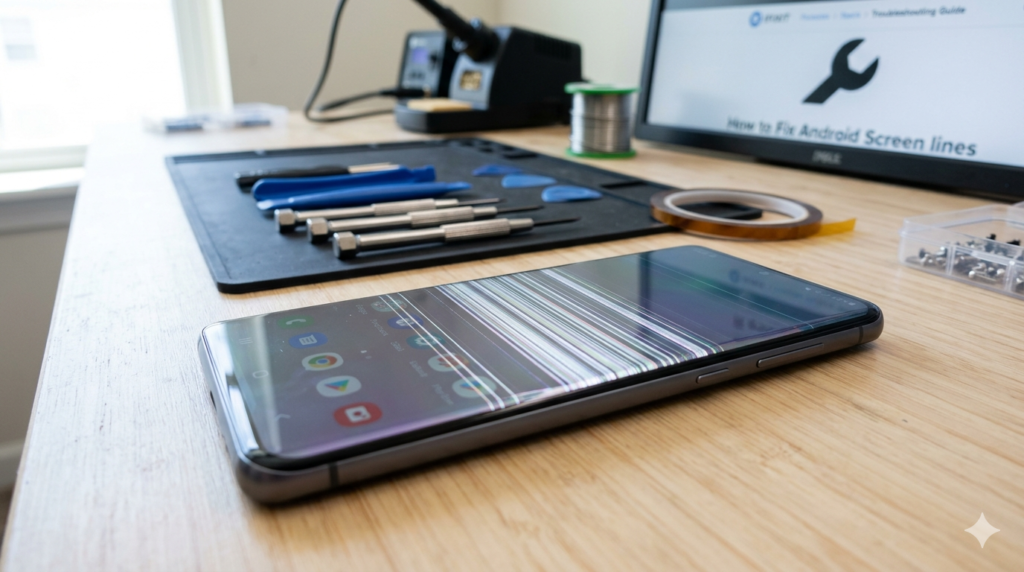
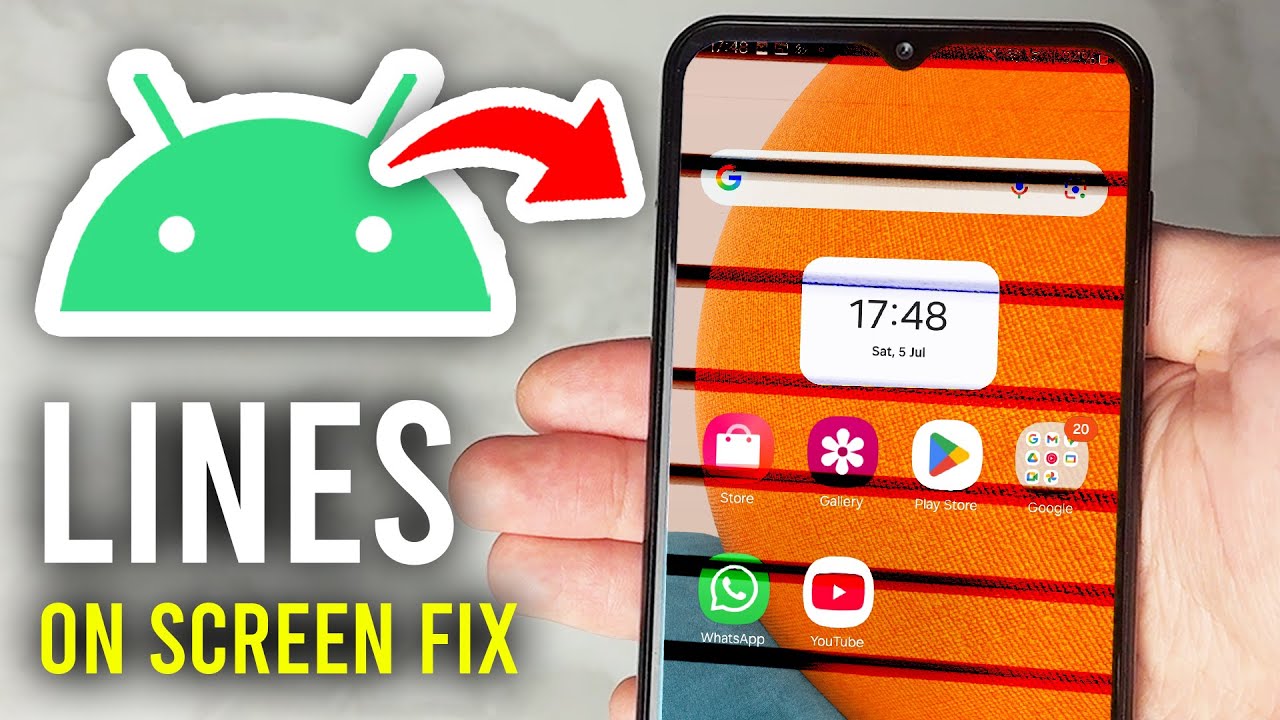
How to Fix Horizontal Lines on Android Phone: Ultimate Troubleshooting and Repair Guide
If you are wondering how to fix horizontal lines on android phone screens, you have come to the right place. This comprehensive guide will walk you through the common causes behind this display phenomenon, provide a structured step-by-step diagnostic process, offer actionable software and hardware fixes, and help you determine whether a DIY approach or professional assistance is best for your situation.
Understanding the Root Causes of Horizontal Lines on Android Displays
Before diving into the technical solutions, it is essential to understand why these lines appear. Display abnormalities generally fall into two categories: software glitches or hardware damage. Pinpointing the underlying issue prevents you from performing unnecessary steps and helps map out the correct path to a solution.
1. Temporary Software Glitches and Corrupted Cache
Sometimes, the phone’s operating system encounters processing bottlenecks or corrupted cache files. When the Graphical Processing Unit (GPU) fails to map pixels correctly across the refresh cycle, temporary horizontal lines or artifacts can flash across the panel. These are usually highly fixable without spending a dime.
2. Incompatible Third-Party Applications
Poorly optimized apps, custom launchers, or experimental graphics tools can conflict with your Android system’s display rendering. If horizontal lines only appear when specific applications are open, software incompatibility is the most probable culprit.
3. Loose or Damaged Display Flex Cable
Inside your smartphone, a thin, fragile ribbon cable (the flex cable) connects the display assembly directly to the motherboard. If you recently dropped your phone or subjected it to heavy structural pressure, this connector can wiggle slightly loose out of its socket, causing intermittent data transmission failures that manifest as horizontal stripes.
4. Physical Impact and Panel Cracks
Even if the front protective glass remains completely intact, a hard drop can fracture the underlying Organic Light-Emitting Diode (OLED) or Liquid Crystal Display (LCD) matrix. When individual rows of pixels lose power or data connectivity due to microscopic internal fractures, solid lines appear permanently.
5. Water Intrusion and Liquid Corrosion
Moisture entering through the speaker grill, charging port, or SIM tray can quickly travel to the display circuitry. Water bridges electrical connections, leading to short circuits that cause permanent pixel discoloration or uniform line bands across the glass.
6. Thermal Stress and Overheating
Leaving your phone on a hot car dashboard or executing heavy gaming sessions while fast-charging can cause internal temperatures to spike past safe limits. Prolonged thermal exposure degrades the delicate adhesives and semiconductor materials driving your display, occasionally forcing rows of pixels to fail.
The Initial Diagnostic Test: Hardware vs. Software
Before attempting intensive resets or purchasing replacement parts, you must perform a simple diagnostic test to isolate the failure point. This ensures you know exactly how to fix horizontal lines on android phone assemblies safely.
The Screenshot Test
-
When you see the horizontal lines actively running across your display, take a standard screenshot (usually by pressing the Power + Volume Down buttons simultaneously).
-
Transfer that screenshot to a computer, view it on another device, or upload it to cloud storage.
-
Open and inspect the image on the separate screen.
-
If the lines are visible in the screenshot: The issue is rooted entirely in your phone’s software or operating system. The GPU is actively drawing those lines into the system’s image cache.
-
If the lines do not appear in the screenshot: The software is rendering images perfectly, but your phone’s physical display hardware is broken or loose.
Step-by-Step Software Solutions (DIY Software Fixes)
If your screenshot test or initial assessment points toward a software anomaly, work your way through these step-by-step solutions from easiest to most advanced.
Step 1: Execute a Force Restart (Soft Reset)
A soft reset flushes out volatile RAM and terminates stuck system processes that might disrupt the display controller.
-
Press and hold the Power Button and Volume Down Button simultaneously for 10 to 15 seconds.
-
Release the keys once the manufacturer’s logo flashes on the screen. Let the system boot normally and check if the lines disappear.
Step 2: Boot into Safe Mode
Booting into Safe Mode temporarily disables all third-party applications, launching the phone exclusively with its native factory software. This isolates app conflicts immediately.
-
Press and hold your phone’s physical Power Button until the power menu appears.
-
Tap and hold the Power Off or Restart icon on the screen for a couple of seconds.
-
A prompt will appear asking if you want to reboot to Safe Mode. Tap OK.
-
Once the phone reboots, look for the “Safe Mode” watermark at the bottom of the screen.
-
If the horizontal lines are gone, an app you downloaded is causing the error. Restart your phone normally and uninstall recently added apps one by one until the visual artifact resolves.
Step 3: Clear the System Cache Partition
System updates can occasionally leave residual, fragmented data files that conflict with display drivers.
-
Turn off your device completely.
-
Hold down the Volume Up and Power buttons together to enter the Android Recovery Menu (the exact key combinations vary slightly depending on your manufacturer, such as Samsung or Google).
-
Use the volume keys to navigate the menu and highlight Wipe Cache Partition.
-
Press the Power Button to execute, then select Reboot System Now.
Step 4: Tinker with Developer Options
Forced hardware configurations via Android’s hidden developer menu can sometimes realign misbehaving pixel streams.
-
Navigate to Settings > About Phone.
-
Locate the Build Number and tap it rapidly seven (7) times until a toast notification states, “You are now a developer!”
-
Go back to the main Settings menu, open System, and select Developer Options.
-
Scroll down and locate settings like Force GPU Rendering or Disable HW Overlays. Toggle them on and off to see if forcing the phone to recalculate its screen positioning clears the horizontal pixel rows.
Step 5: Perform a Factory Data Reset
If all else fails, a complete factory restore is the definitive nuclear option for software-side errors.
-
Warning: This will wipe all photos, accounts, and application data. Ensure you perform a full cloud backup before executing this step.
-
Go to Settings > System or General Management > Reset > Factory Data Reset. Confirm your lock screen PIN and tap Erase All Data.
Advanced Hardware Solutions (DIY and Technical Intervention)
If your screenshot was completely clear, software troubleshooting will not yield results. The issue lies within the physical framework of the device. Here is how to fix horizontal lines on android phone hardware components systematically.
1. The Light Pressure Technique (Loose Connector Test)
If the internal flex cable connector has migrated fractionally out of its motherboard slot, applying structural pressure can momentarily close the circuit.
-
Locate the areas near the top bezel or bottom edge where the display ribbon connects internally.
-
Using your thumbs and a soft microfiber cloth, apply firm but gentle localized pressure along the borders of the glass screen.
-
If the horizontal lines flicker, shift colors, or disappear entirely while you apply pressure, you have verified a loose or structurally compromised LCD/OLED flex connector.
2. Battery Cycling (Pixel Voltage Realignment)
For select LCD-equipped Android smartphones, uniform line anomalies can stem from improper voltage distribution across individual pixel rows. A battery cycle can reset the panel’s electrical capacitance.
-
Use your smartphone continuously until the battery completely drains to 0% and the phone shuts down on its own.
-
Try powering it on a few more times to ensure all remaining residual energy in the internal capacitors is spent.
-
Plug the phone into its original charger and let it charge uninterrupted to 100% while keeping the power turned off.
-
Turn the device back on; occasionally, the uniform electrical reset realigns sub-pixels.
3. Reseating the Display Ribbon Cable (Advanced DIY)
If you are structurally inclined, possess proper precision electronics tools, and have watched device-specific teardowns on sites like iFixit’s Repair Guides, you can attempt to reseat the cable.
+-------------------------------------------------------+
|  WARNING: Opening a modern Android device voids water |
|  resistance seals and can puncture the battery if     |
|  handled improperly. Proceed at your own risk.        |
+-------------------------------------------------------+
-
Apply localized heat using an iOpener or heat gun to soften the outer adhesive holding the back glass cover.
-
Use a plastic opening pick to slice through the softened perimeter adhesive and gently lift the back panel away.
-
Unscrew the internal metal shielding plates covering the main logic board.
-
Locate the display flex ribbon, gently pop it out of its slot using a non-conductive plastic spudger, inspect it for corrosion or dust, and press it firmly back into place until it clicks.
Comparing the Approaches: DIY vs. Professional Repair
Deciding whether to handle a broken display yourself or outsource the task to a certified technician depends on your budget, technical competence, and device value.
| Factor | DIY Self-Repair Path | Certified Professional Service Center |
| Average Cost | Low (Pay only for raw components and tools) | Moderate to High (Includes labor fees + parts) |
| Time Required | 1–3 hours of research and meticulous assembly | Same-day walk-in or a few days for mail-in |
| Risk Factor | High risk of damaging internal components or logic boards | Zero risk; backed by service guarantees |
| Warranty Status | Voids any remaining manufacturer warranty protections | Preserves device warranty (if using authorized centers) |
| Tooling Needed | Requires suction cups, heat guns, and precision drivers | None; the shop handles everything |
Practical Examples and Real-World Scenarios
To help you put this information into context, let’s explore two realistic troubleshooting scenarios that users experience daily.
Scenario A: The Sudden Drop Routine
-
The Situation: Marcus dropped his Samsung Galaxy device onto a hardwood floor. The front glass didn’t shatter, but thick, stubborn horizontal pink bands immediately appeared near the bottom third of the screen.
-
The Diagnosis & Fix: Marcus performed the screenshot test, and the image came out completely pristine. This confirmed a hardware issue. Because the lines appeared exactly after physical impact trauma, the display matrix suffered internal fracturing. A software reset won’t resolve this; Marcus needs to procure a genuine OEM replacement panel or bring it to a repair center.
Scenario B: The Post-OS Update Glitch
-
The Situation: Sarah completed a major Android system software upgrade on her OnePlus phone. An hour later, fine, faint horizontal lines started flickering over her app drawer.
-
The Diagnosis & Fix: Sarah rebooted her device straight into Safe Mode. While in Safe Mode, the screen displayed crystal-clear images without a single line. This proved the hardware panel was perfectly healthy. Sarah cleared her device’s system cache partition and uninstalled an older third-party custom theme engine she had running, permanently resolving the horizontal line glitch.
Expert Tips to Prevent Future Display Issues
Maintaining proper device habits drastically extends the operational lifespan of your mobile hardware and mitigates screen failure rates.
-
Invest in Heavy-Duty Case Architecture: Use phone cases featuring elevated lips around the front bezels. This ensures that face-down impacts drop their kinetic energy into the silicone bumper rather than compressing the display layers.
-
Avoid Tight Pocket Compression: Keeping larger phones inside tight jeans pockets exerts structural bending pressure on the phone frame when you sit down, which can loosen internal LCD ribbon couplings over time.
-
Manage Thermal Profiles: Remove your phone from protective cases if it runs exceptionally hot during graphics-intensive tasks, and never rest your smartphone in direct sunlight.
-
Utilize High-Quality Screen Protectors: Tempered glass shields diffuse structural impacts, preventing the shock waves from traveling deep into delicate internal OLED arrays.
When to Seek Professional Help
If you have systematically walked through soft reboots, factory formatting, and safe mode testing without witnessing a positive shift in your display’s behavior, it is time to accept that the physical hardware is defective.
If your phone screen suffered explicit exposure to liquids, shows dark ink-like localized splotches alongside horizontal lines, or if you simply feel uncomfortable dealing with microscopic components inside a tightly sealed smartphone chassis, do not risk total device destruction. Take the device to an authorized service facility. Technicians have the specialized specialized equipment, static-free mats, and genuine diagnostic components required to return your phone to pristine working order safely.
Exploring Alternative Tech Upgrades and Setups
While trying to optimize your mobile device or dealing with screen complications, many power users shift their focus toward more advanced or robust productivity arrangements. If you find yourself frequently using your mobile device for intensive applications, multitasking, or simulation environments, managing a single small display can often feel incredibly restrictive.
To truly supercharge your screen real estate and avoid the layout constraints inherent in small mobile electronics, investing in a mobile triple screen setup simracing framework can offer a transformative upgrade. Multi-monitor arrays distribute graphic assets uniformly over expansive display fields, reducing localized thermal bottlenecks on individual microprocessors while maximizing visual immersion for complex productivity workflows, gaming simulators, or heavy multi-tasking data matrices.
Conclusion
Encountering unexpected horizontal lines on an Android phone screen is undoubtedly inconvenient, but it is far from an unfixable disaster. By using a systematic approach—beginning with the screenshot test to differentiate between software errors and hardware damage—you can save time, money, and unnecessary stress. Many display issues stem from straightforward software bugs or misbehaving applications that can be resolved using Safe Mode or standard factory cache purges.
However, if your device has sustained physical drops or water ingress, the underlying hardware components will likely need an experienced touch. Assess your technical comfort level, review device schematics through reputable hubs like iFixit’s DIY Community, and do not hesitate to reach out to certified professionals if a complete screen swap is required. Taking proactive prevention measures now, such as applying rugged screen protectors and avoiding overheating, ensures your phone’s display remains crisp, responsive, and line-free for years to come.
Related posts:
![Can You Fix a Broken Screen Without Replacing the Entire Device?]()
How Can You Fix a Broken Screen Without Replacing the Entire Device?
![how to unhide apps on iphone]()
How to Unhide Apps on iPhone: A Complete, Step-by-Step Guide
![How to Update Your iPhone to iOS 26 After the Official Release Date]()
How to Update Your iPhone to iOS 26 After the Official Release Date: A Complete Guide
![ifixit.org.uk]()
How to Transfer iPhone to iPhone: The Complete Step-by-Step Guide
![How to Fix Common HTC U24 Pro Problems and Improve Performance]()
How to Fix Common HTC U24 Pro Problems and Improve Performance: Complete Troubleshooting Guide
![Top 10 Phone Repair Tools]()
Top 10 Phone Repair Tools & Toolkits Every Technician Must Have (2026)
![ifixit.org.uk]()
What Do You Need to Know About MagSafe and How Does It Improve Charging and Accessories on Apple Dev...
![Why Does My iPhone Battery Drain So Fast After an Update? Fixes & Prevention Tips ifixit.org.uk]()
Why Does My iPhone Battery Drain So Fast After an Update? Fixes & Prevention Tips