How Do You Set Up a VPN on Your Router to Protect Every Device on Your Home Network?
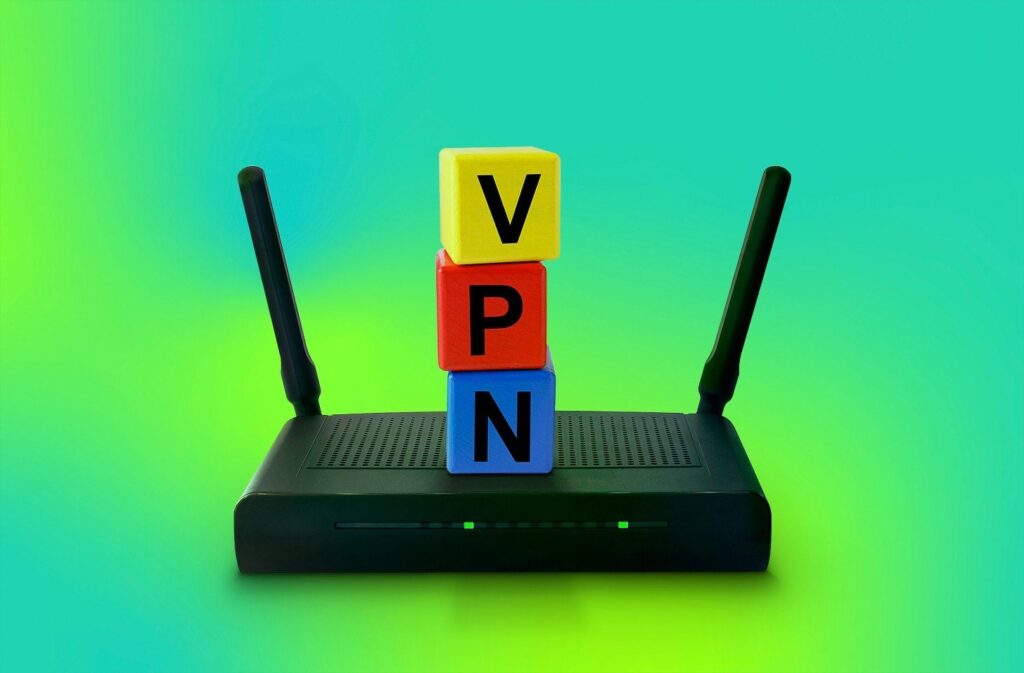
Manually installing a Virtual Private Network (VPN) application on every single device is tedious, and for many smart home products, entirely impossible. The ultimate solution is protecting your network at the source. By configuring a VPN directly on your wireless router, you create an encrypted blanket of security that automatically covers every device connecting to your Wi-Fi network.
This comprehensive guide will walk you through exactly how to set up a VPN on your router, explore the essential hardware requirements, provide step-by-step installation instructions for various firmware types, and analyze how to optimize your network for peak performance.
Why You Should Configure a VPN at the Router Level
When you use a standard desktop or mobile VPN app, it creates a secure, encrypted tunnel exclusively for that specific device. While this is effective for individual remote work or mobile browsing, it leaves the rest of your home network exposed to internet service provider (ISP) tracking and data logging.
Implementing a router-level VPN shifts the security paradigm from individual device management to centralized network defense.
The Benefits of a Router VPN
-
Universal, Always-On Protection: Once configured, any device that logs into your home Wi-Fi—whether it’s a guest’s smartphone, a smart thermostat, or a legacy media player—is instantly encrypted. You don’t have to worry about turning an app on or managing connection profiles.
-
Securing Non-Native Devices: Many popular streaming devices (like older Apple TVs, Roku, and smart TVs) and gaming consoles (such as the PlayStation 5, Xbox Series X, and Nintendo Switch) do not support native VPN applications. A router VPN bypasses this hardware limitation by encrypting the data before it ever leaves your house.
-
Bypassing Device Limitations: Most premium VPN service providers restrict the number of simultaneous active device connections per account (typically ranging from 5 to 10 devices). A router VPN counts as just one single connection to the provider, despite routing traffic for dozens of smart home accessories simultaneously.
-
Eliminating ISP Throttling: ISPs frequently monitor network traffic and intentionally slow down your bandwidth when they detect data-heavy activities like 4K streaming, torrenting, or intensive online gaming. Because a VPN hides your traffic type, your ISP cannot selectively throttle your connection based on your online behavior.
Choosing the Right Hardware: VPN Routers Explained
Before learning how to set up a VPN on your router, you must determine if your existing hardware is capable of handling the workload. Running a network-wide VPN requires significant processing power because the router must constantly encrypt and decrypt data packets on the fly for multiple devices.
Standard, budget-friendly routers supplied directly by your ISP (frequently called gateway hubs) are rarely powerful enough to support VPN configurations. In fact, most ISP-provided modems completely lock out the advanced settings required to establish a VPN client connection.
To successfully run a network-wide VPN, your hardware will generally fall into one of three categories:
1. VPN-Compatible (Consumer) Routers
Many premium, aftermarket routers from reputable brands like ASUS, Netgear, Linksys, and TP-Link come out of the box with native VPN client support. ASUS, in particular, includes its “VPN Fusion” feature on most modern Asuswrt firmware builds, allowing users to configure OpenVPN or WireGuard protocols in just a few clicks without altering the router’s core operating system.
2. Pre-Configured VPN Routers
For absolute beginners who prefer a plug-and-play experience, several specialized retailers sell pre-flashed routers. Companies like FlashRouters take top-tier hardware and pre-install open-source firmware alongside your chosen VPN provider’s configuration profiles. This eliminates the technical risk of manually upgrading router software.
3. Open-Source Firmware Upgrades (Flashing)
If you own a compatible router that doesn’t natively support VPN clients, you can choose to “flash” it with custom open-source firmware such as DD-WRT or FreshTomato. Flashing essentially replaces the restrictive factory software with a highly customizable Linux-based operating system, unlocking enterprise-grade features and granular VPN configurations.
Step-by-Step Guide: How to Set Up a VPN on Your Router
Because different router manufacturers utilize unique administrative interfaces, there is no single universal button to enable a VPN. However, the overarching methodology remains consistent across all platforms.
Below, we detail the step-by-step process for the two most common deployment scenarios: native ASUS Asuswrt firmware and open-source DD-WRT firmware.
Prerequisites Before Installation
Before accessing your router dashboard, ensure you have gathered the following components:
-
A premium VPN subscription that explicitly provides OpenVPN manual configuration files (.ovpn) or WireGuard configuration keys.
-
Your router’s local IP address (typically
192.168.1.1or192.168.0.1). -
The administrative username and password to log into your router dashboard (this is different from your Wi-Fi password).
Method A: Configuring a VPN on Native ASUS Firmware (Asuswrt)
ASUS routers feature one of the most accessible VPN setups in the consumer electronics market. Here is how to configure it correctly:
Step 1: Download Configuration Profiles
Log into your VPN account dashboard via a web browser on your computer. Navigate to the manual setup or advanced configuration section. Choose your desired server location (e.g., London, New York, or Tokyo) and download the corresponding .ovpn profile or copy the WireGuard script. Keep your unique manual configuration username and password handy.
Step 2: Access the Router Administration Panel
Open an internet browser window, type your router’s gateway IP address into the address bar, and hit enter. Enter your admin login credentials to access the primary control center.
Step 3: Locate the VPN Client Tab
In the left-hand navigation sidebar, look under the Advanced Settings heading and click on VPN. Once inside the VPN menu, look at the top horizontal navigation tabs and click on VPN Client (do not select VPN Server, as this is used to dial into your home network from afar).
[Main Router Dashboard]
   └── Advanced Settings
        └── VPN
             └── VPN Client (Select This Tab)
                  └── Add Profile
Step 4: Add and Populate the Profile
Click the Add Profile button at the bottom of the screen. A pop-up menu will present three protocol options: PPTP, L2TP, or OpenVPN/WireGuard. Select OpenVPN or WireGuard for modern, secure encryption.
-
Description: Give your profile a recognizable name (e.g., “NordVPN New York”).
-
Username / Password: Paste the unique credentials provided by your VPN for manual configurations (note: these are often entirely different from your primary website login details).
-
Import .ovpn file: Click the “Browse” button, select the configuration file you downloaded in Step 1, and click Upload.
Step 5: Activate the Connection
Once the file uploads successfully, hit OK. You will see the newly created profile listed under the VPN Client table. Click the Activate button next to it. Once a blue checkmark or a green check icon appears under the “Connection Status” column, your router is successfully tunneling traffic through the VPN.
Method B: Setting Up a VPN on DD-WRT Custom Firmware
If you have upgraded your hardware to DD-WRT, the steps require a bit more manual input, but offer unprecedented control over network routing.
Step 1: Verify NTP Time Sync
VPN connections rely heavily on precise time stamps to validate encryption certificates. Before starting, navigate to Setup > Basic Setup in DD-WRT. Scroll down to Time Network Setup, enable NTP Client, select your appropriate time zone, and ensure the router syncs its internal clock with atomic time servers.
Step 2: Open the OpenVPN Client Configuration
Navigate to the Services tab at the top of the page, and select the VPN sub-tab. Find the section titled OpenVPN Client and click the radio button to change its status to Enable.
Step 3: Input Server Information Manually
Open the .ovpn configuration file you downloaded from your provider using a standard plain text editor (like Notepad or TextEdit). You will need to extract specific text strings from this file to fill out the DD-WRT fields:
-
Server IP/Name: Look for the line starting with
remotein your text file (e.g.,us-ny.vpnprovider.com). Paste this domain or IP into the Server IP field. -
Port: Look for the number directly following the server name (usually
1194for UDP or443for TCP). -
Tunnel Device: Select TUN.
-
Tunnel Protocol: Match this to your profile, typically UDP.
-
Encryption Cipher: Set this to match your provider’s parameters (e.g., AES-256-CBC or AES-128-GCM).
-
Hash Algorithm: Set this to match (typically SHA256 or SHA512).
Step 4: Paste Encryption Certificates and Keys
Scroll down to the keys section within DD-WRT. In your open text editor, look for the <ca> XML-style tag. Copy all the text blocks between <ca> and </ca> and paste them cleanly into the CA Cert box in your router dashboard. If your provider uses a TLS Authentication key, copy the text between <tls-auth> and </tls-auth> and paste it into the TLS Auth Key field.
Step 5: Save and Apply Settings
Scroll to the absolute bottom of the DD-WRT interface. Click Save, wait five seconds, and then click Apply Settings. To monitor the live link status, navigate to Status > OpenVPN. If configured properly, the status log will display a message reading Initialization Sequence Completed.
Performance Optimization and Managing Multi-Screen Setups
Routing your home’s total aggregate bandwidth through a singular encryption tunnel places a heavy demand on system performance. While simple smart home accessories use negligible data, heavy workloads like streaming video or running an immersive online simulator can test the limits of your router’s processor.
For instance, when configuring a specialized entertainment hub, such as a mobile triple screen setup simracing rig, every single millisecond of latency counts. Online competitive racing simulators demand instantaneous ping responses to accurately track car placements on a track.
If your router’s central processing unit (CPU) is overwhelmed trying to encrypt standard household traffic while you are in the middle of an intense sim racing league event, you will experience sudden packet loss or latency spikes. To keep latency to an absolute minimum during high-bandwidth tasks, consider implementing Split Tunneling.
Many premium VPN-compatible routers allow you to create rule exceptions based on MAC addresses or LAN ports. By isolating your dedicated gaming or sim racing rig, you can route its specific data packets directly through your standard unencrypted ISP connection for optimal speed, while leaving the rest of your household’s smartphones, laptops, and smart TVs completely protected inside the encrypted VPN tunnel.
Troubleshooting Common Router VPN Connection Issues
Setting up a router-level VPN can sometimes run into roadblocks. If your internet connection suddenly drops or your devices cannot access specific pages after configuration, check the following common failure points:
1. The Double NAT Conflict
If your aftermarket VPN router is plugged directly into a primary modem/router combo supplied by your internet provider, you may suffer from a condition known as Double NAT (Network Address Translation). This occurs when two separate routing systems try to assign local IP paths simultaneously.
-
The Fix: Log into your original ISP modem’s settings panel and turn on Bridge Mode or IP Passthrough. This completely disables the routing capabilities of the ISP hub, turning it into a transparent modem that hands all public networking responsibility over to your secondary VPN-enabled hardware.
2. Slow Network Speeds and Bandwidth Bottlenecks
If your base internet speed drops significantly after enabling the VPN, your router’s CPU is likely hitting 100% capacity. Open-source protocols like OpenVPN are mathematically intensive.
-
The Fix: Switch your configuration profile from OpenVPN over to the modern WireGuard protocol if your hardware supports it. WireGuard is designed with a lightweight code architecture that executes encryption calculations much faster, reducing processor load and reclaiming lost bandwidth.
3. DNS Leaks Exposing Location Data
Sometimes, even though your data traffic passes through the encrypted tunnel, your device might accidentally route domain name requests (DNS) through your default ISP servers rather than the secure VPN equivalents.
-
The Fix: Inside your router’s advanced DHCP settings menu, manually override the default DNS inputs. Explicitly hardcode the static IP addresses of your VPN provider’s proprietary secure DNS servers, or use trusted public alternatives like Cloudflare (
1.1.1.1) and Google Public DNS (8.8.4.4).
Hardware Management: Protecting Device Components From Heat
Running an active VPN client on a consumer router 24 hours a day forces the internal hardware components to operate continuously at high clock speeds. This increased workload naturally generates substantial thermal energy inside the router housing.
Just like other complex electronics, excess heat is a primary cause of premature component degradation. For example, if you look at modern high-resolution computer monitors or display hardware, prolonged exposure to excessive operating temperatures can result in significant pixel wear, causing permanent artifacts like macbook pro screen burn marks. While routers don’t have visual displays to show thermal wear directly, the internal storage chips and processors degrade similarly under continuous thermal stress.
To prevent your router from overheating, dropping connections, or experiencing premature hardware fatigue, ensure the device is positioned in a well-ventilated space. Avoid trapping the router inside closed entertainment consoles, dusty closets, or stacking it directly on top of other hot electronic components like amplifiers or desktop computers. If your router feels hot to the touch or suffers unexplained mid-day reboots, raising the device slightly off the desk surface with rubber spacers can greatly improve passive airflow through the bottom ventilation grilles.
Comparing the Pros and Cons of a Router VPN vs. Device Apps
Before committing fully to a network-wide deployment, it is vital to contrast this strategy against standard device-specific applications. Understanding these tradeoffs will help you manage your household connectivity efficiently.
The Advantages
-
Invisible Operation: No software icons sit in taskbars, and no startup routines are required on client machines.
-
Total Ecosystem Coverage: Legacy systems, budget smart devices, and custom hardware are instantly protected without updates.
-
Shared Subscription Costs: One paid account covers dozens of home clients seamlessly.
The Drawbacks
-
Complex Server Switching: Changing your virtual location to a different country requires re-logging into the router control panel to switch configuration profiles, rather than clicking a simple map icon on your phone screen.
-
Local Traffic Issues: Running a permanent VPN can disrupt localized home connections, such as cast commands to local wireless printers or file transfers between network-attached storage (NAS) drives.
-
Hardware Replacement Costs: Upgrading to a router powerful enough to run high-speed VPN connections without lag can require an upfront investment in advanced networking hardware.
Managing Your Connected Ecosystem Wisely
As you optimize your digital home network, remember that true digital management encompasses both your local network setup and your ongoing software configurations. Just as setting up your router protects your data, organizing your various digital software profiles prevents unwanted subscription costs.
When configuring network-wide security rules, evaluate any active automated service accounts you maintain across your home ecosystem. For instance, if you balance your household budget carefully, managing automated cloud printing accounts requires the same level of deliberate control as choosing your VPN protocols. It is smart practice to perform quarterly checks on your automated cloud services, verifying billing details and canceling any idle tier accounts you no longer utilize.
Taking an active approach to your connected accounts—whether adjusting your VPN rules, updating device security keys, or staying on top of smart printer subscription management—ensures you extract maximum utility from your tech stack without incurring hidden monthly fees.
Conclusion: Take Command of Your Network Privacy
Configuring a Virtual Private Network directly on your wireless router is one of the most effective steps you can take to secure your digital home. By establishing encryption directly at the entry point of your local network, you eliminate security gaps, safeguard vulnerable smart home products, and ensure that every person stepping into your home enjoys automatic protection from tracking and data mining.
While the initial technical setup requires careful attention—from evaluating your current router’s hardware limitations to importing certificate keys into dashboards—the long-term rewards of set-and-forget security are well worth the effort. By selecting appropriate high-performance hardware, routing heavy tasks with split-tunneling exceptions, and keeping your router running cool in a well-ventilated space, you can maintain peak internet speeds without compromising on your digital privacy. Assess your current hardware options today, pick a reliable server configuration, and transform your home network into an encrypted digital fortress.
Related posts:
![How to fix Google Messages landscape layout issues on Android phone]()
How to Fix Google Messages Landscape Layout Issues on Android Phone?
![fix 403 forbidden error on Google Chrome ifixit.org.uk]()
How to Fix 403 Forbidden Error on Google Chrome: The Complete Troubleshooting Guide
![Microsoft Surface Laptop 3 Screen Crack: ifixit.org.uk]()
Microsoft Surface Laptop 3 Screen Crack: Comprehensive Guide to Causes, Repair Options, and Preventi...
![Why Won’t macOS Golden Gate 27 Beta Install in a Virtual Machine]()
Why Won’t macOS Golden Gate 27 Beta Install in a Virtual Machine?
![How to Fix Google Chrome Not Updating on Older Macs]()
How to Fix Google Chrome Not Updating on Older Macs (2026 Complete Guide)
![How to Screenshot on Mac: The Ultimate Guide to Keyboard Shortcuts & Hidden Features]()
The Ultimate Guide on How to Screenshot on Mac: Shortcuts, Tips, and Hidden Utilities
![How to Fix mds_stores High Memory and CPU Usage on Mac]()
How to Fix mds_stores High Memory and CPU Usage on Mac
![How to Install macOS Golden Gate 27 Beta on Your Mac]()
How to Install macOS Golden Gate 27 Beta on Your Mac?