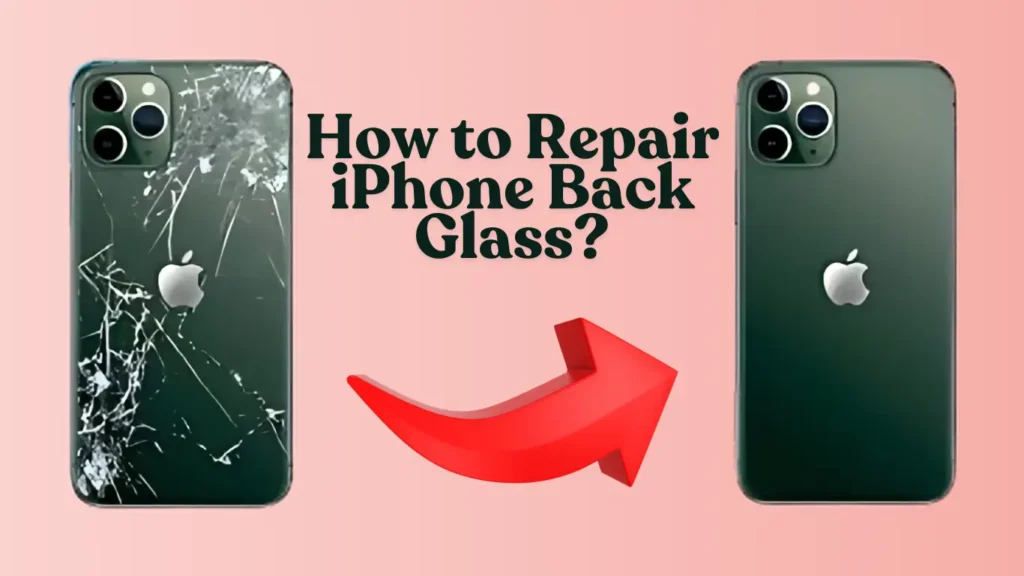
Dropping your phone is never fun. But seeing a spiderweb of cracks spreading across the back glass of your brand‑new iPhone 17e can feel like a punch to the gut. Your first thought might be: do I really have to take the whole phone apart just to replace the back glass?
The short answer is no – and that’s a major step forward for iPhone repairability. Thanks to a redesigned modular back glass system introduced on recent iPhone models, the iPhone 17e Back Glass Replacement can now be performed without fully disassembling the device. However, the reality is a bit more nuanced: the official DIY method requires only partial disassembly (opening the phone from the back), while professional laser techniques can remove the glass with almost no prying at all.
In this article, we’ll break down exactly how the back glass of the iPhone 17e is attached, explore the two main replacement methods (modular swap and laser removal), provide a step‑by‑step walkthrough, compare costs and risks, and help you decide whether to tackle the repair yourself or seek professional help.
Understanding the iPhone 17e Back Glass Design
Before diving into the repair techniques, it helps to know how the back glass is actually attached to the phone. Apple introduced a significant engineering shift with the iPhone 14 and continued refining it through the iPhone 17 lineup.
A Modular Back Glass System
Unlike earlier iPhones where the back glass was fused directly to the metal frame as one inseparable piece, the iPhone 17e features a removable back glass panel. This modular design allows technicians (and brave DIYers) to access the back glass from the outside without going through the front display.
Key design highlights of the iPhone 17e include:
-
Modular back glass assembly – The glass is a separate component that can be removed and replaced as a unit.
-
Strong but removable adhesive – The glass is held in place by a high‑bond adhesive layer that can be softened with heat.
-
External access – The repair can be performed by opening the phone from the back, leaving the display assembly untouched.
-
Replacement adhesive strips – New glass comes with pre‑cut adhesive that ensures a proper seal and maintains IP68 water resistance.
This design is a direct response to years of criticism over the poor repairability of earlier iPhones. The result? A iPhone 17e Back Glass Replacement that is faster, safer, and more accessible than ever before.
The Two Main Methods for Replacing the Back Glass
When it comes to replacing the cracked back glass on an iPhone 17e, you essentially have two paths: the official modular method (recommended for DIYers and certified repair shops) and the professional laser ablation method (used mainly by high‑volume repair centers). Let’s explore both.
Method 1: Official Modular Replacement (Partial Disassembly)
This is the procedure described in Apple’s own repair manuals and the iFixit guide for the iPhone 17e. It involves opening the phone from the back, but does not require removing the display or logic board.
How it works:
-
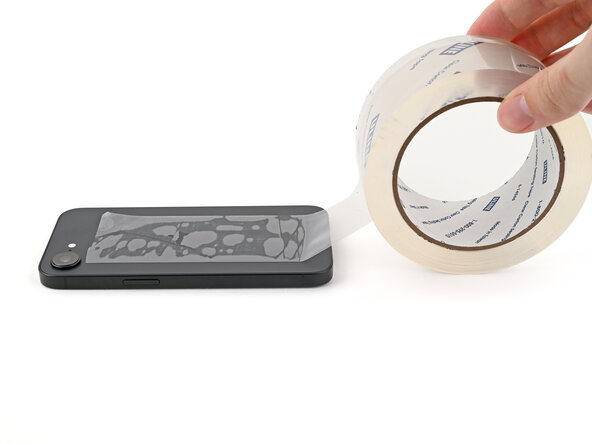
Prepare the device – Power off the phone, drain the battery below 25% for safety, and tape over any severely cracked areas to contain glass shards.
-
Apply heat – Use a heat gun, hair dryer, or a heated iOpener to soften the adhesive around the edges of the back glass.
-
Create a gap – Attach a suction handle to the bottom edge and pull up steadily until a small gap appears.
-
Cut through the adhesive – Slide an opening pick into the gap and carefully slice around the perimeter, staying within 3 mm of the edge to avoid internal cables.
-
Disconnect the back glass flex cable – Some iPhone models have a small flex cable connecting the back glass (for the flash or microphone). On the iPhone 17e, you may need to lift the edge just enough to disconnect it.
-
Remove the old glass – Once all adhesive is cut and any cables are disconnected, lift off the entire back glass panel.
-
Clean the frame – Remove old adhesive residue, glass fragments, and dust from the phone’s frame.
-
Install new glass – Peel the backing off the replacement back glass (which comes with pre‑applied adhesive) and press it firmly into place. Use a press or heavy books to ensure full adhesion.
-
Run Repair Assistant – If you use an Apple genuine back glass, you must run Apple’s Repair Assistant software to calibrate the part and restore full functionality.
What’s not opened?
The front display stays in place. You don’t need to remove the screen, battery, logic board, or cameras. That’s a huge improvement over earlier models where back glass replacement often required a near‑complete teardown.
Method 2: Professional Laser Removal (Almost No Disassembly Required?)
This is where the question of “without opening the whole device” gets interesting. Laser machines specifically designed for iPhone back glass removal can ablate (burn away) the adhesive layer through the glass itself, making the removal process much cleaner.
How it works:
-
Disassemble the phone – Wait – this is the catch. To use a laser safely, the technician must remove all internal components (display, battery, logic board, cameras, Face ID module). The laser only works on an empty housing.
-
Place the empty frame in the laser machine – The housing is positioned in the machine, and the correct iPhone model file is selected.
-
Laser ablation – The laser fires through the glass, targeting only the paint and adhesive underneath. The glass itself is largely transparent to the chosen wavelength, so it remains intact while the glue is vaporised.
-
Remove the glass – After the laser run, the adhesive is gone and the glass can be lifted off with almost no prying.
-
Clean the frame – Any soot or residue is wiped away.
-
Install new glass – A new back glass panel is attached using cold‑press adhesive.
-
Reassemble the phone – All internal components are reinstalled.
So does it avoid opening the device?
Only in the sense that you don’t pry the glass off. But the phone is completely torn down before the laser is used. This method is not simpler for the average owner – it’s a professional technique that requires extensive disassembly. However, from a mechanical standpoint, the glass itself is removed without prying tools, reducing the risk of frame damage.
Key takeaway: The modular method (Method 1) is what most people mean when they say “without opening the whole device.” It leaves the screen and most internal components untouched. Laser removal, while elegant, actually requires a full teardown beforehand.
Step‑by‑Step: Performing an iPhone 17e Back Glass Replacement
Now let’s walk through the official modular replacement in detail. Whether you plan to do it yourself or just want to understand what a repair shop will do, these steps will give you a clear picture.

What You’ll Need
| Tool / Material | Purpose |
|---|---|
| P2 Pentalobe screwdriver | Remove the two bottom screws near the charging port |
| Heated iOpener, heat gun, or hair dryer | Soften the adhesive |
| Suction handle | Create an initial gap |
| Opening picks (marked at 3 mm) | Cut the adhesive without damaging internal cables |
| Tweezers | Handle small fragments and connectors |
| Replacement back glass (Apple genuine or quality third‑party) | Must include pre‑cut adhesive |
| Isopropyl alcohol (90%+) | Clean residue from the frame |
| Lint‑free cloths | Wipe the frame before installation |
| Repair Assistant (Apple genuine parts only) | Software calibration |
Step 1 – Prepare Your Workspace and Phone
-
Work on a clean, well‑lit, static‑free surface.
-
Back up your iPhone (just in case).
-
Drain the battery below 25% to reduce the fire risk if a battery is accidentally punctured.
-
Power off the phone completely.
-
If the glass is badly shattered, cover it with packing tape to prevent glass splinters from flying around.
Step 2 – Remove the Bottom Screws
Using a P2 Pentalobe driver, remove the two 7.8 mm screws next to the Lightning/USB‑C port. Place them in a small magnetic container so they don’t roll away.
Step 3 – Heat the Back Glass
Apply a heated iOpener to the bottom edge for about 90 seconds. If using a hair dryer or heat gun, keep it moving and heat the glass until it’s “hot to the touch” – but not so hot that you cannot comfortably hold the device (around 60–70°C). Excessive heat can damage the battery.
Step 4 – Create an Opening Gap
Attach a suction handle to the bottom edge of the back glass. Pull up with steady, strong force. As the adhesive softens, a small gap will appear between the glass and the frame.
Step 5 – Slice the Adhesive
Insert an opening pick into the gap, but do not push it in deeper than 3 mm. The iPhone 17e has a delicate flex cable near the volume buttons and several spring contacts around the perimeter. Going too deep can sever these connections.
Slide the pick along the bottom edge, then continue around the left, top, and right edges, reheating as needed. You will hear and feel small “clicks” as metal clips release.
Step 6 – Disconnect the Back Glass Cable (if present)
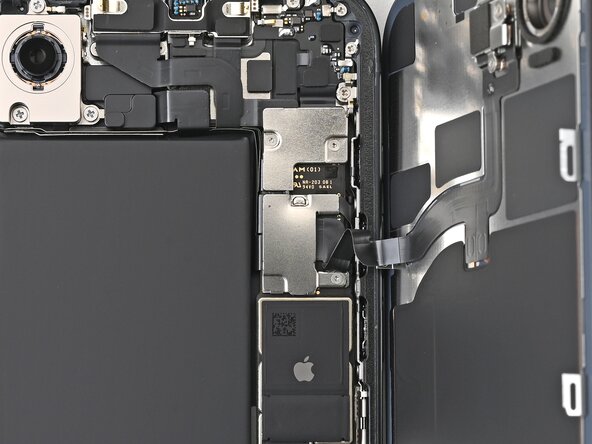
Lift the bottom edge just enough to see if a flex cable connects the back glass to the logic board. On the iPhone 17e, this cable is present for the flash and rear microphone. Use tweezers or a spudger to gently disconnect it before fully removing the glass.
Step 7 – Lift Off the Old Back Glass
Once all adhesive is cut and any cables are disconnected, lift the back glass away from the phone.
Step 8 – Clean the Frame
Inspect the frame for leftover adhesive, glass chips, or dust. Use isopropyl alcohol and a lint‑free cloth to thoroughly clean the mating surface. Any debris left behind will prevent the new glass from sitting flush and could compromise water resistance.
Step 9 – Install the New Back Glass
Peel the liner off the replacement back glass to expose the adhesive. Carefully align the glass over the frame, paying special attention to the camera bump and any alignment marks. Press down firmly, then use a press, heavy books, or a clamp to apply even pressure for several minutes.
Step 10 – Run Repair Assistant (Apple genuine parts)
If you purchased an Apple genuine back glass through the Self Service Repair Store, you must run Apple’s Repair Assistant software. This program calibrates the new part, verifies serial numbers, and restores full functionality (True Tone, battery health reporting, etc.). Third‑party glass panels will work for basic protection but cannot be calibrated and may trigger “Unknown Part” warnings in Settings.
Step 11 – Power On and Test
Turn on the phone and check the flash, rear microphone, wireless charging, and overall fit. Verify that the edges are smooth and the glass is fully seated.
How Does the Adhesive Release Work?
One of the most common questions is: how does the back glass come off without breaking the phone?
The magic is in the adhesive. Apple uses a pressure‑sensitive adhesive that softens significantly when heated to around 60–80°C. Once softened, the adhesive loses much of its tensile strength, allowing the glass to be separated with moderate force. The opening pick essentially “cuts” through the softened glue without needing to melt it entirely.
For professional laser removal, the principle is different: a high‑power fibre laser (typically 20 W) is tuned to a wavelength that passes through the glass but is absorbed by the dark paint and adhesive layer underneath. The laser energy vaporises the glue, turning it into a fine ash or powder. This eliminates the need for heat guns or prying tools – but again, requires a complete teardown of the phone before the laser is used.
Tools and Parts: What You Really Need
Apple has made genuine parts and tools available through its Self Service Repair Store. For the iPhone 17e, you can order:
-
Official back glass replacement
-
Replacement adhesive (included with the back glass)
-
Pentalobe screwdrivers
-
Heated display removal fixtures (overkill for back glass alone, but available)
If you prefer third‑party options, Amazon and specialised repair suppliers offer aftermarket back glass panels. These usually cost less but may not include pre‑cut adhesive or the required quality for water resistance.
Expert tip: Always buy a back glass that comes with pre‑installed adhesive. Adding your own glue from a tube is messy, inconsistent, and almost never achieves the same water resistance as the factory adhesive.
Cost Breakdown: How Much to Fix iPhone 17e Cracked Back Glass
Your total out‑of‑pocket expense depends on where you get the repair done.
| Repair Option | Estimated Cost (US) | Notes |
|---|---|---|
| Apple Out‑of‑Warranty | $169 – $199 | Official service, includes genuine part and full calibration |
| With AppleCare+ | $29 (service fee) | Unlimited incidents; requires AppleCare+ active on the device |
| DIY (Apple genuine part) | ~$130 – $160 | Part cost + tool rental/shipping |
| DIY (third‑party part) | $30 – $80 | Lower cost, but no calibration, lower water resistance |
| Third‑party repair shop | $80 – $150 | Varies widely by location and part quality |
| Laser repair service | $100 – $250 | Usually includes full teardown and reassembly |
For context, Apple’s out‑of‑warranty back glass repair for the iPhone 17 series is often cited around $1298 CNY (~$180 USD). With AppleCare+, the service fee drops dramatically to around HK$228 or roughly $29.
Pros and Cons of the Modular Back Glass Design
| Pros | Cons |
|---|---|
| ✅ No need to remove the display | ❌ Still requires some disassembly (bottom screws, heating) |
| ✅ Faster repair time (30–60 minutes for experienced technician) | ❌ Risk of damaging the flex cable if pick goes too deep |
| ✅ Lower repair cost compared to older iPhones | ❌ Water resistance may be compromised if adhesive is not applied perfectly |
| ✅ Doable by intermediate DIYers with patience | ❌ Requires specialty tools (P2 driver, heating source, picks) |
| ✅ Genuine parts available directly from Apple | ❌ Third‑party parts often lack proper adhesive or fit |
Real‑World Scenarios: When to Choose Each Method
Scenario 1 – You have AppleCare+ and live near an Apple Store
Just take it to Apple. Pay the $29 service fee and let the professionals do it. You get a genuine part, full calibration, and retained water resistance.
Scenario 2 – You’re confident with repairs and want to save money
The DIY modular method is your best bet. Buy an official Apple part or a high‑quality third‑party back glass, follow the steps above, and take your time. This is especially worthwhile if you have multiple Apple devices and can justify buying the tools once.
Scenario 3 – You want the “cleanest” removal possible (no prying marks)
Find a repair shop that uses a laser back glass removal machine. Yes, they will fully disassemble your phone, but the glass removal itself leaves the frame completely unmarred. This method is particularly good if the frame is already scratched and you want to avoid any additional wear.
Scenario 4 – You just need a quick, cheap fix before selling the phone
A third‑party replacement glass from Amazon (around $30) might be acceptable. Be aware that the new glass may not have oleophobic coating, the fit may be slightly off, and you’ll lose water resistance. But for a device you’re about to trade in, it can be a cost‑effective solution.
Expert Tips for a Successful Back Glass Replacement
-
Always mark your opening pick at 3 mm. Inserting a pick too far can sever the internal flex cable or damage the wireless charging coil. A simple piece of tape or a permanent marker line will keep you safe.
-
Don’t skip the heating step. Cold adhesive is incredibly strong. Trying to pry the glass off without heat will almost certainly crack it further and may bend the frame.
-
Use a heat gun sparingly. If you use a heat gun, keep it moving at a distance of about 10–15 cm. Concentrated heat can delaminate the display or overheat the battery.
-
Clean, clean, clean. Any dust or old adhesive left on the frame will create a bump under the new glass, making it prone to cracking under pressure.
-
Cure the adhesive under pressure. After installing the new glass, place the phone under a stack of heavy books or use a clamp for at least 4–6 hours. This ensures the adhesive bonds fully.
-
Consider professional calibration. If you use a genuine Apple back glass and want to keep all software features (True Tone, battery health, etc.), you must run Apple’s Repair Assistant software. Without it, the part will show as “Unknown” in Settings.
Frequently Asked Questions
Does replacing the back glass void my warranty?
If you perform the repair yourself or use a non‑authorised service, Apple will void the warranty for any future repairs that could be related to the back glass or water damage. However, unrelated components (like the logic board failing due to a manufacturing defect) may still be covered. To be safe, always have repairs done by Apple or an Apple Authorised Service Provider if you care about warranty coverage.
Is water resistance maintained after a back glass replacement?
If you install a genuine Apple back glass with pre‑cut adhesive and apply it correctly, the phone can regain IP68 water resistance. Third‑party glasses or poorly applied adhesive will almost certainly reduce or eliminate water resistance. Apple’s internal testing uses specialised presses and calibrated torque – you cannot replicate that perfectly at home.
Can I use the phone while the adhesive is curing?
It’s best to leave the phone untouched for at least 4–6 hours after installing the new glass. The adhesive needs constant pressure to bond properly. Using the phone earlier could lift an edge and allow dust or moisture inside.
Why does Apple require Repair Assistant for genuine back glass?
Apple has added hardware serialisation to many parts, including the back glass assembly. Repair Assistant pairs the new part’s serial number to the logic board, enabling full functionality and removing any “Unknown Part” warnings. It’s a security and anti‑tampering measure.
Additional Resources
For more detailed information, consult these reliable sources:
-
iFixit – iPhone 17e Back Glass Replacement Guide – Complete step‑by‑step photos and tool list.
-
Apple Self Service Repair Store – Order genuine parts and official repair manuals for the iPhone 17e.
-
Apple Support – iPhone 17e Repair Manual – The official documentation from Apple.
-
PhoneArena – iPhone 17e Self‑Service Repair – News about the availability of official parts.
-
Wikipedia – iPhone 17e – General specifications and release information.
Conclusion
The iPhone 17e represents a welcome shift in Apple’s repairability philosophy. You can now replace the back glass without fully opening the entire device. The official modular method leaves the front display and most internal components untouched, making the repair faster, cheaper, and more accessible than ever before. If you need to fix iPhone 17e cracked back glass, you have multiple viable options: Apple’s own service (especially if you have AppleCare+), a DIY modular replacement with genuine parts, a third‑party shop, or even a professional laser removal service.
Actionable takeaways:
-
If you have AppleCare+, the $29 service fee is almost always worth it – let Apple handle the repair.
-
For confident DIYers, the modular replacement is a realistic weekend project. Just invest in the right tools and a genuine or high‑quality third‑party back glass.
-
Laser removal is impressive technology, but it requires a full device teardown – it’s not a shortcut to an easier repair.
-
Always mark your opening pick at 3 mm, apply steady heat, and clean the frame thoroughly before installing the new glass.
-
Running Apple’s Repair Assistant is mandatory if you want full software functionality with an official Apple part.
By understanding how the iPhone 17e Back Glass Replacement works, you can make an informed decision that balances cost, convenience, and quality. Whether you hand it to a professional or roll up your sleeves and do it yourself, the process is now more straightforward than it ever was on older iPhones.
Related posts:
![Apple iPhone 17e Unlocked by RedPocket Mobile]()
Apple iPhone 17e Unlocked by RedPocket Mobile: Best Budget Deal in 2026?
![How to Reset Network Settings on iPhone: Ifixit]()
How to Reset Network Settings on iPhone: The Complete 2025 Troubleshooting Guide
![How Can You Find a Reliable Phone Repair Service Near You]()
How Can You Find a Reliable Phone Repair Service Near You?
![How to Fix Android Phone Not Charging Properly ifixit.org.uk]()
How to Fix Android Phone Not Charging Properly: 2026 Troubleshooting Guide
![How to Fix iPhone Stuck on Apple Logo Screen?]()
How to Fix iPhone Stuck on Apple Logo Screen?
![Can You Fix a Broken Screen Without Replacing the Entire Device?]()
How Can You Fix a Broken Screen Without Replacing the Entire Device?
![ifixit.org.uk]()
How to Fix Horizontal Lines on Android Phone: Ultimate Troubleshooting and Repair Guide
![how to unhide apps on iphone]()
How to Unhide Apps on iPhone: A Complete, Step-by-Step Guide