How Can You Troubleshoot Common AEE Mach 1 Problems and Get Your Action Camera Working Again?
However, like any sophisticated electronic device, action cameras can occasionally experience technical hiccups. Whether it’s a sudden freeze during an intense recording session, a battery that drains too quickly, or connectivity issues with your smartphone, encountering problems can be incredibly frustrating.
This comprehensive guide serves as your ultimate resource for AEE Mach 1 troubleshooting. We will walk you through the most common issues users face, provide step-by-step solutions to get your camera working again, and share expert tips to ensure your device runs flawlessly on your next outing.
Meta Information (SEO Optimized)
-
Meta Title: Ultimate AEE Mach 1 Troubleshooting Guide: Fix Common Action Camera Issues
-
Meta Description: Are you struggling with a freezing camera, rapid battery drain, or Wi-Fi connectivity problems on your device? This comprehensive AEE Mach 1 troubleshooting guide provides step-by-step solutions, expert maintenance tips, and practical fixes to get your action camera working perfectly again. Learn how to manage firmware updates, handle memory card errors, fix audio issues, and optimize your settings for seamless recording. Don’t let technical glitches ruin your adventure footage—read our expert manual to fix your camera today!
Understanding Your Action Camera: A Quick Overview
Before diving deep into the technical troubleshooting steps, it is essential to understand how the components of your action camera interact. Action cameras pack immense processing power, image stabilization algorithms, and wireless modules into a miniature chassis. Because they operate at high bitrates to capture crisp 4K or 1080p video, they rely heavily on high-speed data pipelines and optimal thermal management.
When an action camera malfunctions, the root cause is typically divided into three categories:
-
Hardware limitations: Aging batteries, faulty charging ports, or physical damage.
-
Firmware glitches: Corrupted software instructions, failed updates, or communication bugs between internal sensors.
-
External factors: Slow or corrupted memory cards, incompatible smartphone applications, or extreme environmental temperatures.
By isolating these variables, you can systematically address any issue without needing advanced technical skills.
The Ultimate AEE Mach 1 Troubleshooting Matrix
When your action camera acts up in the field, you need quick answers. Below is a quick-reference matrix designed to help you identify symptoms and jump straight to the required solution.
Step-by-Step Fixes for Common AEE Mach 1 Issues
Let’s look closely at the step-by-step procedures to resolve these problems permanently.
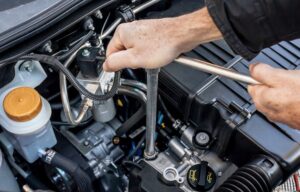
1. Camera Fails to Power On or Charge
There is nothing worse than pressing the power button before an epic jump or scenic trail only to find the screen completely black.
-
Step 1: Inspect the Charging Cable and Port: Action cameras frequently get exposed to dust, sand, and moisture. Inspect the Type-C or Micro-USB port on your AEE Mach 1. Use a non-conductive toothpick or compressed air to gently remove any lint or debris. Ensure you are using a high-quality cable connected to a 5V/2A wall adapter rather than a low-power computer USB port.
-
Step 2: Isolate the Battery: Remove the battery entirely from the compartment. Plug the camera directly into a power source without the battery inserted. If the camera powers on, your camera’s internal circuitry is fine, meaning the battery itself is either completely depleted, improperly seated, or chemically dead and needs replacement.
-
Step 3: The Hard Reset Sequence: If the camera is unresponsive even when plugged into external power, the firmware may be locked in a boot loop. Press and hold both the Power and Shutter buttons simultaneously for 15 to 20 seconds. This cuts internal power registers and forces the microcontroller to restart from scratch.
2. Random Freezing and Screen Lag
If your AEE Mach 1 freezes mid-recording, the issue is almost always tied to data transmission bottlenecks.
Action cameras write immense amounts of data every second. If the internal buffer fills up faster than the MicroSD card can write the data, the processor hangs, leading to a system freeze.
-
The MicroSD Card Check: Ensure you are using a card rated at least UHS-I Speed Class 3 (U3) or Video Speed Class 30 (V30). Standard Class 10 cards intended for smartphones or basic point-and-shoot cameras cannot handle high-bitrate 4K action footage.
-
Deep Formatting: Avoid simply deleting files from the camera menu. Over time, file allocation tables become fragmented. Connect the card to a PC, back up your footage, and perform a full (not quick) format using the exFAT file system. For advanced maintenance assistance with storage peripherals and hardware diagnostics, you can check local community repair frameworks like iFixit UK.
3. Resolving MicroSD Card Errors
When the screen displays “SD Error,” “No Card,” or “Card Protected,” the camera cannot read the storage medium’s partition table.
-
Clean the Contacts: The gold pins on MicroSD cards can accumulate oil from your fingers or microscopic oxidation. Wipe them gently with a microfiber cloth dipped in a tiny drop of isopropyl alcohol (90%+ concentration). Allow it to dry completely before reinserting.
-
Fixing File System Corruptions: If the card was pulled out while the camera was still writing data, the partition might be corrupted. Plug the card into a Windows PC, open Command Prompt as an administrator, and run the command:
chkdsk X: /f(replace X with your actual SD card drive letter). This will repair structural errors without destroying your files.
4. Overheating and Rapid Battery Drain
Because action cameras are incredibly small, they lack internal cooling fans. They rely on the ambient air moving around them to dissipate heat from the image processor.
-
Manage Wireless Connections: Built-in Wi-Fi and Bluetooth modules continuously scan for signals, which consumes massive amounts of power and generates internal heat. Turn these off unless you are actively transferring files or using a remote control.
-
Optimize Resolutions: Shooting continuously in 4K at high frame rates (like 60fps) pushes the processor to its absolute thermal limits. If you are shooting a long, static scene where high-speed motion capture isn’t required, drop the resolution to 1080p at 30fps or 60fps. This dramatically extends battery life and keeps the device cool.
-
Environmental Adjustments: Lithium-ion batteries perform poorly in freezing temperatures. If you are snowboarding or skiing, keep spare batteries in an inner jacket pocket close to your body heat until the exact moment you need to use them.
5. Wi-Fi Companion App Pairing Failures
Connecting your camera to your smartphone allows you to frame shots accurately and download footage instantly. However, local wireless handshakes can fail due to aggressive mobile network switching.
-
Disable Mobile Data: Modern smartphones are programmed to automatically disconnect from Wi-Fi networks that do not offer internet access. Because your AEE Mach 1’s Wi-Fi network is local only, your phone might silently drop the connection in favor of cellular data. Turn off “Cellular Data” or “Smart Network Switch” in your phone’s settings before connecting to the camera.
-
Clear App Cache: If the application crashes or fails to recognize the camera stream, navigate to your phone’s App Management settings, select the AEE companion app, clear both the cache and data, and try the pairing sequence again from scratch.
Advanced Troubleshooting: Firmware Restoration
When standard troubleshooting cycles fail to resolve recurring crashes or graphical glitches, the underlying operating system (firmware) of the camera may be corrupted. Performing a manual firmware flash reinstalls the core instructions onto the camera’s read-only memory.
How to Flash Your Firmware Manually
-
Locate the Exact Firmware: Visit the official manufacturer support portal and download the precise firmware file (.bin format) for your specific camera variant.
-
Prepare the Card: Format a reliable MicroSD card completely. Drag and drop the downloaded firmware file directly onto the root directory of the card (do not place it inside any folders).
-
Initiate the Update: Ensure your camera’s battery is charged to at least 80%. Insert the card into the powered-off camera. Hold down the designated update key combination (usually the power button while holding down the shutter button).
-
Wait for the Sequence: The camera’s LED indicator lights will flash rapidly, signifying that the firmware update is in progress. Do not press any buttons or remove the battery during this window. Turning off the device during a firmware flash can permanently brick your camera. Once finished, the camera will automatically restart.
Troubleshooting Peripheral Diagnostics: Display Diagnostics
In rare cases, what looks like a system crash might actually be a display fault. For instance, if you hear the startup chime or recording tones but the screen remains dark, the display ribbon cable may have worked loose due to heavy vibrations.
When analyzing displays across various electronics, unexpected markings can arise from localized pressure or heat. For example, understanding how a macbook pro screen burn marks occurs can provide context on panel degradation; these marks happen when static elements remain on screen too long at maximum brightness, causing microscopic pixel wear. While action camera LCDs rarely suffer from true burn-in due to moving interfaces, physical impacts or prolonged exposure to direct sunlight on a dashboard can mimic these visual anomalies, distorting your view or rendering the display completely blank.
If you suspect your camera display panel is damaged or suffering from severe artifacts similar to a macbook pro screen burn marks, try connecting the camera to an external TV or monitor via its HDMI output port. If the video output displays perfectly on the external monitor, your camera’s processor, sensor, and storage arrays are fully functional. The fault lies entirely within the integrated LCD panel assembly or its internal connection. This distinction can save you from replacing the entire device when only a screen replacement or connection adjustment is required.
Pro-Tips for Maximizing Your Action Camera’s Lifespan
Preventative maintenance is always better than emergency troubleshooting. Implement these field-tested strategies to keep your AEE Mach 1 running optimally for years:
-
Seal Maintenance: Every time you use a waterproof housing or open the camera side doors, check the rubber gaskets. Even a single grain of sand or hair can break the seal, allowing micro-moisture to penetrate the housing and corrode the mainboard over time.
-
Avoid Complete Depletion: Try not to let your lithium-ion batteries drop to 0% regularly. Deep discharges put high chemical strain on the internal cells, accelerating degradation. Swap out batteries when they hit the 15-20% mark.
-
Lens Protection: Use a removable protective lens cap whenever the camera is tucked inside your backpack. Micro-scratches on the outer lens element scatter incoming light rays, causing severe lens flare and ruining video clarity in bright sunlight.
Comparing Action Camera Maintenance: DIY vs. Professional Repair
When troubleshooting doesn’t yield results, you must choose between repairing the camera yourself or handing it over to a professional technician. Let’s weigh the pros and cons of both approaches.
DIY Repair
-
Benefits: Extremely cost-effective; no waiting periods for shipping; helps you understand your device’s internals intimately.
-
Drawbacks: Risk of accidentally tearing internal ribbon cables; can permanently void existing manufacturer warranties; requires steady hands and specialized precision tools (like Torx screwdrivers and spudgers).
Professional Repair
-
Benefits: Work is typically covered by a repair warranty; certified parts are guaranteed; specialized diagnostic instruments find hidden electrical shorts easily.
-
Drawbacks: Can be expensive relative to the market value of the camera; turnaround times can range from days to weeks, leaving you without a camera during an upcoming trip.
Real-World Troubleshooting Scenarios
To help apply these tips, let’s look at a couple of common real-world scenarios action camera users run into.
Scenario A: The Muddy Mountain Bike Trail
An avid mountain biker noticed their camera stopped recording exactly 12 minutes into every single run down the trail. The camera didn’t turn off; it just stopped saving files.
-
The Diagnosis: Heavy continuous vibrations from the bike handlebars were causing an older MicroSD card with loose internal clearance tolerances to momentarily shift away from the card reader pins. This tiny fraction of a millimeter break caused the processor to lose its connection to the storage medium, causing the file write to abort.
-
The Solution: Placing a tiny piece of electrical tape on the non-contact side of the MicroSD card slightly increased its thickness, allowing it to wedge firmly into the spring-loaded slot. This stopped vibration-induced disconnects entirely.
Scenario B: The Scuba Diving Condensation Mystery
A diver noticed that after 20 minutes under water, the inside of the waterproof housing fogged up right in front of the lens, rendering all footage completely blurry.
[Image demonstrating condensation forming inside an action camera housing case]
-
The Diagnosis: The camera generated internal heat while processing video. When submerged in cold water, the temperature difference caused the humidity trapped inside the air-tight housing to condense into liquid droplets on the coolest surface—the lens glass.
-
The Solution: The user started inserting anti-fog drying strips (silica gel inserts) into the sides of the waterproof housing before snapping it shut. These inserts absorb internal moisture before it can settle onto the camera optics.
Alternative Solutions: Upgrading Your Setup
If your camera consistently experiences physical connectivity issues during intense simulation or mounting environments, it may be time to evaluate your overall gear configuration. For example, users setting up intricate motion or telemetry displays—such as a complex mobile triple screen setup simracing—frequently encounter tricky cable management issues and data signal attenuation over long lines.
Just like tuning a high-end racing rig requires ensuring your computer hardware, extra monitors, and data hubs work perfectly together without dropping frames, optimization is key. If you are feeding your action camera’s video stream into a wider recording layout, live streaming dashboard, or multi-angle setup, managing data bottlenecks is essential. Ensuring your main data bus is unburdened and configuring clean power distribution lines will solve system instabilities across your entire setup.
Troubleshooting Hardware Display Indicators
If you are using your camera without a smartphone or external screen, understanding the built-in LED indicator light patterns is crucial. These patterns act as diagnostic error codes.
Flashing Red Light (Rapid)
This indicates that the camera is either running dangerously low on battery power or cannot detect a valid media storage device. Double-check your battery level or re-seat the storage card.
Solid Blue/Green Light with No Screen Activity
This combination usually points to a system crash during initialization. The camera has powered up its main power rails but failed to boot into the operating core. Refer to the hard reset sequence or try booting the device with the MicroSD card completely removed to see if a corrupt file system is stalling the system startup checks.
Double Beep and Shutdown
If the camera turns on for two seconds, emits a double beep tone, and immediately powers down, it is encountering an over-current safety trip or an immediate thermal shutdown sensor reading. This indicates a damaged battery cell or a short circuit within the charging port.
Deep Dive: Managing Complex Screen Burn Anomalies
As mentioned earlier, understanding panel behavior is key to diagnosing visual issues. While screen issues are rare on action cameras, users who work with multi-device production setups or monitor screens all day often notice persistent image ghosts. For instance, fixing a macbook pro screen burn marks requires cycling high-contrast color patterns across the pixels or utilizing dedicated software utilities to balance out the sub-pixel voltages.
If your action camera’s secondary status screen or main display starts showing faint ghosting outlines of the menu icons, you can apply similar logic:
-
Turn off the auto-lock feature temporarily so the screen stays on.
-
Play a video file that features high-brightness, rapidly shifting geometric colors (like a white noise pattern or color cycle video).
-
Let it run for 30 minutes to stimulate the pixels across the entire spectrum.
-
Once completed, restore your standard screen-timeout settings to prevent static elements from sitting on the display for hours at a time.
Comprehensive Maintenance Schedule Checklist
To minimize any future need for AEE Mach 1 troubleshooting, use this simple maintenance checklist before and after every major shooting excursion.
Pre-Trip Checks
-
[ ] Charge all lithium-ion batteries fully using an external smart charger.
-
[ ] Format the high-speed MicroSD card within the camera’s system settings menu.
-
[ ] Clean the optical lens elements using a dedicated lens pen or clean microfiber cloth.
-
[ ] Inspect housing seals for any dust particles, hair, or physical cracks.
-
[ ] Verify the mobile application pairs cleanly and displays the live view stream.
Post-Trip Maintenance
-
[ ] Back up all footage immediately onto two distinct physical storage drives.
-
[ ] Wipe down the external camera chassis using a damp cloth to clear salt water, mud, or sweat.
-
[ ] Store the camera with the battery removed to prevent slow parasitic power drain or corrosion.
-
[ ] Keep the device stored in a cool, dark, dry place away from direct sunlight or humid environments.
Conclusion and Key Takeaways
Troubleshooting your AEE Mach 1 doesn’t have to be an overwhelming or stressful experience. By taking a systematic, step-by-step approach, you can quickly diagnose and fix the vast majority of common action camera issues right at home or out in the field.
Summary of Key Steps:
-
Power Glitches: Check for charging port debris, isolate the battery, and use a high-powered wall adapter to execute a hard reset.
-
System Freezes: Always use high-speed U3/V30 memory cards and perform full exFAT formats on a computer to prevent data write bottlenecks.
-
Heat & Battery Management: Keep wireless connections turned off when they are not in use, and lower your shooting resolution during long recordings in hot environments.
-
Display Anomalies: Check for physical impact symptoms resembling a macbook pro screen burn marks or test via HDMI to isolate a loose internal ribbon cable connection.
-
App Disconnects: Turn off cellular data on your smartphone to prevent your operating system from automatically dropping the camera’s local Wi-Fi connection.
By taking care of your device, performing preventative maintenance, and keeping your firmware updated, you ensure your camera is always ready to capture your best moments. Keep your gear clean, choose high-quality components, and you’ll spend less time troubleshooting and more time recording your next great adventure!