Canon cameras are renowned for their reliability, image quality, and user-friendly features. However, even the best equipment can encounter issues, particularly with the lens mechanism. One of the most frustrating problems users face is the Canon camera lens error or stuck lens, often displaying messages like “Lens error, restart camera,” E18, or similar codes.
This issue typically occurs in compact PowerShot models but can also affect certain EOS mirrorless or DSLR setups with extendable or interchangeable lenses. The good news is that many cases can be resolved without sending the camera to a service center. This guide provides practical, step-by-step solutions for Canon Camera Lens Error or Stuck Lens Repair at home, helping you avoid costly repairs while understanding the risks involved.
Understanding Canon Camera Lens Errors: Common Causes
Before jumping into fixes, it’s essential to know why these errors happen. A stuck or erroneous lens usually stems from mechanical or electrical disruptions in the lens barrel’s extension and retraction system.
Key causes include:
- Debris and sand: Dust, sand, or small particles jam the delicate gears and motors, especially after beach or outdoor shoots.
- Physical impact: Dropping the camera while the lens is extended can misalign barrels or damage internal components.
- Low battery power: Insufficient power prevents the motor from completing its cycle, triggering error messages.
- Obstructed movement: A bent lens cover, loose ribbon cable, or misaligned elements.
- Software glitches: Temporary firmware hiccups after rapid on/off cycles or memory card issues.
Recognizing the error message (e.g., E18 is particularly common in older PowerShot models) helps narrow down solutions. In many real-world scenarios, users report the lens partially extending, failing to retract, or the camera shutting down automatically.
Safety Precautions Before Attempting DIY Fixes
While these methods are popular among photographers, they carry risks. Always prioritize gentle handling to avoid voiding any remaining warranty or causing further damage.
- Work in a clean, well-lit area.
- Use only fresh, fully charged batteries.
- Never force the lens physically.
- Avoid liquids near the camera.
- If your camera is under warranty, contact Canon support first.
Expert Tip: Document the error with photos or notes before starting. This helps if you eventually need professional help.
Step-by-Step Basic Troubleshooting for Canon Lens Errors
Most users successfully resolve Canon Camera Lens Error or Stuck Lens Repair issues with these initial steps.
1. Power Cycle and Hard Reset
This is the simplest and most effective first step:
- Turn off the camera.
- Remove the battery and memory card.
- Press and hold the power button for 30–60 seconds to discharge residual power.
- Wait 5–10 minutes.
- Insert a fully charged battery (no memory card yet).
- Turn the camera on and observe.
If the lens moves smoothly, reinsert the memory card and test further.
2. Try Without Memory Card
Some Canon models reset internal settings when no card is present. This has resolved errors for many users by forcing a recalibration.
3. Gentle Tapping and Gravity Assistance
For misaligned lenses:
- Place the camera lens-up on a soft surface.
- Gently tap the side of the camera with your palm (not too hard).
- Alternatively, hold it lens-down and shake lightly to dislodge particles.
Real-world example: A photographer dropped their Canon PowerShot on vacation. The lens was crooked. Gentle pressure on the higher side while powering on realigned it with a satisfying click, restoring full function.
Cleaning Debris from the Lens Mechanism
Debris is a leading culprit in stuck lenses.
Tools needed:
- Compressed air canister (electronics-safe).
- Soft blower brush.
- Microfiber cloth.
- Thin strip of paper or plastic (for careful gap cleaning).
Procedure:
- With the camera off and battery removed, blow compressed air around the lens barrel gaps while gently rotating the camera.
- Use a vacuum on low suction if available (hold it near but not touching).
- Avoid cotton swabs, as fibers can worsen the jam.
Repeat the power cycle after cleaning.
Advanced Home Repair Techniques
If basic methods fail, try these with extra caution.
Realignment for Dropped Cameras
Examine the lens from multiple angles. If one side appears higher:
- Hold the camera with the lens facing up.
- Gently press down on the raised side while powering on.
- Listen for a click indicating proper seating.
Using AV Cable or External Connections
Connecting to a TV or computer sometimes bypasses the error by keeping the LCD off during startup, allowing the lens motor to focus properly.
Battery and Contact Cleaning
Clean the battery and lens contacts (for interchangeable lenses) with a dry microfiber cloth or isopropyl alcohol on a cotton swab (dry thoroughly afterward).
Comparison of Methods:
| Method | Difficulty | Success Rate (Anecdotal) | Risk Level | Best For |
|---|---|---|---|---|
| Power Cycle | Easy | High | Low | All errors |
| Debris Cleaning | Medium | Very High | Low | Sand/dust issues |
| Gentle Tapping | Easy | Medium | Medium | Misalignment after drops |
| Full Disassembly | Hard | Variable | High | Experienced users only |
When to Consider Opening the Camera (For Advanced Users)
Note: This is not recommended for beginners and may void warranties. Guides exist for specific models like the PowerShot SX or G series, involving ribbon cable reconnection or gear realignment.
Proceed only if comfortable with small electronics. Search for model-specific YouTube tutorials, but follow at your own risk.
Prevention Tips to Avoid Future Lens Errors
Prevention is better than cure:
- Always retract the lens before turning off or storing the camera.
- Use a protective case, especially for travel.
- Keep the camera away from beaches without proper protection.
- Maintain fresh batteries and clean contacts regularly.
- Update firmware when available via Canon’s website.
- Store in a dry, dust-free environment.
Actionable Advice: Invest in a good UV filter or lens cap for added protection on compatible models.
Professional Repair vs. DIY: Benefits and Drawbacks
DIY Benefits:
- Cost-effective (often free).
- Quick resolution.
- Educational experience.
DIY Drawbacks:
- Risk of further damage.
- No guarantee of long-term fix.
- Potential warranty issues.
Professional Repair: Canon service centers provide reliable fixes but can cost $100–300+ depending on the model. For older cameras, the repair cost might exceed the device’s value.
Consider professional help if multiple DIY attempts fail or you notice physical cracks.
Here is a helpful resource on Canon camera troubleshooting from the official Canon support site. Another community discussion on common fixes can be found on Reddit’s r/canon.
Additional Subheading: Common Error Codes and Their Meanings
- E18: Lens barrel obstruction or misalignment (very common in PowerShots).
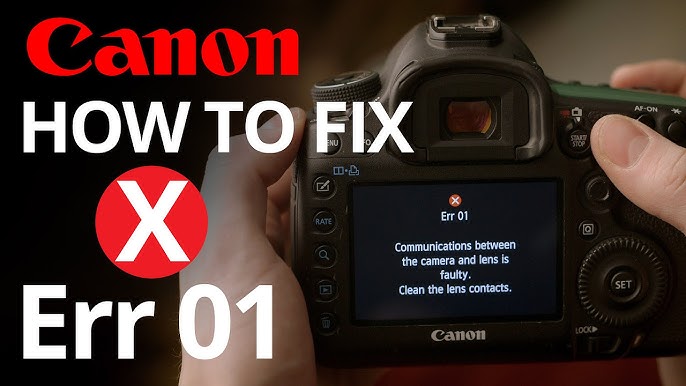
- Err 01: Communication error between body and lens (often contacts or cable).
- Lens Error Restart Camera: Generic message for mechanical failure.
Understanding these helps target the right fix.
Model-Specific Considerations
PowerShot compact cameras are most prone to these issues due to their retractable lenses. Mirrorless EOS models with kit lenses may require different approaches, focusing more on contact cleaning and firmware resets. Always check your exact model number (usually on the bottom) for tailored advice.
Expert Tips from Photographers
- Use high-quality rechargeable batteries for consistent power delivery.
- Test the camera in different modes (Auto, Manual) after fixes.
- If traveling, carry a backup point-and-shoot or smartphone.
- Join photography forums for model-specific experiences.
Conclusion
Dealing with a Canon camera lens error or stuck lens can be stressful, but many issues are fixable at home with patience and the right techniques. By starting with simple power cycles, thorough cleaning, and gentle realignment, you can often restore your camera without professional intervention. Remember to prioritize safety and know when to stop if the problem persists.
Key takeaways:
- Always begin with battery removal and reset.
- Clean debris promptly to prevent permanent damage.
- Prevent issues through careful handling and storage.
- Weigh DIY success against the value of your camera before deep repairs.
With these steps, you’re well-equipped to handle Canon Camera Lens Error or Stuck Lens Repair challenges confidently. If your camera is a cherished tool, a successful DIY fix can extend its life significantly and save you money for new lenses or accessories. Happy shooting!