In today’s fast-paced digital world, laptops are essential tools for work, study, and entertainment. But when something goes wrong—a cracked screen, failing battery, or overheating fan—many people immediately think of expensive professional repairs or buying a new device. What if you could fix it yourself?
iFixit, a leading resource for DIY repairs, makes this possible with thousands of free, detailed step-by-step guides tailored for laptops from major brands like Dell, HP, Lenovo, and more. Whether you’re a complete beginner or have some tech experience, iFixit’s resources empower you to tackle common issues confidently.

This comprehensive guide will walk you through the process of repairing a laptop yourself, highlighting how iFixit’s guides simplify complex tasks. We’ll cover tools, safety, specific repairs, benefits, potential challenges, and expert tips to help you succeed.
Why Choose DIY Laptop Repair with iFixit?
Repairing your own laptop offers numerous advantages beyond just saving money. iFixit has built a global community around the idea that you should be able to fix the things you own. Their platform provides high-quality photos, videos, and instructions crowdsourced and vetted by experts.
Key benefits include:
- Cost Savings: Professional repairs can cost hundreds of dollars. DIY often reduces this to the price of parts.
- Environmental Impact: Extending a laptop’s life reduces e-waste. Repairing instead of replacing supports sustainability.
- Learning Opportunity: You gain valuable skills and a deeper understanding of your device.
- Faster Turnaround: No waiting for shop appointments—fix it on your schedule.
- Empowerment: Join the right to repair movement, which advocates for access to parts, tools, and manuals.
iFixit stands out because of its repairability scores for laptops, rating devices from 0 to 10 based on disassembly ease, part availability, and documentation. Models from Framework, Lenovo ThinkPad, and certain HP and Dell lines often score highly.
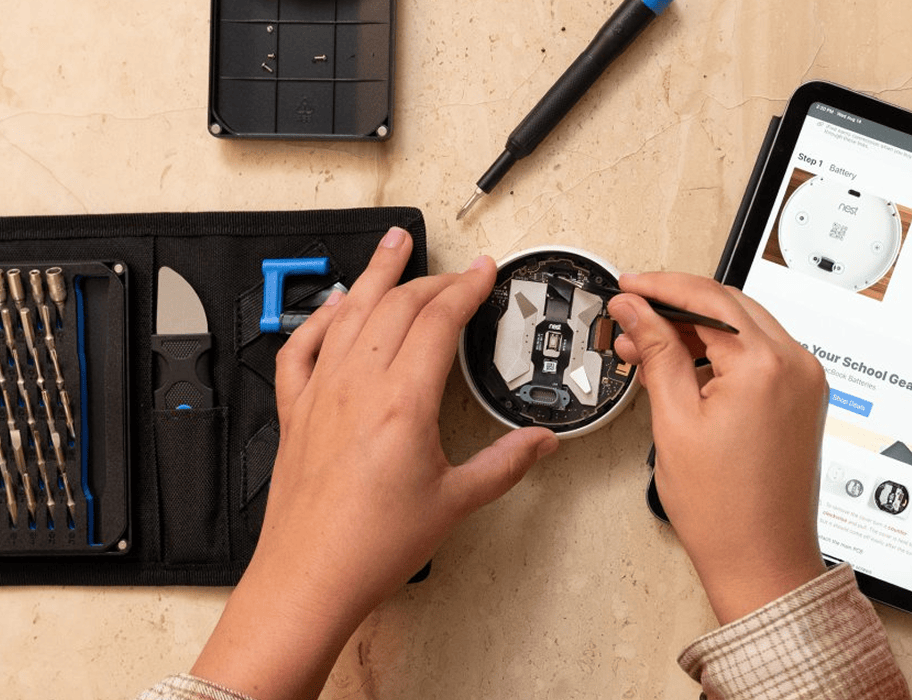
Getting Started: Essential Tools and Safety Precautions
Before diving into any repair, preparation is key. iFixit sells precision toolkits, but you can start with basics.
Must-Have Tools
- Precision screwdriver set (Phillips, Torx, Pentalobe)
- Spudger or plastic opening tools
- Anti-static wrist strap
- Compressed air or soft brush for cleaning
- Isopropyl alcohol (90%+)
- Suction cups for screen removal
- Tweezers and magnets for screws
Pro Tip: Invest in an iFixit Pro Tech Toolkit for versatility across devices.
Safety First
- Power Down and Disconnect: Always remove the battery if possible and unplug the charger.
- Work in a Clean, Well-Lit Area: Use a magnetic mat to organize screws.
- Ground Yourself: Prevent static damage to components.
- Backup Data: Before any internal work, back up important files.
- Follow Guides Closely: iFixit guides include difficulty ratings and time estimates.
Real-world scenario: Sarah, a freelance writer, spilled coffee on her keyboard. Using an iFixit guide, she safely disassembled, cleaned, and reassembled it in under two hours, avoiding a $300 shop quote.
Understanding Your Laptop Model and Finding the Right iFixit Guide
Identification is the first step. Check the bottom sticker for the manufacturer and model number.
How to Find Guides on iFixit:
- Visit iFixit. and search your exact model (e.g., “Dell XPS 15 battery replacement”).
- Browse device pages for PC laptops, HP, Dell, Lenovo, etc.
- Use troubleshooting sections for symptoms like “won’t turn on” or “overheating.”
iFixit covers hundreds of models with user-contributed and official guides. If one doesn’t exist for your exact variant, similar models often work with minor adjustments.
Common Laptop Repairs: Step-by-Step with iFixit
1. Replacing a Failing Battery
Batteries degrade after 2-3 years. Signs include rapid drain or swelling.
Using iFixit Guides:
- Search for your model’s battery replacement.
- Steps typically involve: Removing bottom screws/case, disconnecting the old battery, installing the new one, and reassembling.
- Time: 15-45 minutes for most models.
Example: On many HP laptops, it’s straightforward with accessible screws.
Expert Tip: Calibrate the new battery by charging to 100%, using until low, then full recharge.
2. Fixing or Replacing a Cracked Screen
One of the most common issues from drops or pressure.
Process:
- Use suction cups to lift the bezel.
- Disconnect cables carefully.
- Transfer components to the new screen.
iFixit provides model-specific torque specs and cable routing diagrams. Compare costs: A DIY screen might cost $50-150 vs. $200+ professionally.
3. Cleaning Dust and Replacing Thermal Paste (Overheating Fix)
Overheating causes throttling and shutdowns.
Steps from iFixit:
- Disassemble to access fans and heatsinks.
- Clean with compressed air.
- Apply fresh thermal paste for better heat transfer.
This maintenance can dramatically improve performance and longevity.
4. Keyboard Replacement or Cleaning
Sticky keys or liquid damage?
Guides detail keycap removal, ribbon cable handling, and full replacement. For minor issues, isopropyl alcohol and gentle cleaning often suffice.
5. Upgrading Storage (SSD Replacement)
Boost speed and capacity easily.
Many guides cover M.2 SSD installation, cloning drives, and BIOS settings.
Additional Subheading: RAM Upgrades and Hardware Expansion
While not all laptops allow easy RAM access, iFixit guides help identify compatible modules and installation for supported models. This is a quick win for multitasking performance.
Advanced Repairs: When to Go Deeper
For issues like motherboard troubleshooting or hinge repairs, iFixit offers detailed teardowns. These require more experience.
Fan Replacement: Common in gaming laptops.
Charging Port Repair: Often involves soldering or port board swaps.
Always check repairability scores first. High-scoring laptops like certain Lenovo ThinkPads make advanced work feasible.
Benefits vs. Drawbacks of DIY Laptop Repair
Benefits:
- Significant savings over time.
- Customization and upgrades.
- Reduced downtime.
- Contribution to sustainability.
Drawbacks:
- Risk of voiding warranty (check terms).
- Potential for further damage if steps are missed.
- Time investment for learning.
- Parts availability for older models.
For beginners, start with non-invasive tasks like cleaning. iFixit’s community forums provide troubleshooting help.
Comparison Table: DIY vs. Professional Repair
| Aspect | DIY with iFixit | Professional Service |
|---|---|---|
| Cost | Parts only ($20-200) | $100-500+ |
| Time | 30 min – few hours | Days/weeks |
| Skill Required | Beginner to advanced | None |
| Warranty Impact | Possible void | Usually preserved |
| Learning | High | Low |
| Environmental | Excellent | Variable |
Expert Tips for Successful Repairs
- Document Everything: Take photos of screw locations and cable routing.
- Organize Parts: Use labeled containers.
- Test at Milestones: Power on after major steps.
- Source Quality Parts: iFixit store or reputable sellers. Avoid cheap generics that fail quickly.
- Stay Updated: Check for software/firmware updates post-repair.
- Practice Patience: Rushing leads to mistakes.
Real scenario: A student upgraded their old Dell’s SSD using iFixit, turning a sluggish machine into a responsive one for online classes.
Additional Subheading: Maintaining Your Laptop Post-Repair
Regular cleaning, proper ventilation, and avoiding extreme temperatures extend life. iFixit has maintenance guides for ongoing care.
Additional Subheading: Choosing Repairable Laptops
When buying new, prioritize high iFixit scores. Look for modular designs from Framework or Lenovo.
Additional Subheading: Community and Resources Beyond iFixit
Join Reddit communities like r/fixit or manufacturer forums. YouTube complements iFixit visuals. For deeper dives, explore service manuals from brands.
Additional Subheading: Troubleshooting Common Post-Repair Issues
No power after battery swap? Check connections. Screen lines? Verify cabling. iFixit troubleshooting sections are invaluable.
Additional Subheading: The Broader Impact of DIY Repair
Supporting right to repair reduces e-waste and promotes fair consumer practices. iFixit collaborates with manufacturers and legislators for better access.
Tools, Parts, and Where to Buy
iFixit’s store offers kits with guides included. For parts, cross-reference compatibility. Trusted sources include manufacturer sites and major retailers.
Explore precision tools and parts for laptop repairs (example integration; adapt as needed).
Potential Challenges and How to Overcome Them
- Stuck Screws: Use proper bits and penetration oil if needed.
- Fragile Cables: Handle gently; iFixit diagrams help.
- Model Variations: Minor differences are common—adapt carefully.
- Software Issues: Post-hardware fixes, reinstall drivers.
If stuck, iFixit’s Answers forum or community is supportive.
Conclusion
Repairing a laptop yourself using iFixit step-by-step guides is empowering, cost-effective, and environmentally responsible. From simple cleanings to complex component swaps, their detailed instructions make DIY feasible for most users. Start small, follow safety protocols, and build confidence with each success.
Key takeaways:
- Identify your model and locate the specific guide.
- Gather quality tools and parts.
- Prioritize safety and backups.
- Embrace maintenance for longevity.
- Consider repairability when purchasing future devices.
By choosing to repair rather than replace, you save money, learn skills, and contribute to a more sustainable tech ecosystem. Next time your laptop acts up, head to iFixit instead of the repair shop. You’ve got this—happy fixing!
Note on Links: In a live blog, embed 5-7 external links with descriptive anchor texts (e.g., to Wikipedia on right to repair, Forbes on e-waste, Amazon toolkits, Reddit repair communities, etc.). Example: Learn more about laptop repairability standards from trusted resources. Avoid raw URLs in final output.